
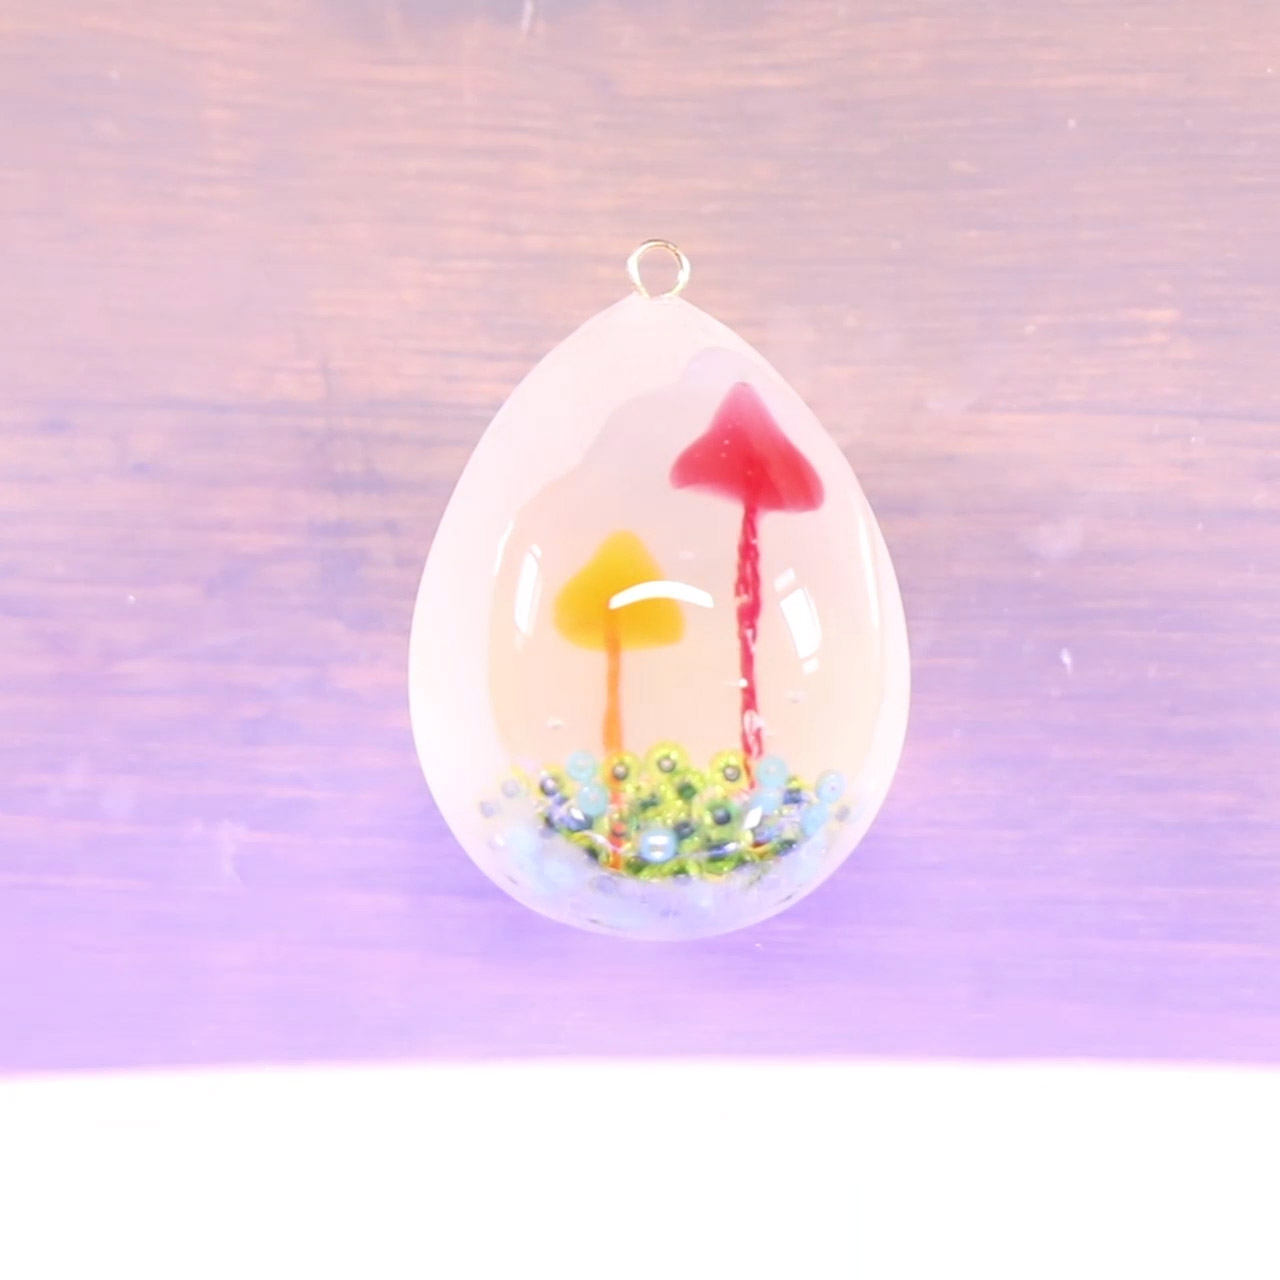
幻想的に浮かび上がるキノコは
すりガラスのような中に封入されなんとも不思議な佇まい♫
バリをとる過程であえて全部ヤスリで表面を白くし
見せたい部分だけレジンで光らせればOK^ ^
今までの立体レジンもワンランクアップさせられそうです☆
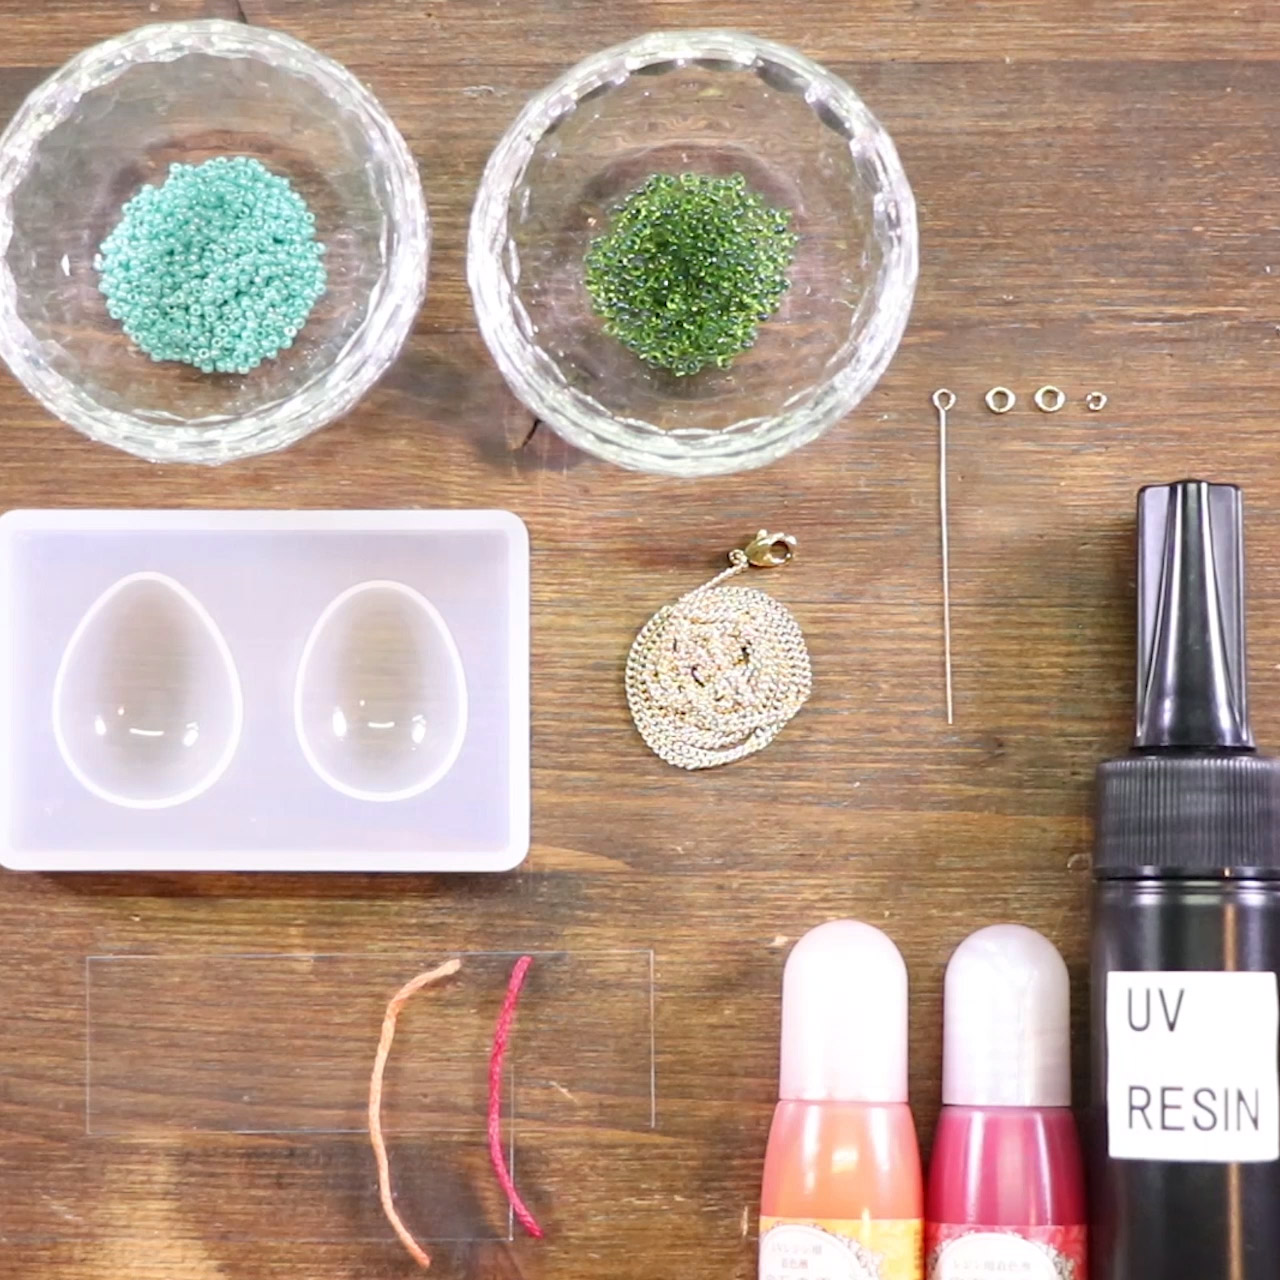
【材料】
①UV-LEDレジン 5g
②UVレジン用着色剤 少々 (レッド、オレンジ)
③丸小ビーズ 少々 (ダークグリーン)
④丸小ビーズ 少々 (ターコイズ)
⑤刺繍色 (赤、オレンジ 各5cm)
⑥9ピン 1本
⑦丸カン 3個
⑧チェーン 60cm×1本
⑨カニカン 1個
【MATERIALS】
①UV-LED resin : 5g
②Resin Coloring Agenet: (red, orange)
③Seed beads: dark green
④Seed beads: turquoise
⑤Embroidery thread: (red, orange, 5cm each)
⑥Eye pin: 1
⑦Jumprings: 3
⑧Chain: 60cm×1
⑨Lobster clasp: 1
【道具】
①UV-LEDライト
②調色スティック
③調色パレット
④たまご型シリコンモールド
⑤ニッパー
⑥平ペンチ
⑦ピンセット
⑧シリコンマット
⑨紙やすり
⑩OPP袋
⑪セロハンテープ
⑫洗濯バサミ
⑬はさみ
⑭カッターナイフ
【TOOLS】
①UV-LED light
②Mixing stick
③Mixicng palette
④Egg shape silicon mold
⑤Nipper
⑥Flat nose plier
⑦Tweezers
⑧SIlicon mat
⑨Sand paper
⑩OPP bag
⑪Scotch tape
⑫Laundry clip
⑬Sissors
⑭X-Act knife
【注意】
◎レジンを使用する際は手袋、マスクなどを着用して下さい
◎レジンを使用する際は風通しの良い、換気のできる場所で作業をして下さい
◎レジンに気泡が残らないようにピンセット(つまようじ)で抜いてください
◎レジンは必ず固まってから取り出してください
◎レジンが肌についた際はすぐによく洗い流してください
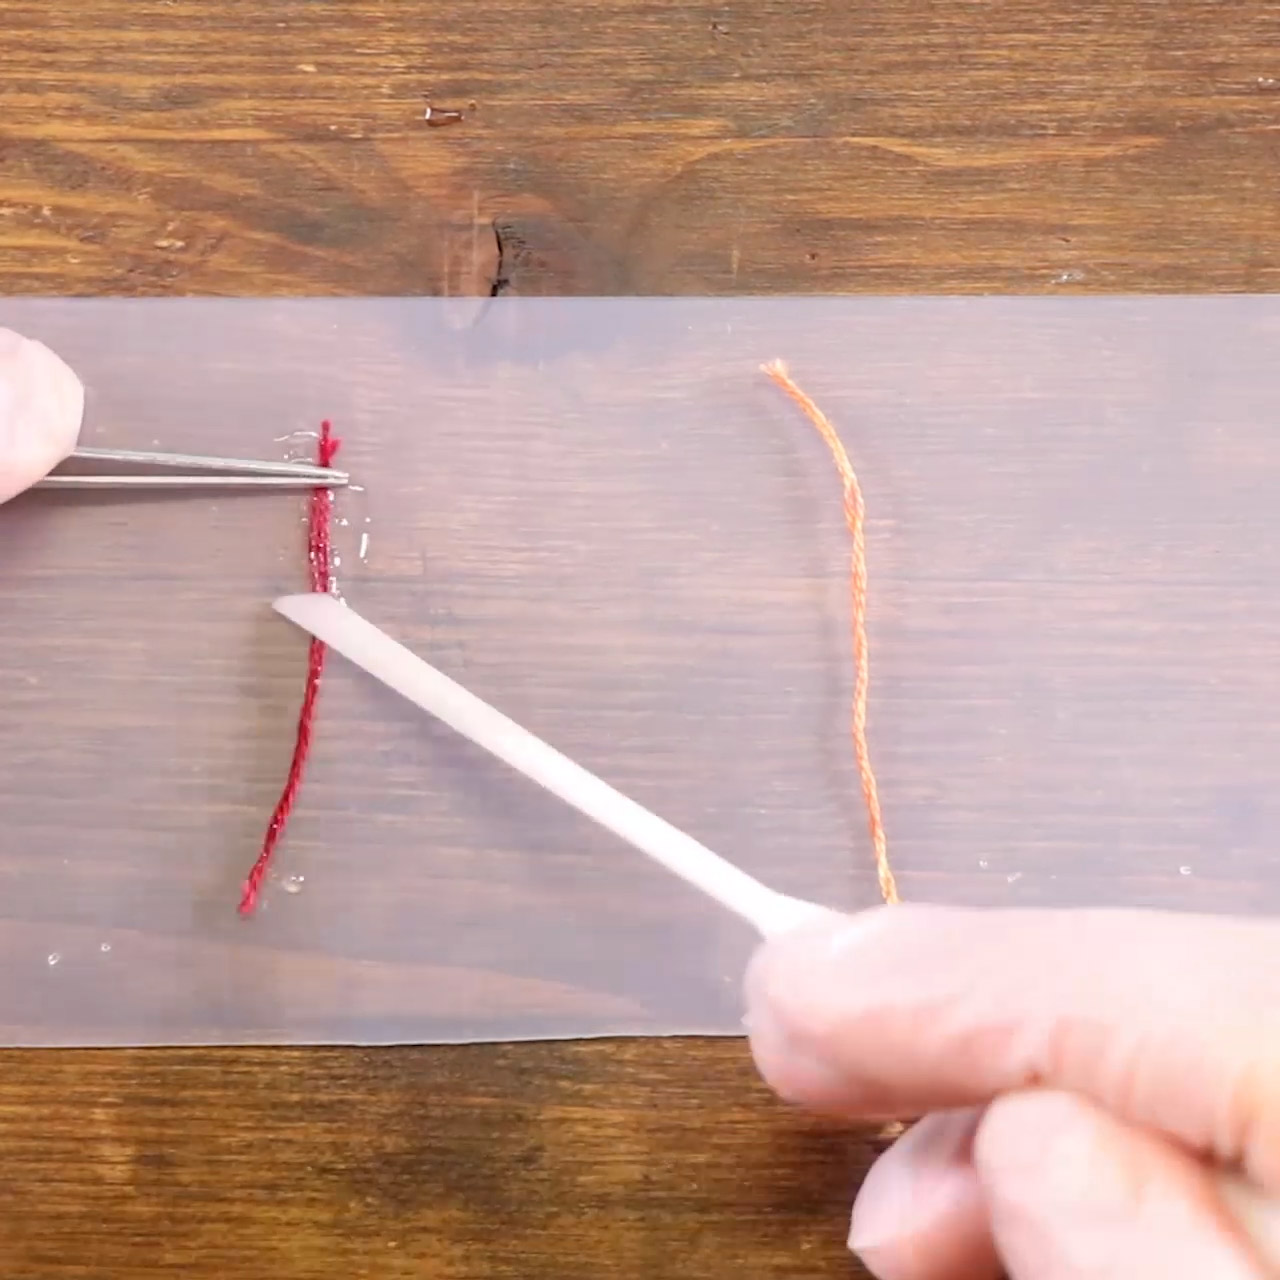
赤とオレンジの刺繍糸を3本ずつに分け、シリコンマットの上に置く。
レジンを刺繍糸に塗り、3本ずつ束ねた状態で照射
Separate red and orange embroidery threads in three.
Put them on a silicon mat.
Put some resin on threads. Cure.
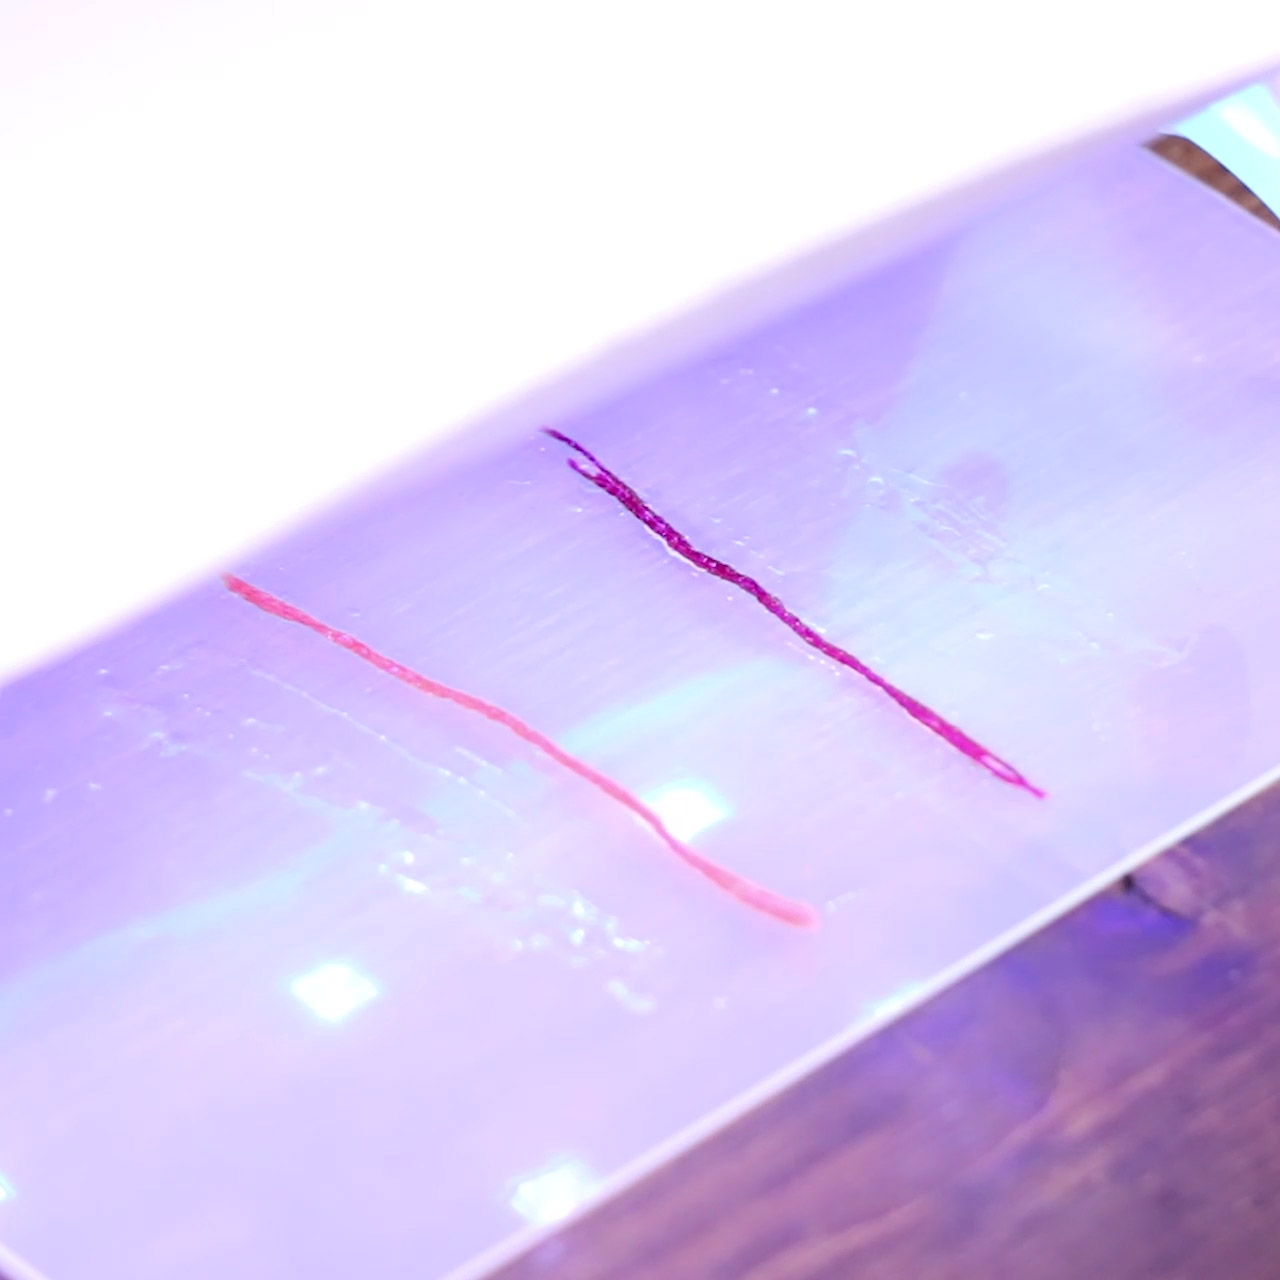
照射
Cure.
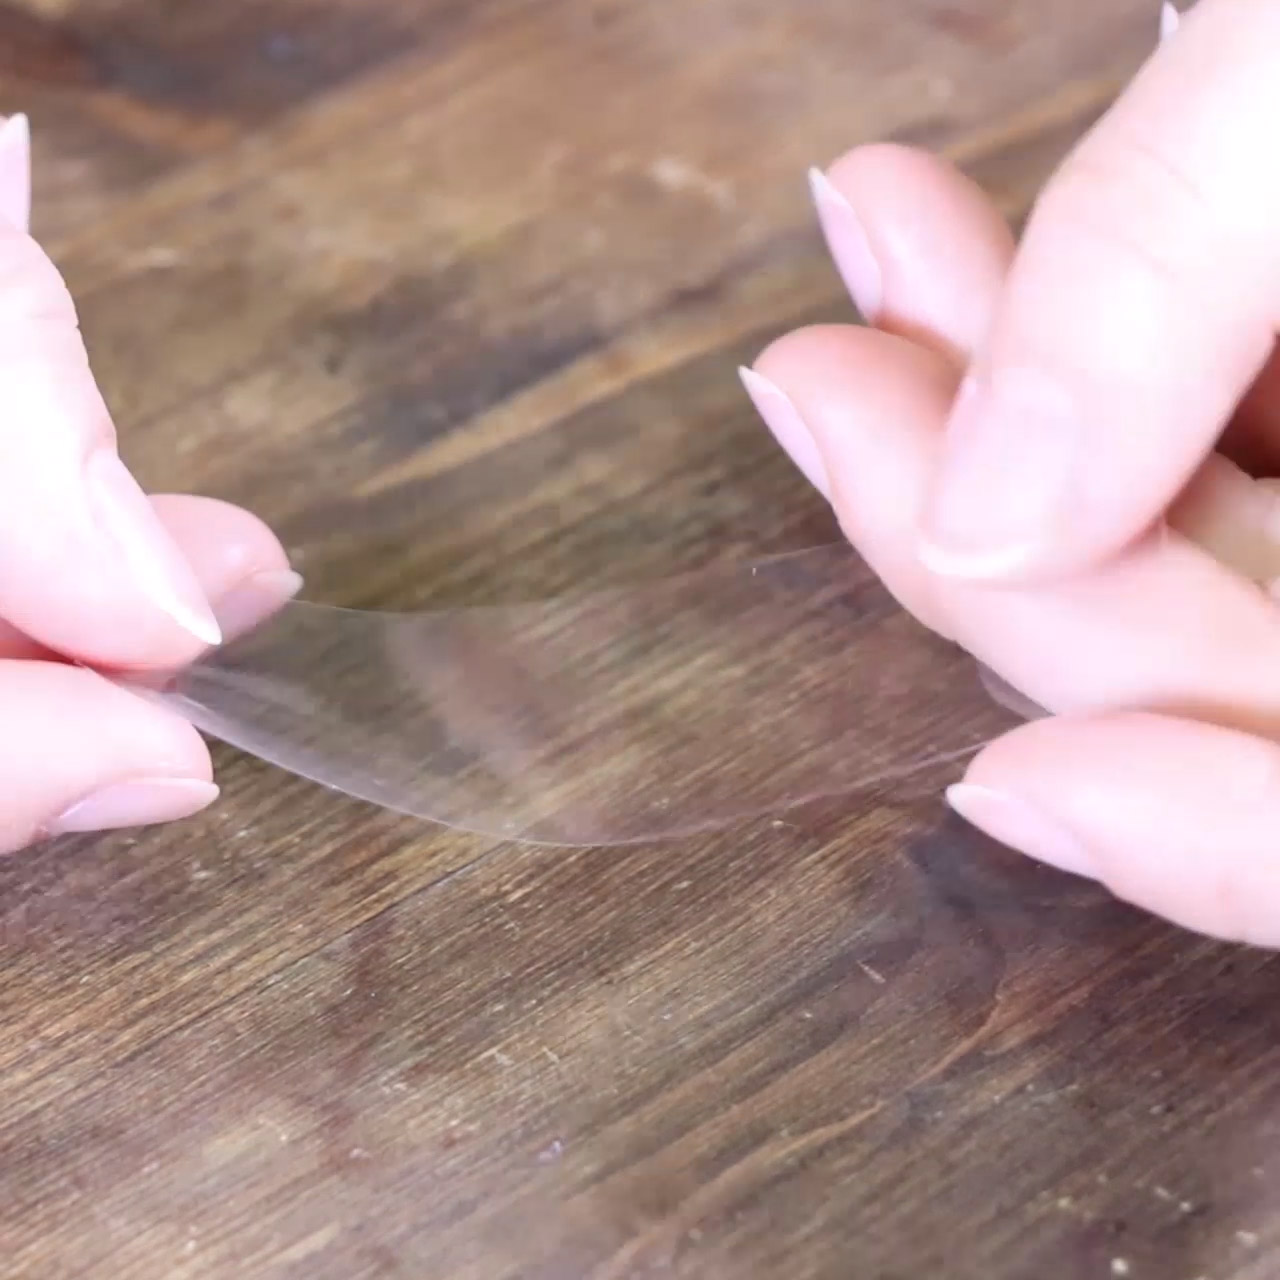
OPP袋を用意する。
Take an OPP bag.
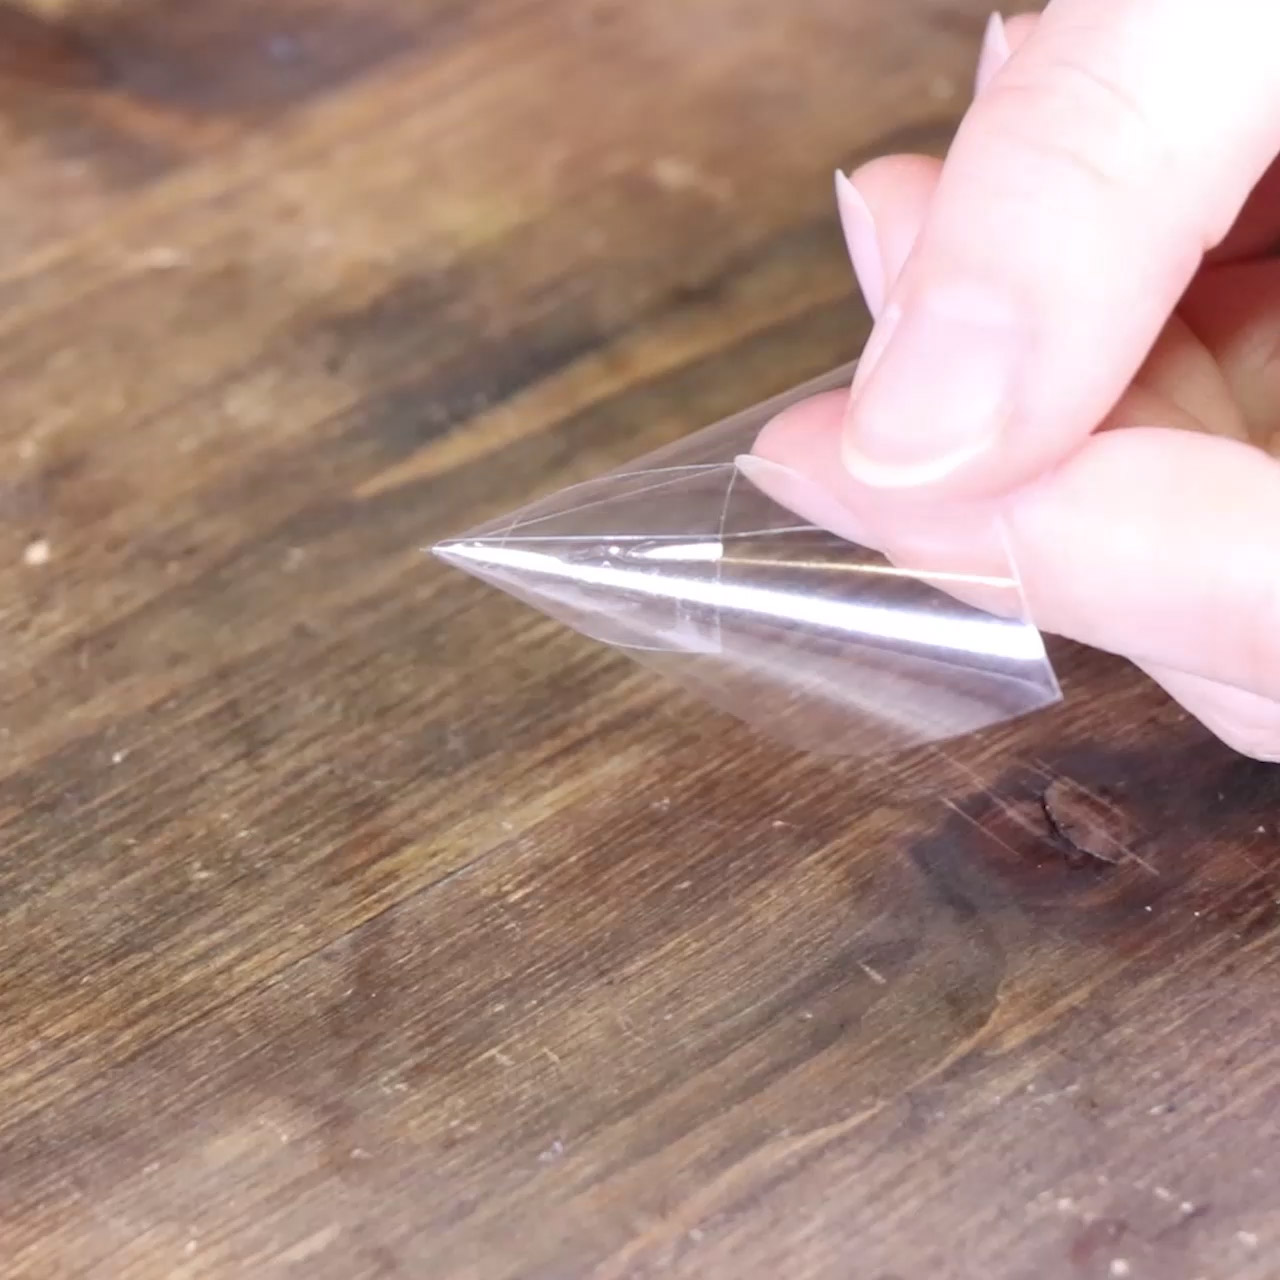
三角錐に丸める。
Make a corn shape.

セロハンテープで端を止める。
Put some scotch tape to keep it hold.
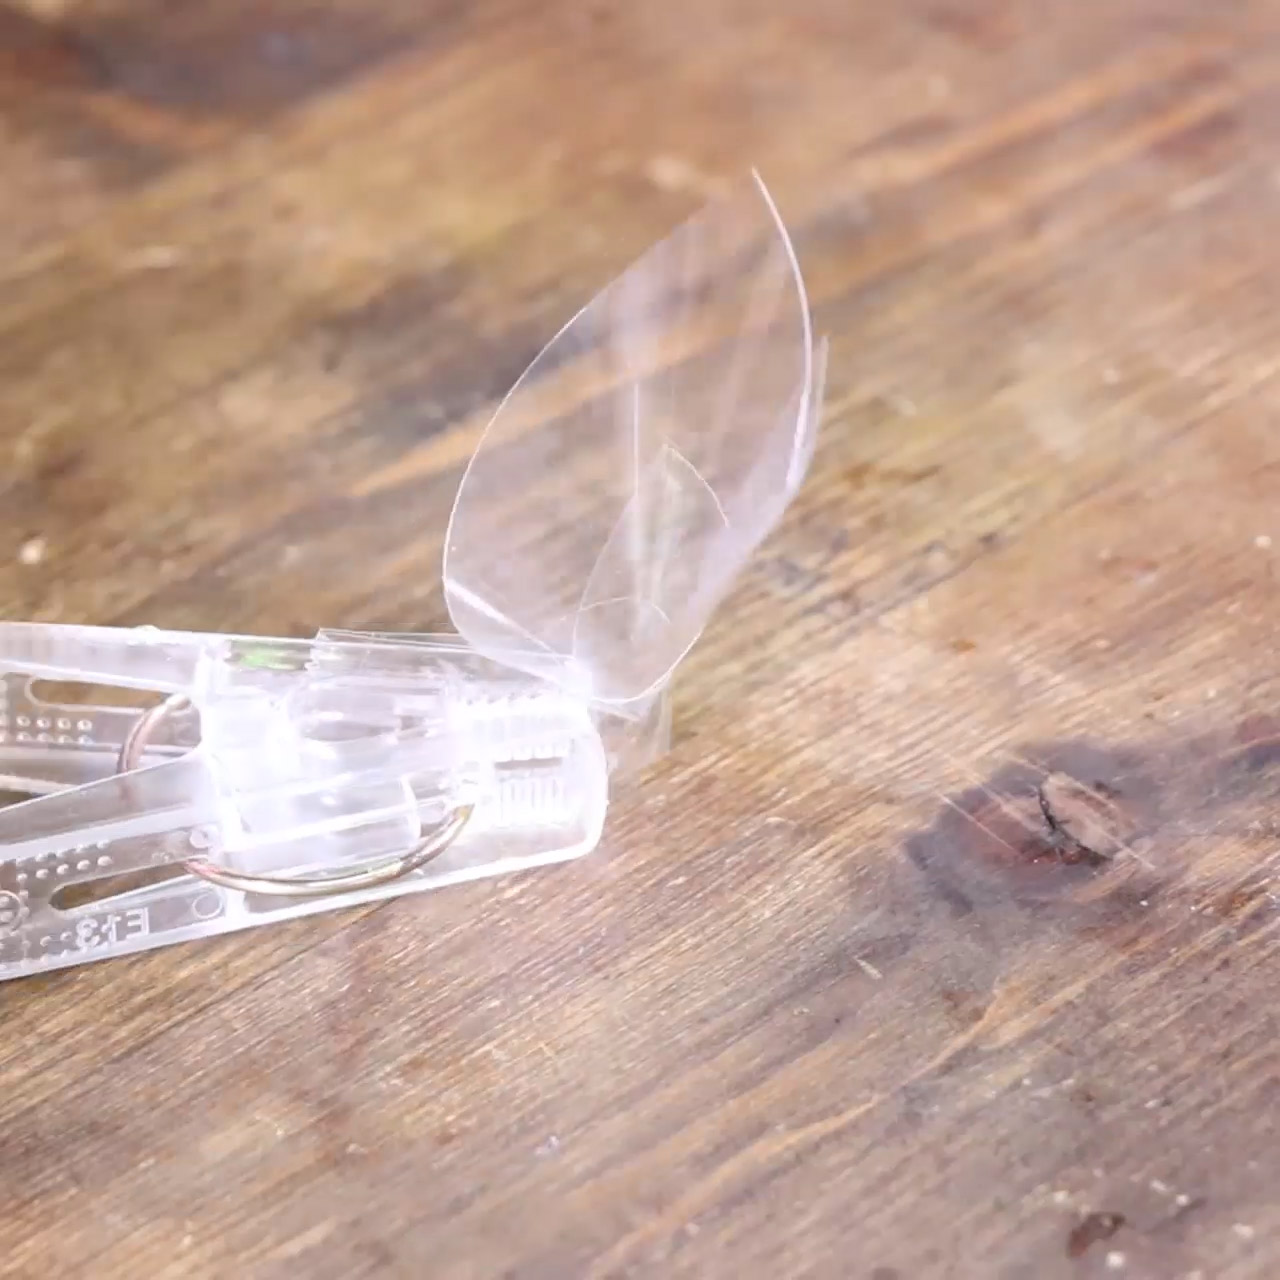
三角錐の先の部分にもテープを付けて洗濯バサミで固定する。(2個作る)
Put a laundry clip to make it stay. (make 2 of them)
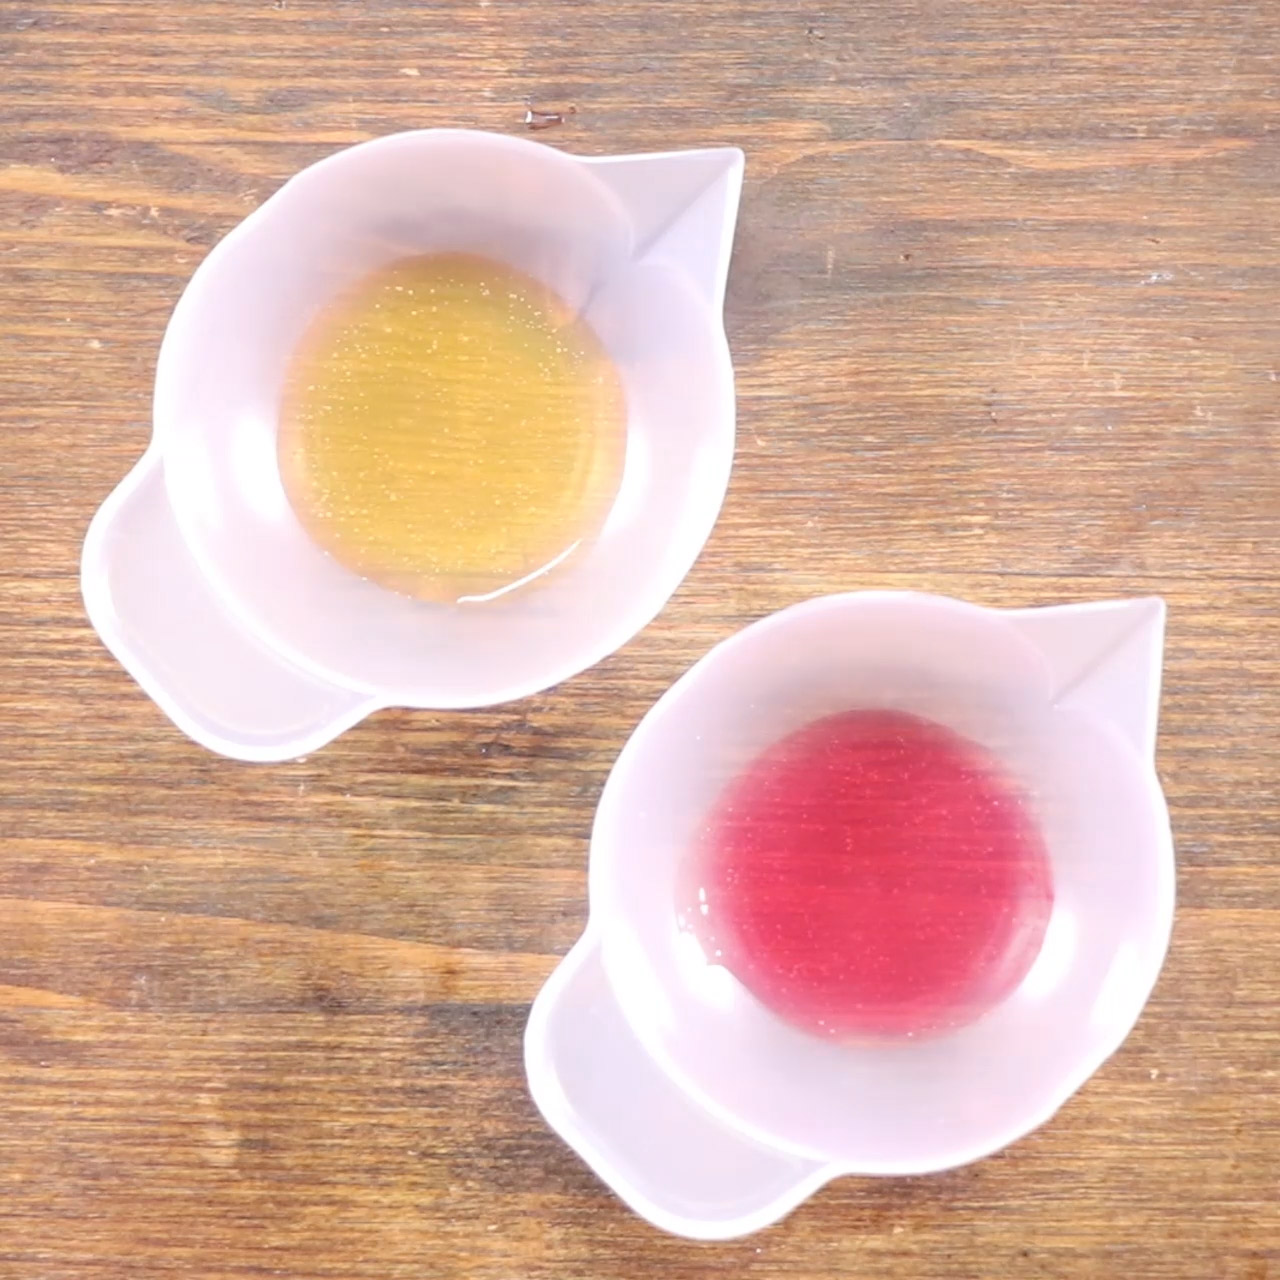
赤とオレンジのレジンを作る。
Make yellow and red resin.
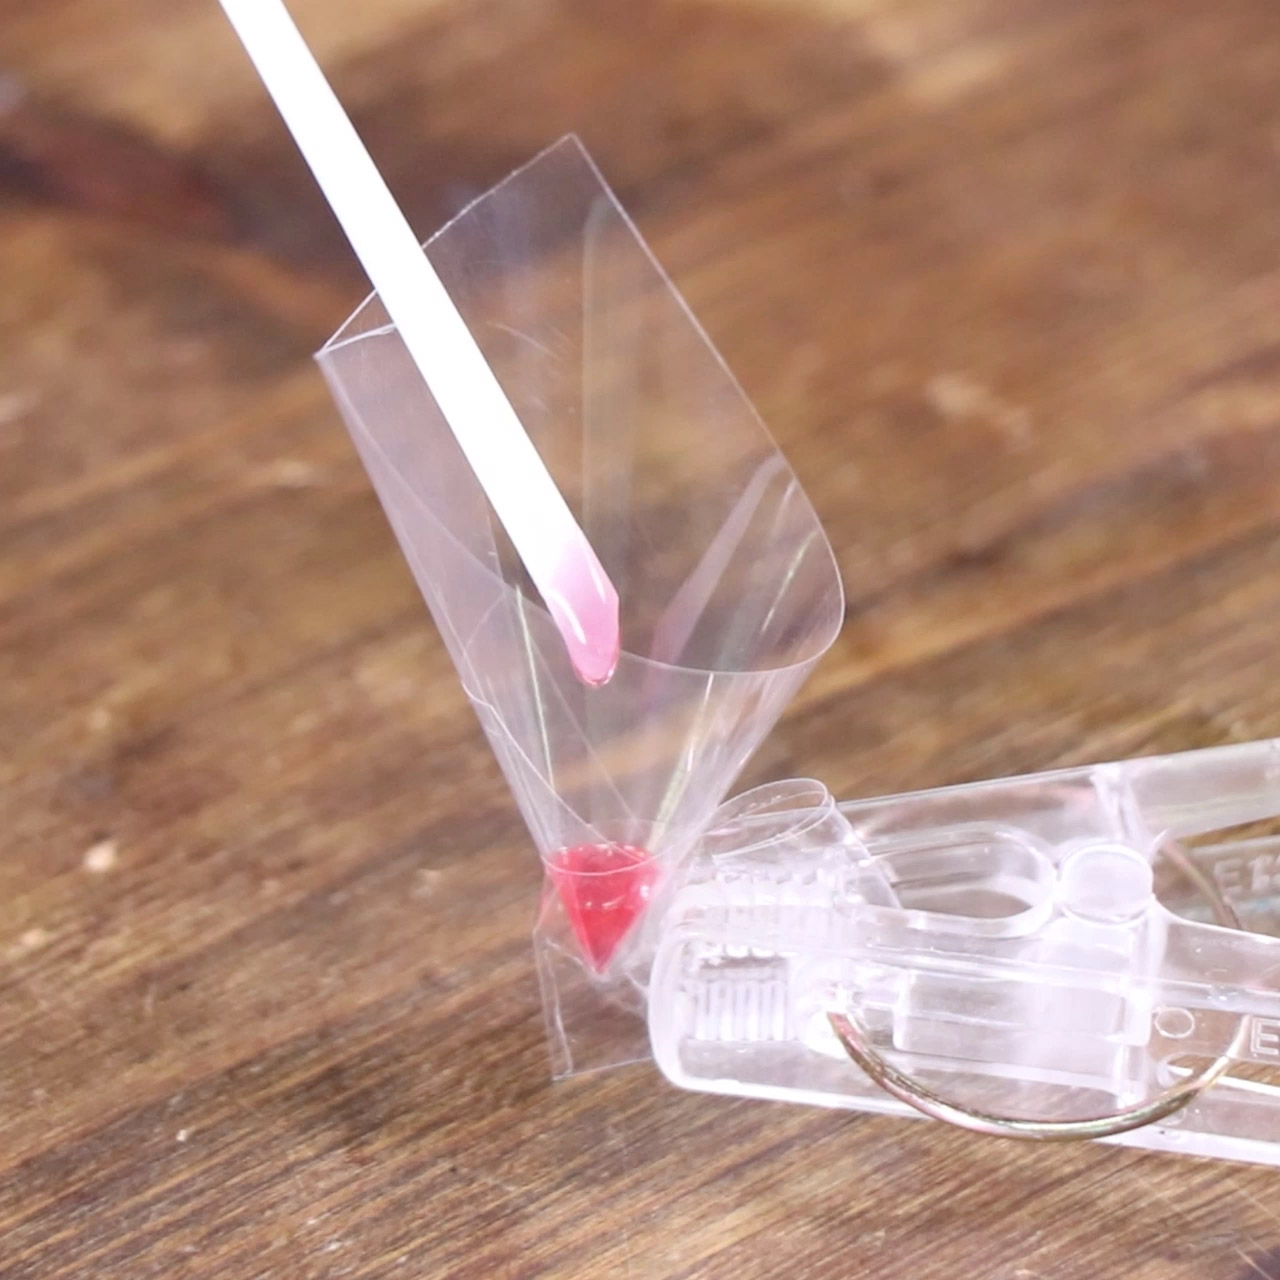
三角錐の中に5ミリ程の高さになるように赤のレジンを入れる。
Pour red resin into the corn bag, 5mm from the bottom.
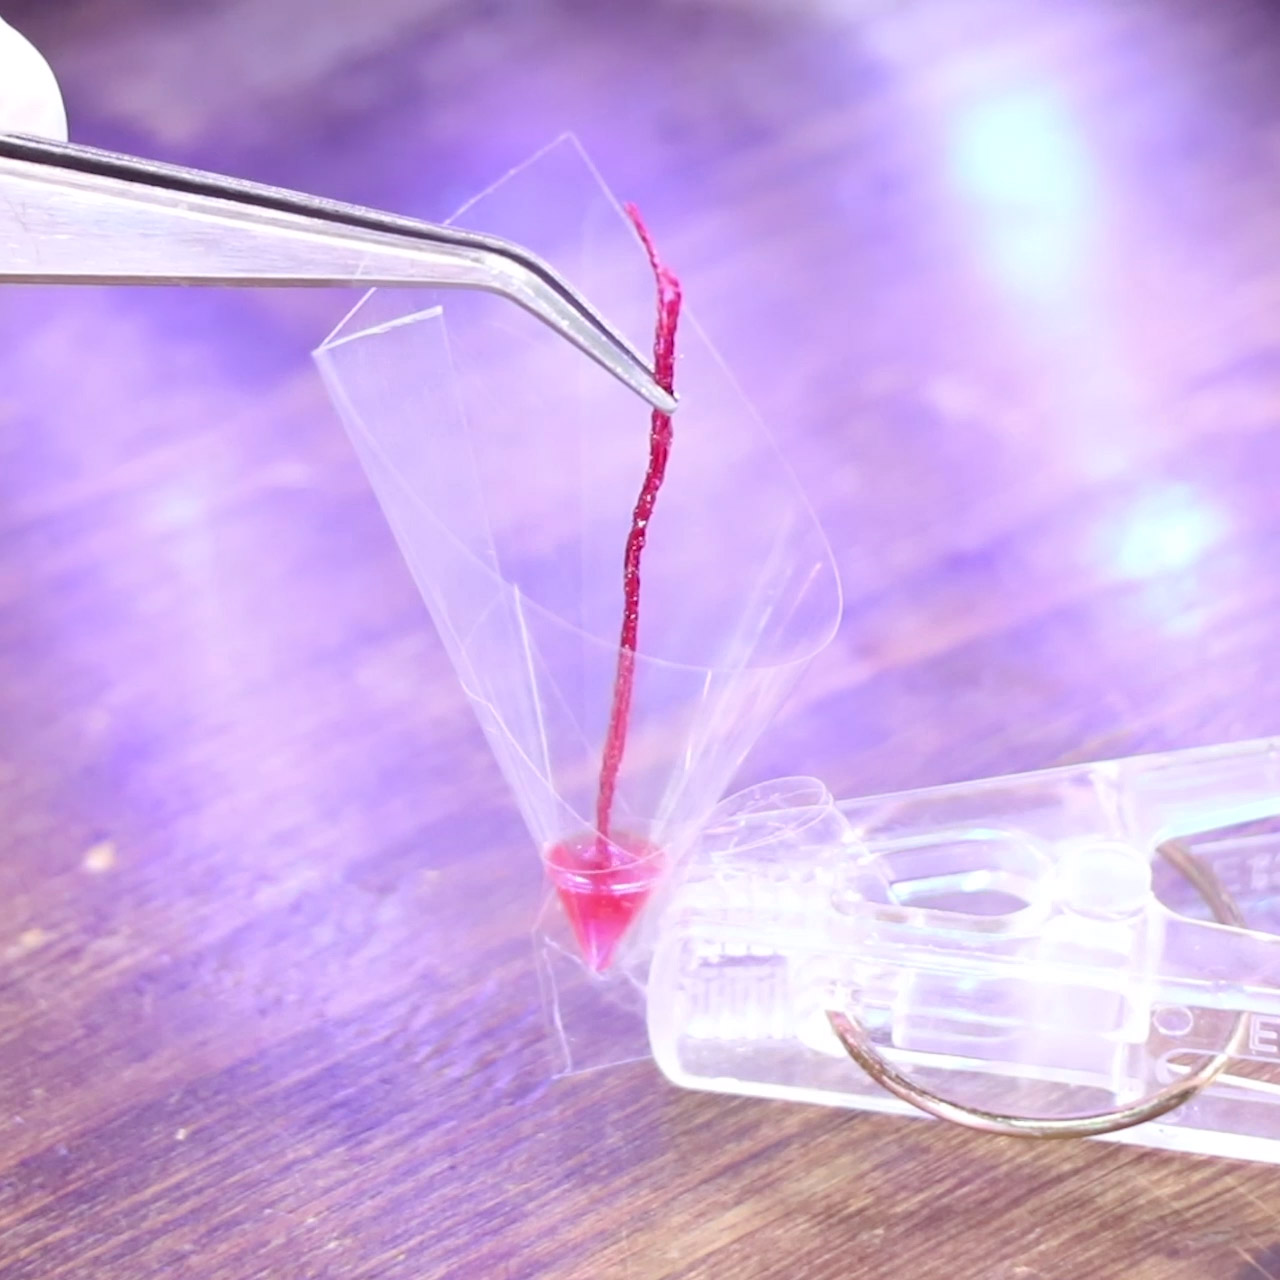
刺繍糸を真ん中に刺して照射。
Stick the red resin coved threads in the middle and cure.

オレンジも同様に作る。
Make an orange mushroom too.

三角錐の先をはさみでカットし、バリを取る。
Cut the little tip of the corns and burr with a sissors.
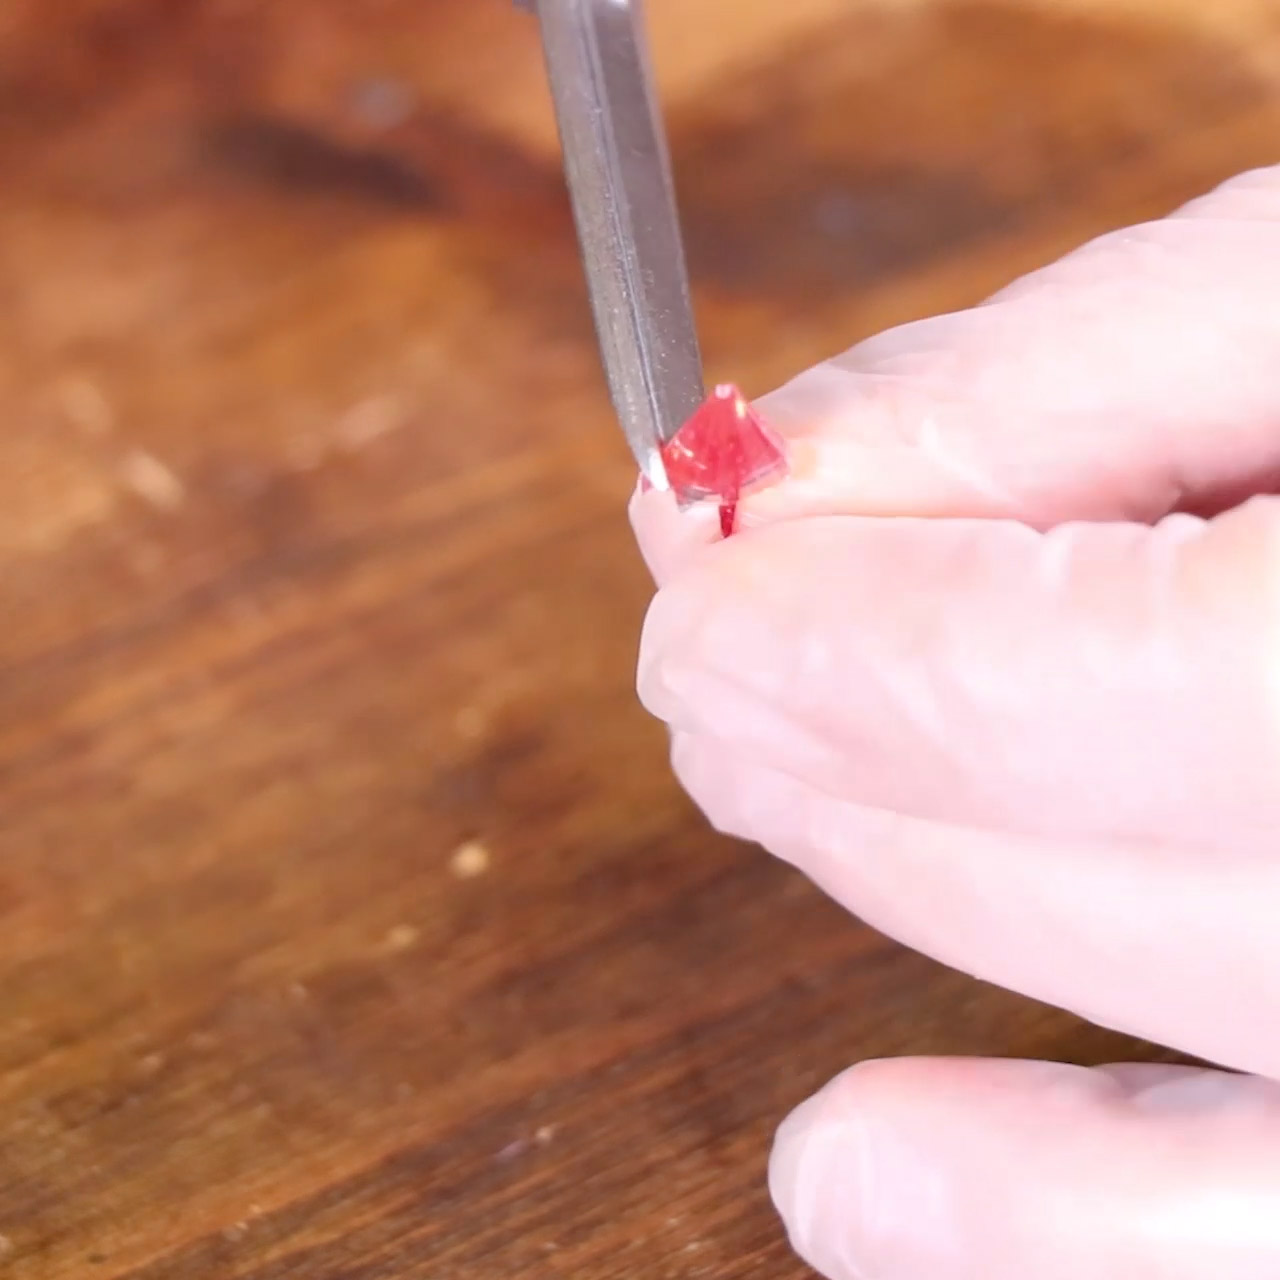
赤の刺繍糸を1.5cm、オレンジを1cmの長さにカットする。
Cut the red thread into 1.5cm and orange into 1cm.
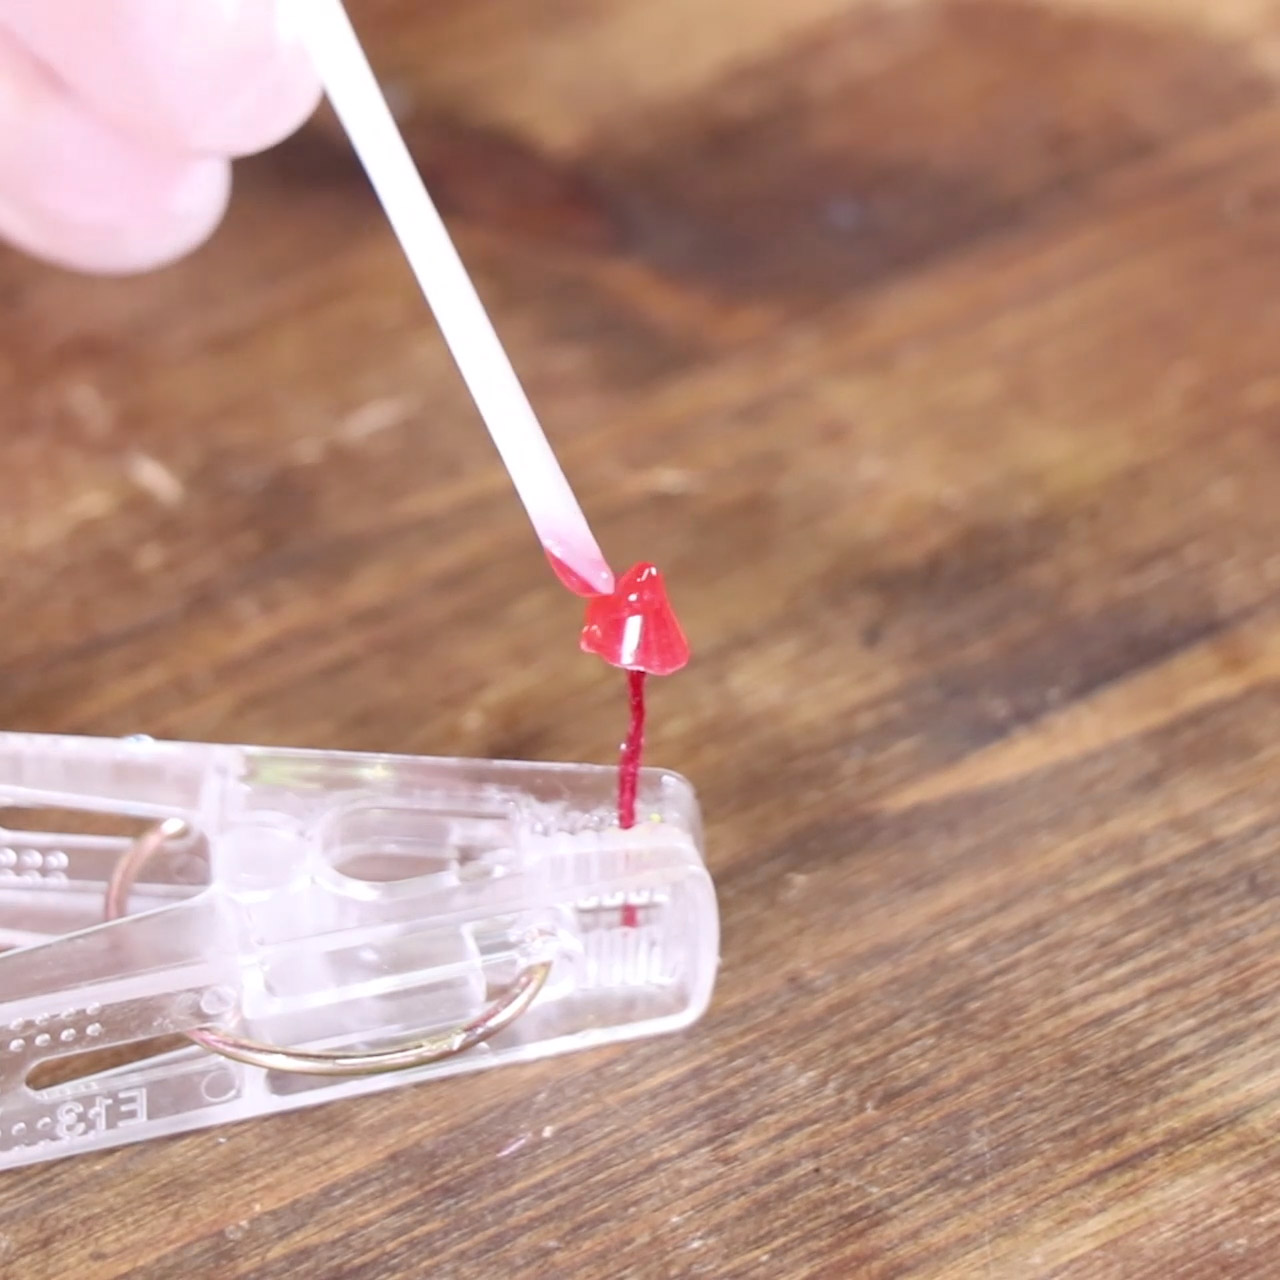
洗濯ばさみで固定し、カサ部分にレジンを塗り、丸みを作る。
Hold the mushroom with a laundry clip and put red resin on.
照射
Cure.
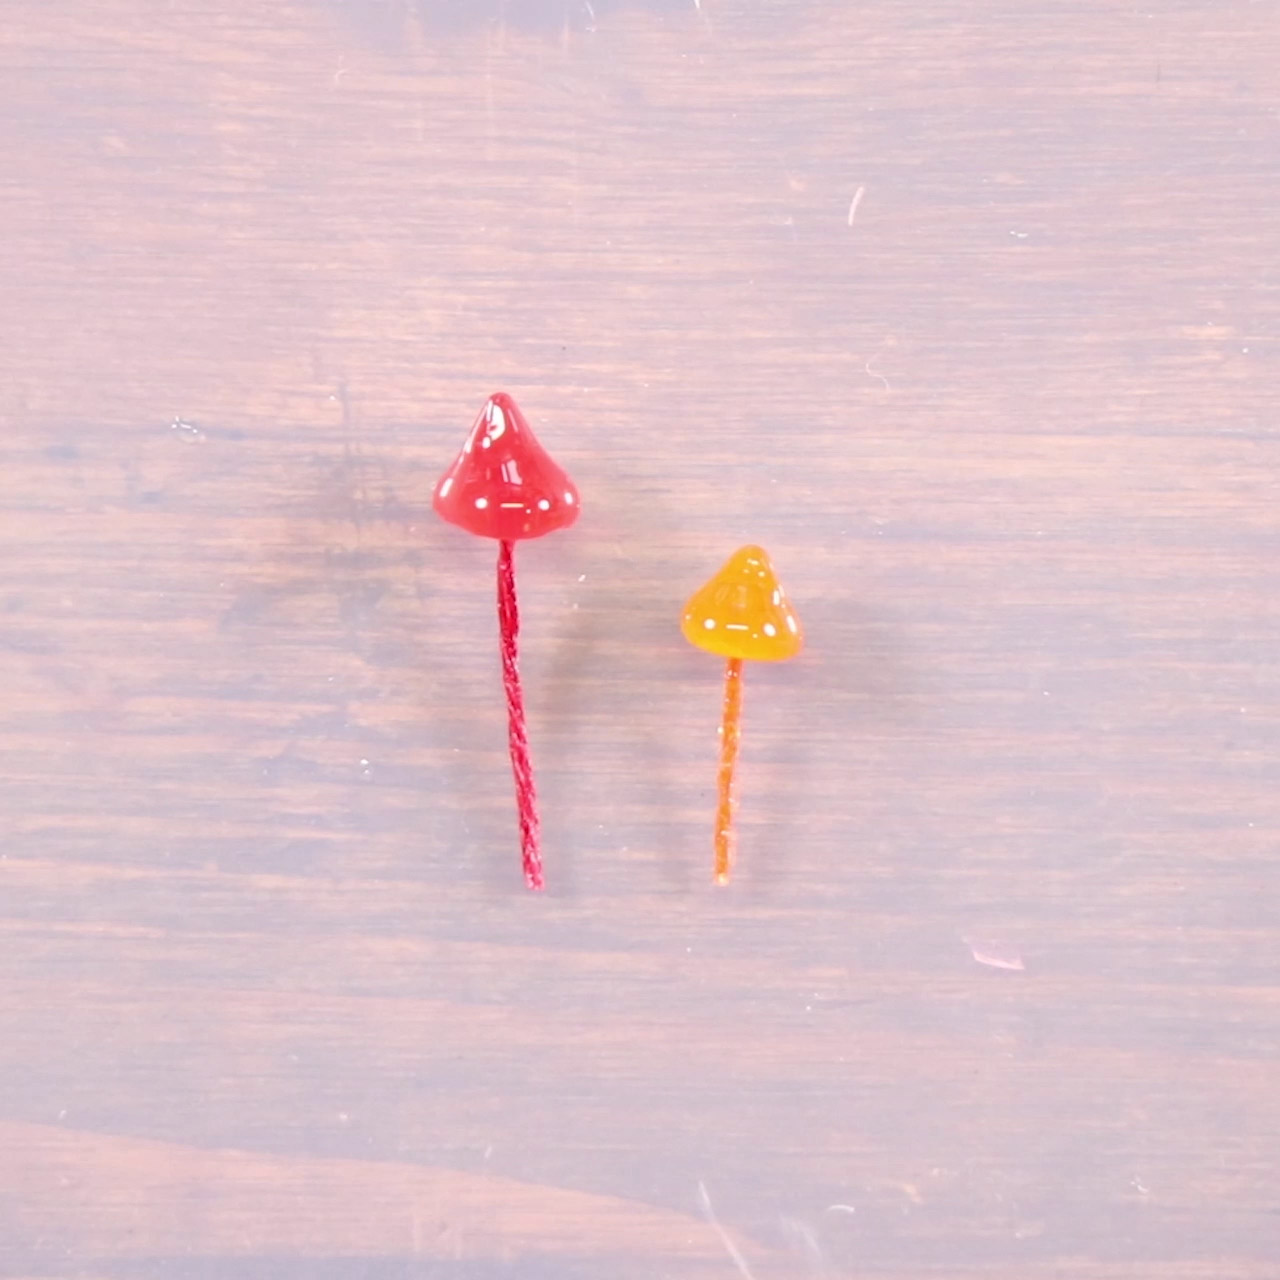
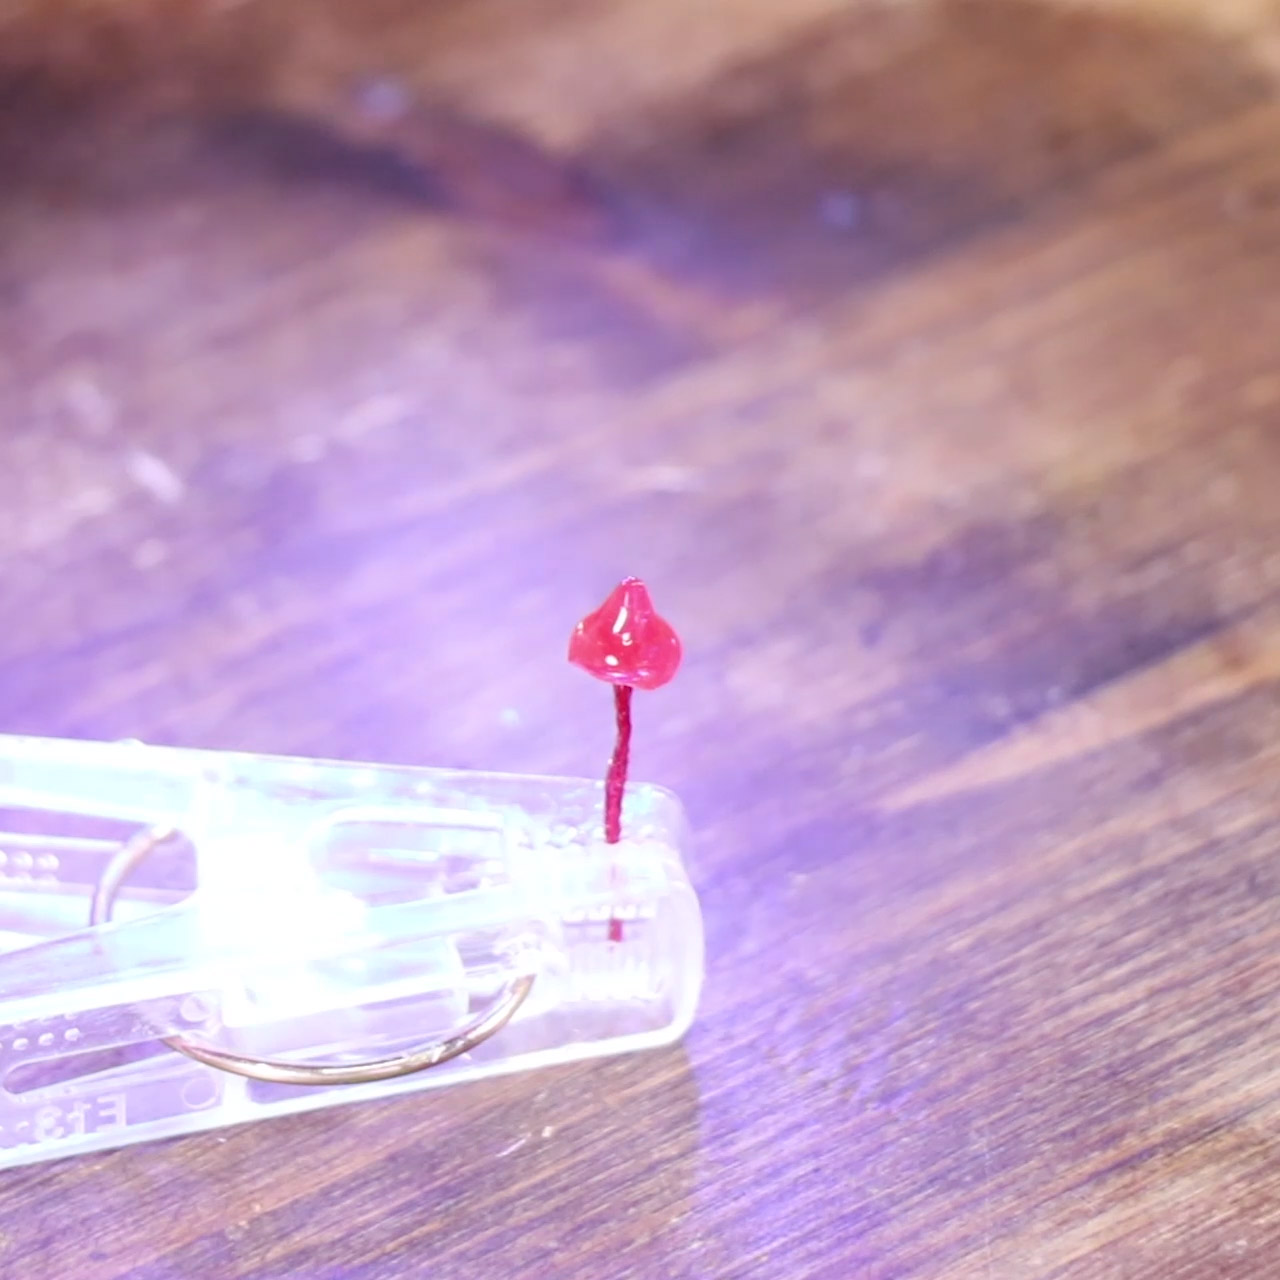
オレンジも同様にレジンを塗り、きのこ型にする。
Make the orange mushroom also.
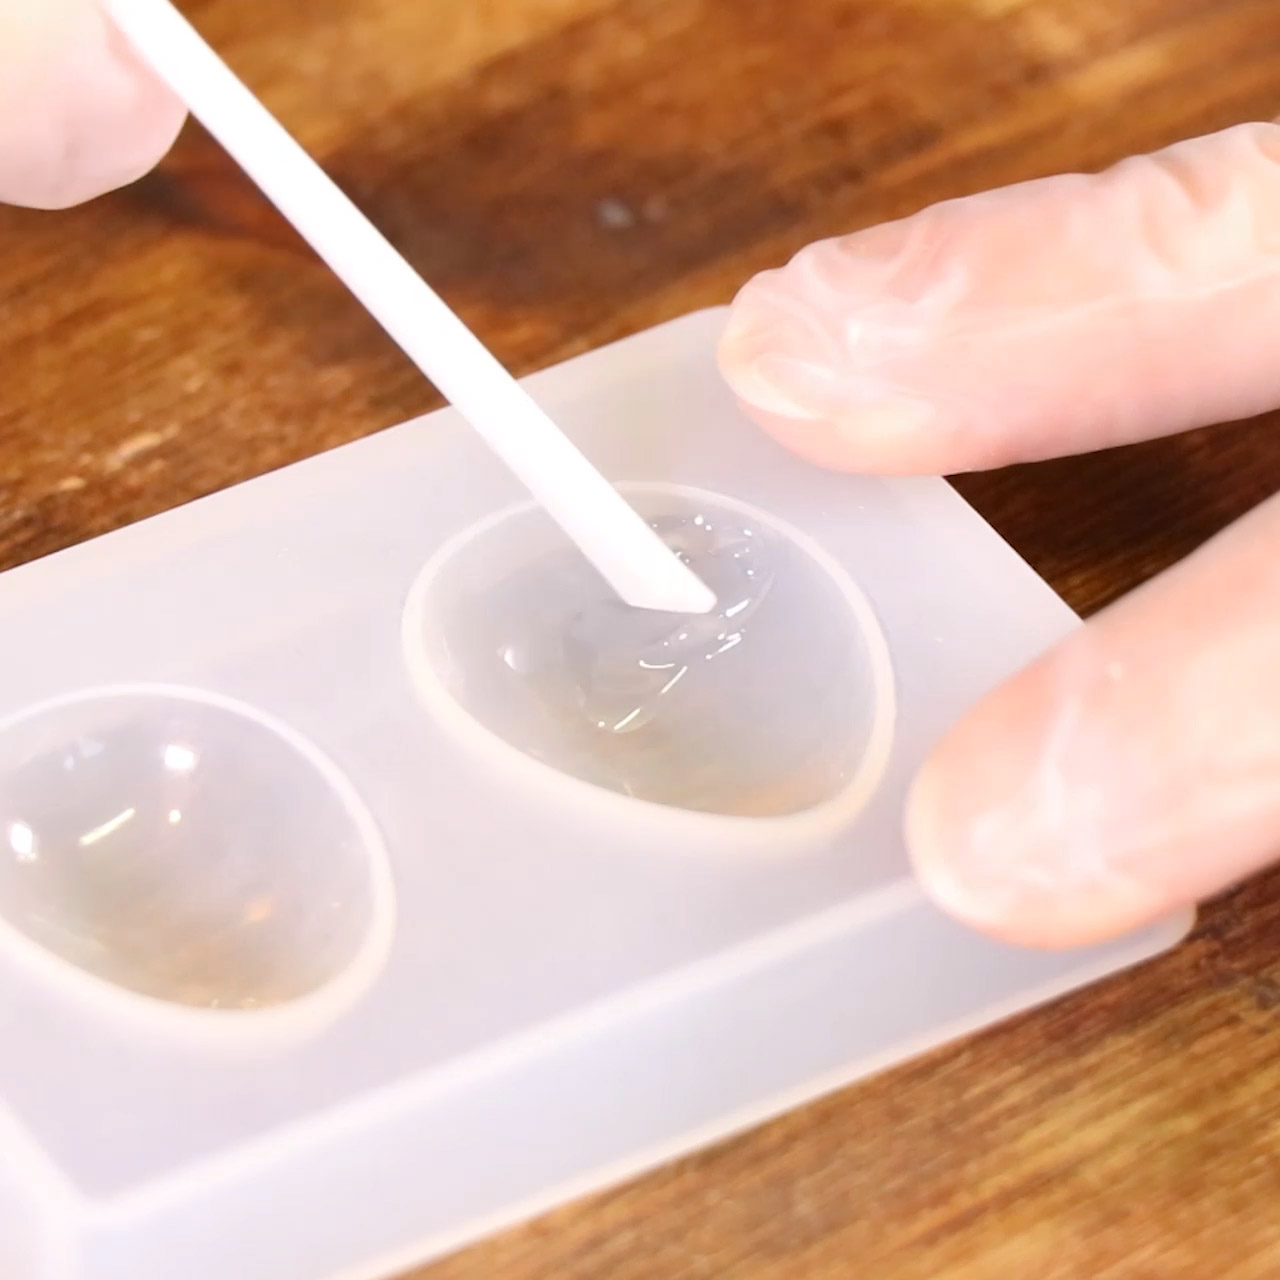
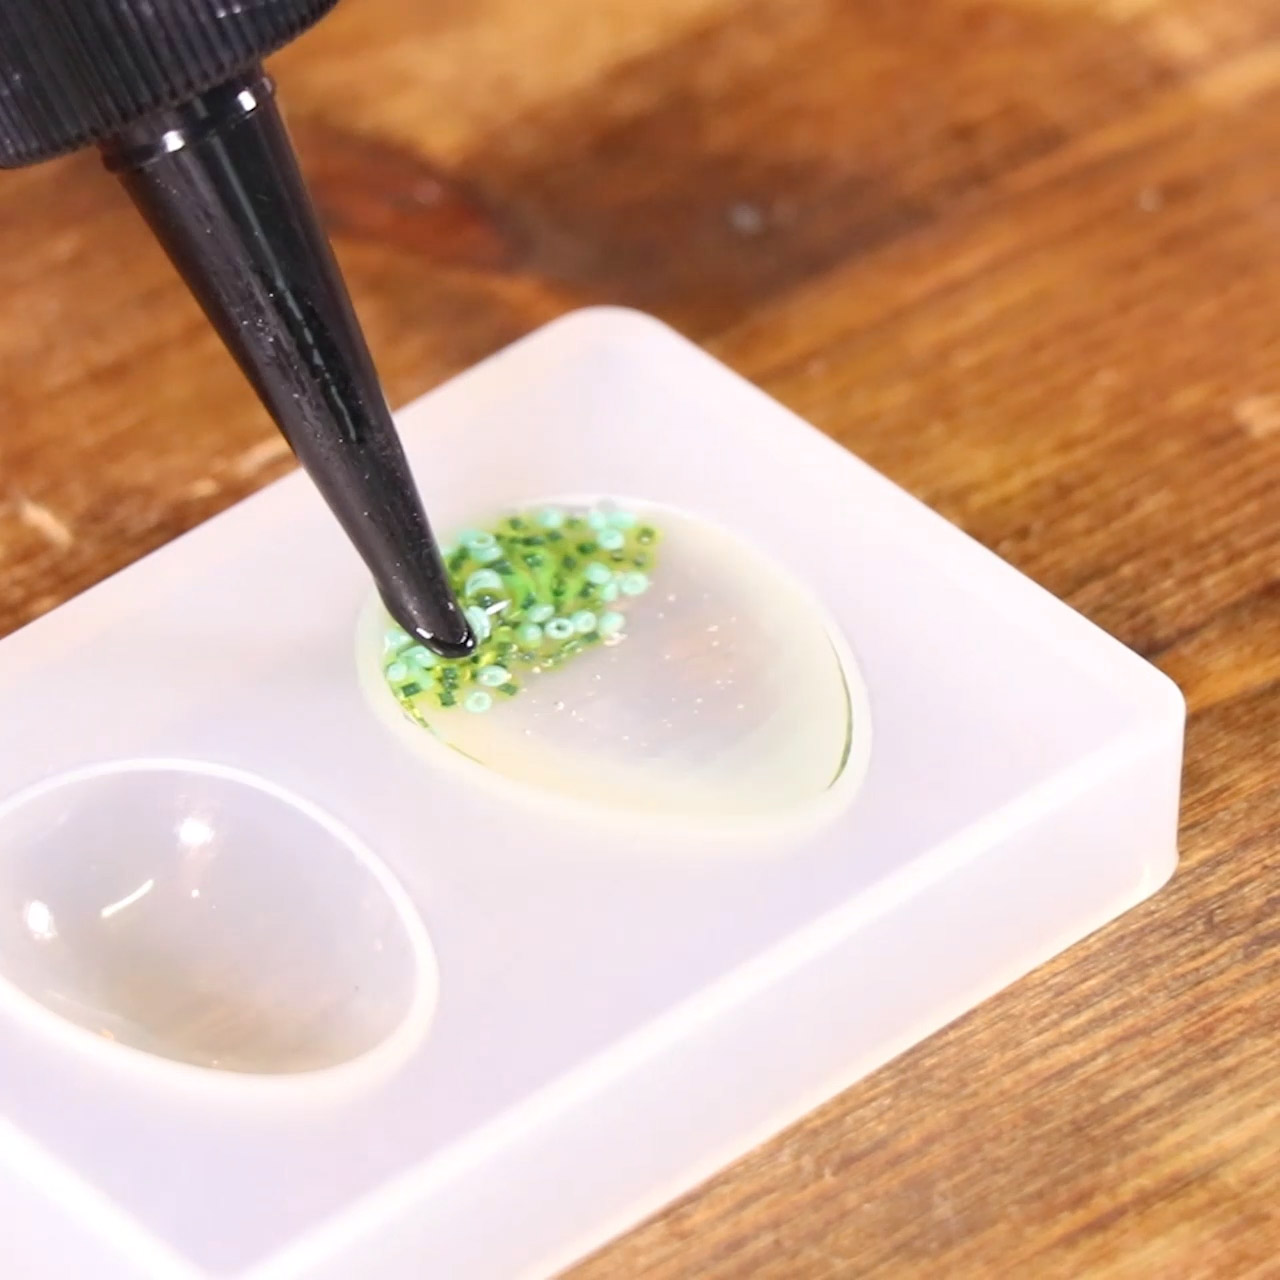
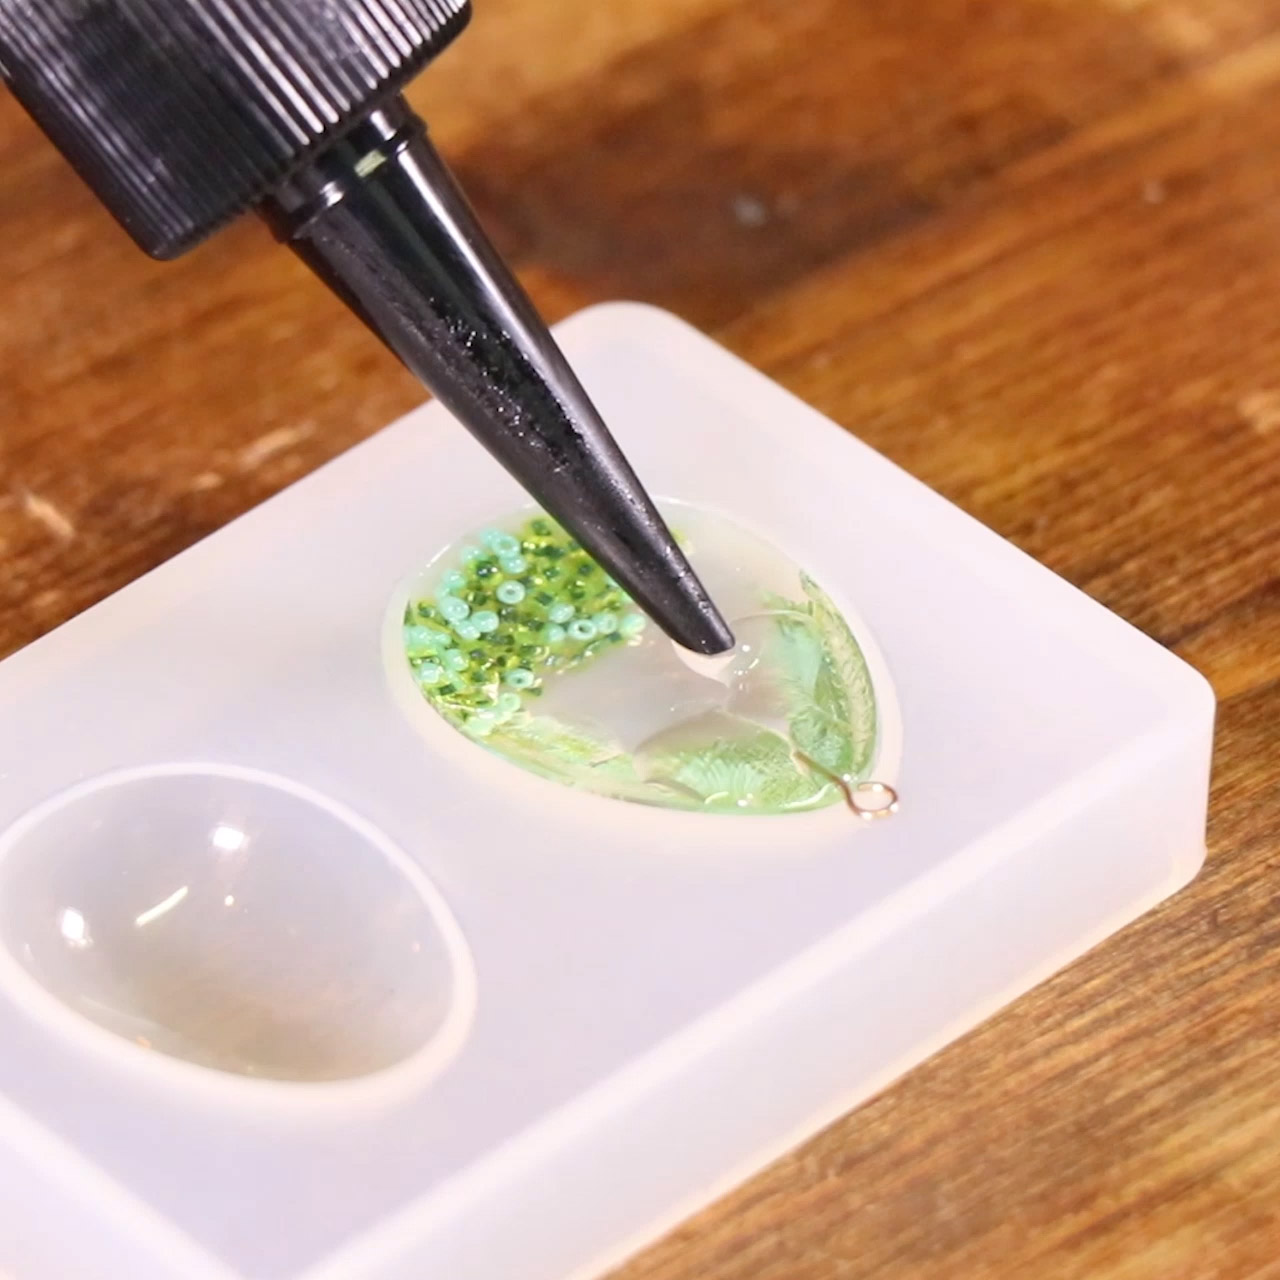
卵型モールドの下から1/3までレジンを塗る。
Put resin at the 1/3 of the egg mold.
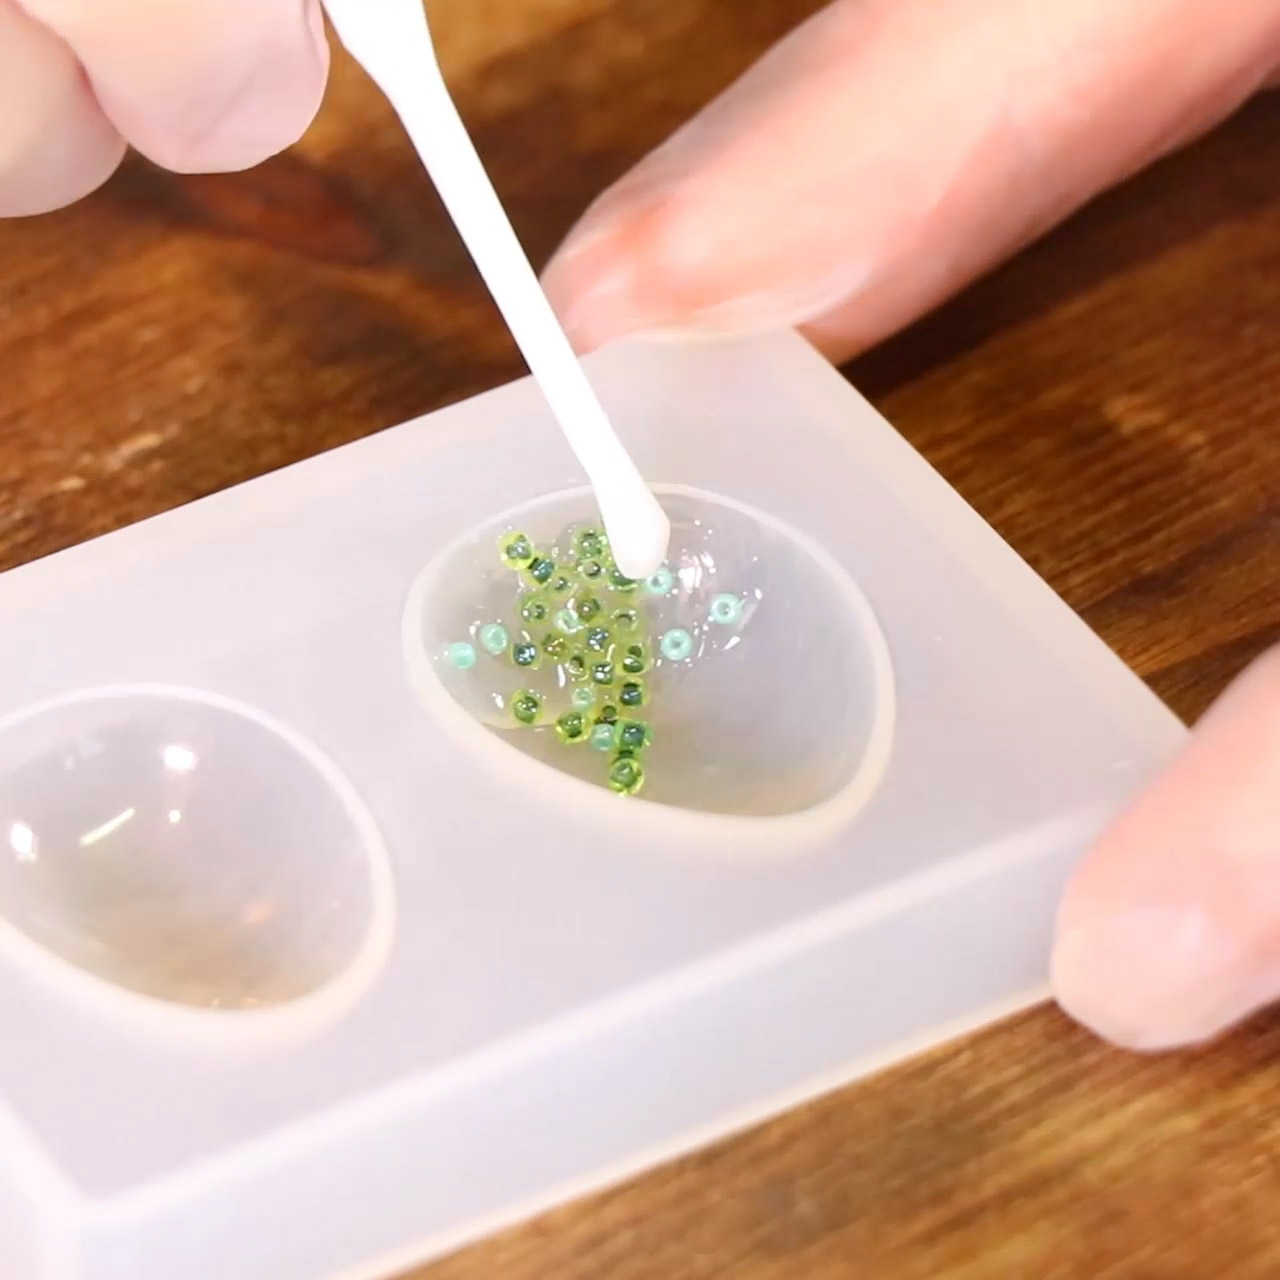
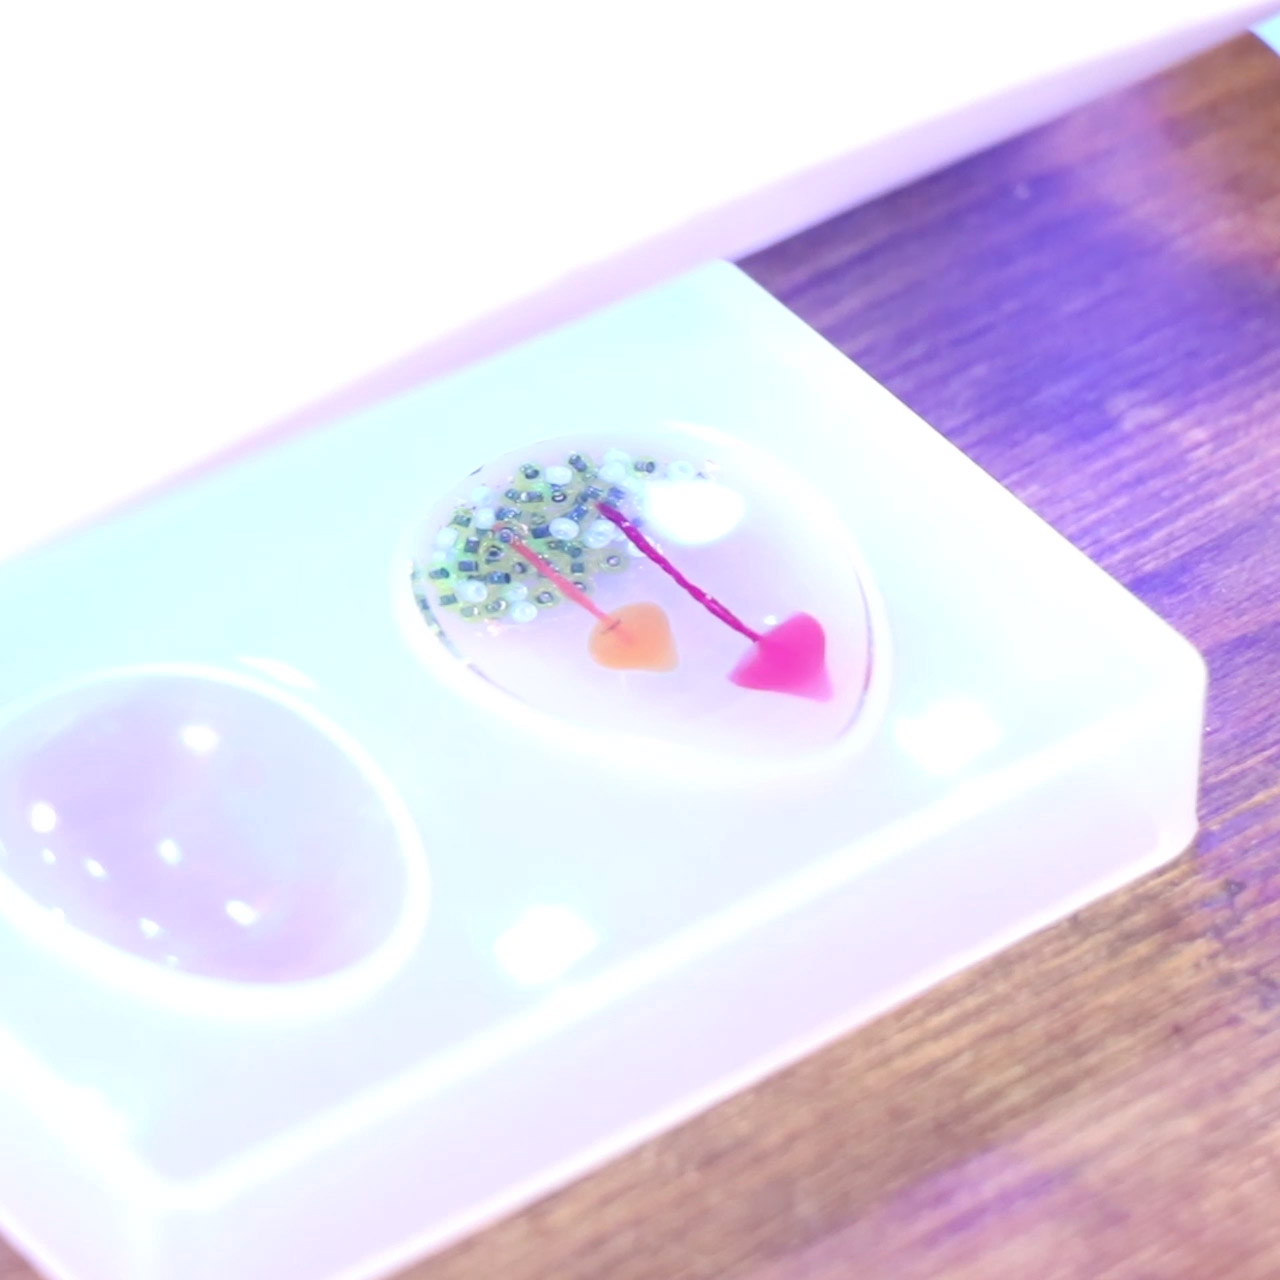
2色のビーズを貼り付ける。
Attach two colored beads.
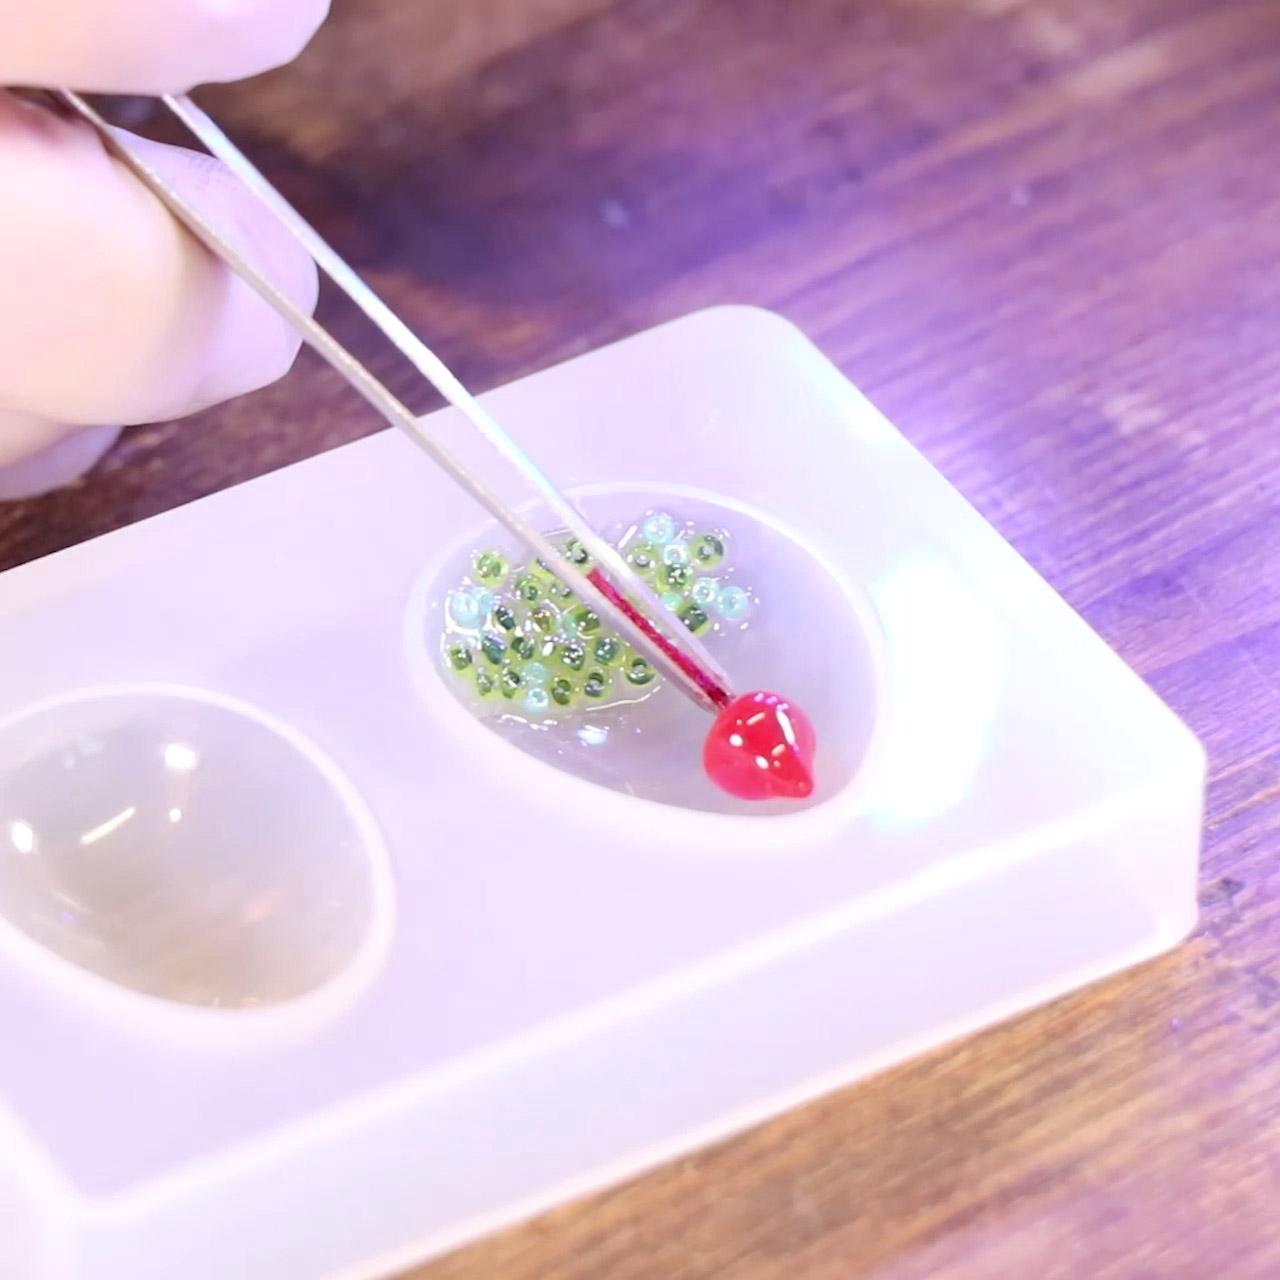
赤きのこを固定しながら照射。
Place a red mushroom and cure.

ビーズ部分にさらにレジンを塗り、ビーズ2色とオレンジきのこを乗せて固定する。
クリアレジンをモールドの上まで入れる。
Put some resin on the beads part, and attach more beads and an orange mushroom.
Pour clear resin into the top of the mold.
照射。
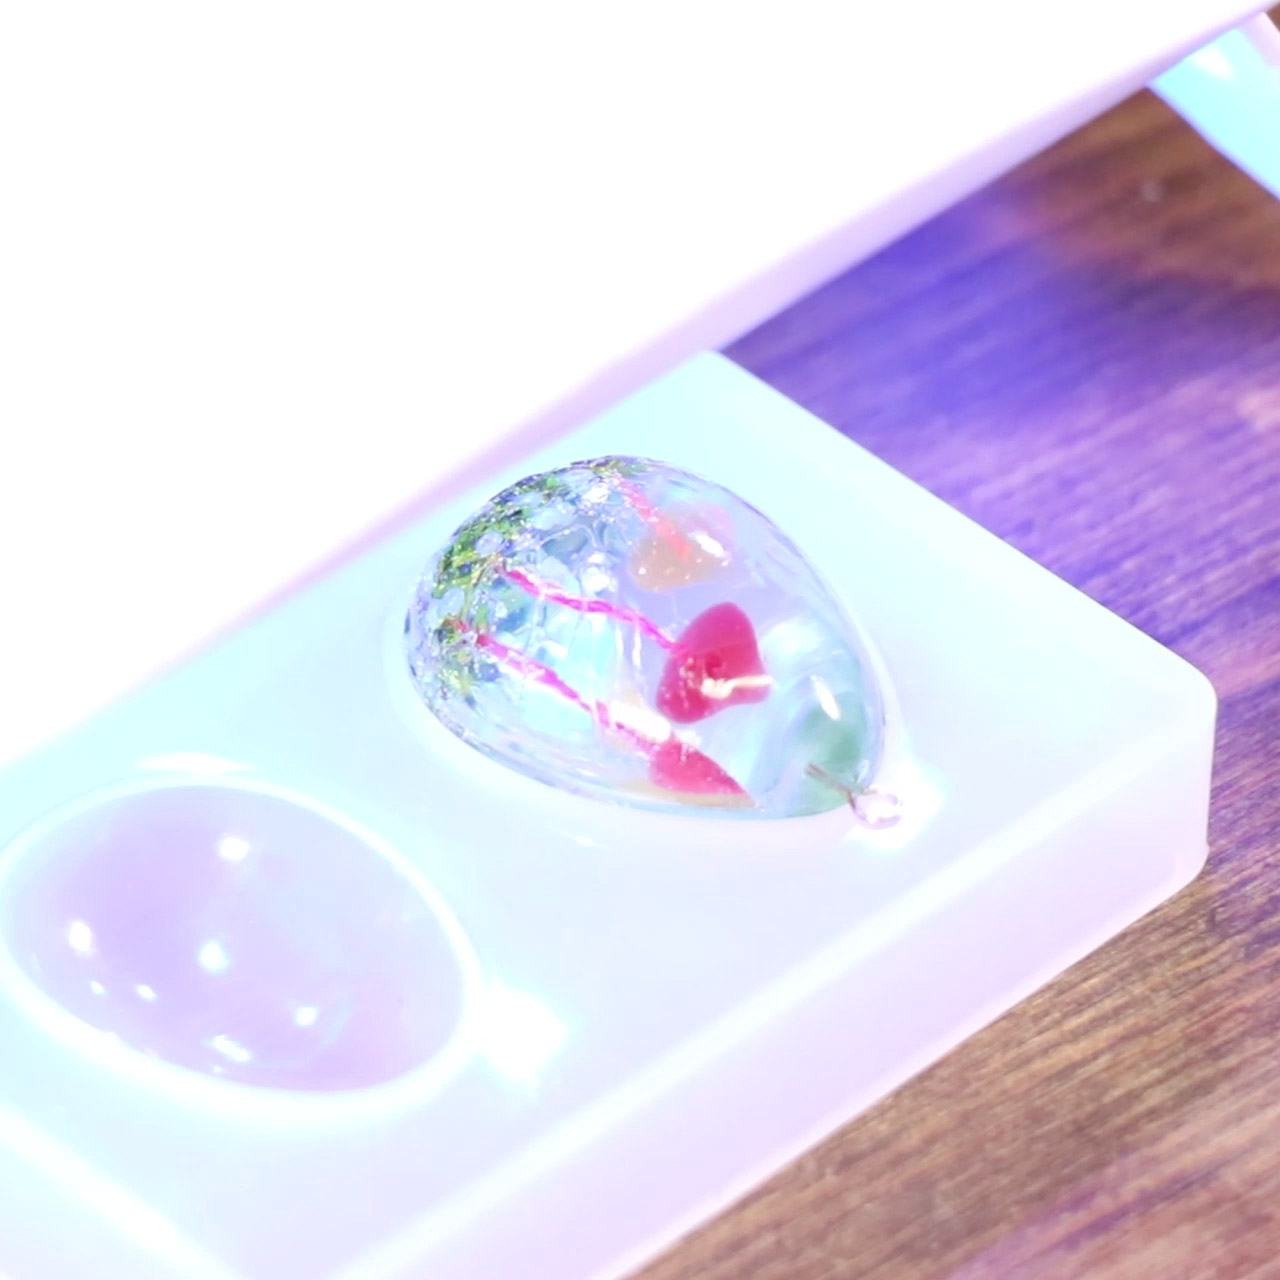
完全に固まったらモールドから取り出す。
Cure.
Take it out of the mold.
同じ容量でもう1つキノコなしのものを作る。(まだ照射しない)
Make the same thing without mushrooms. (DO NOT cure yet)
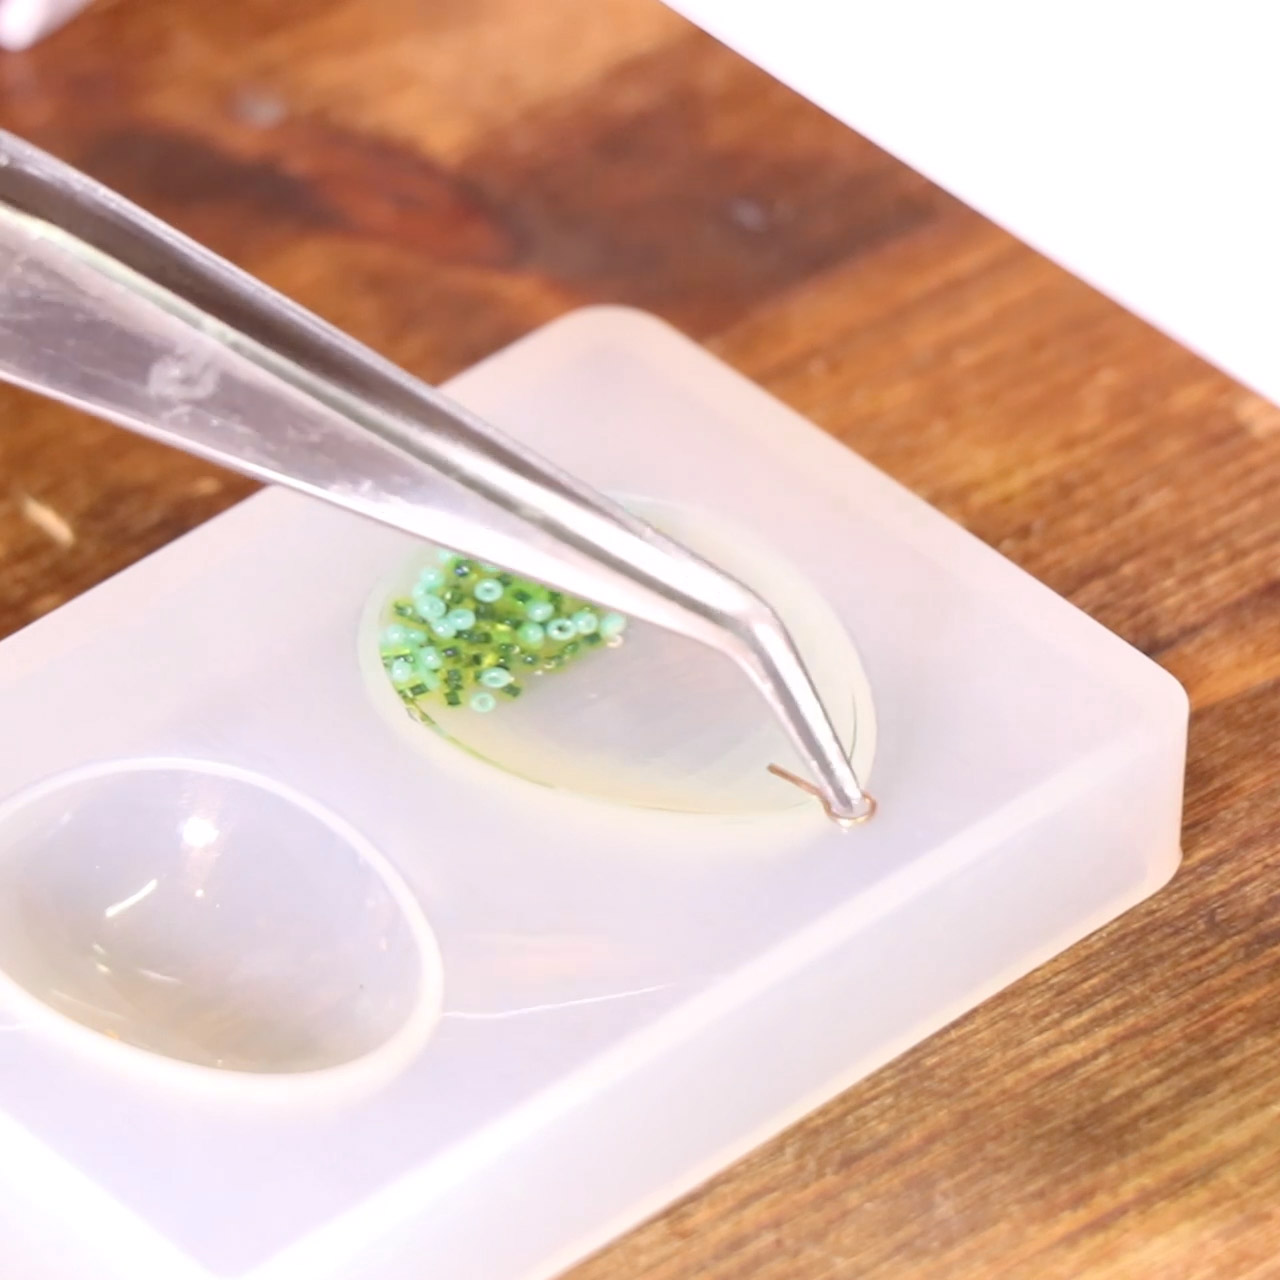
5mmにカットした9ピンを乗せる。
Place an eye pin that's cut into 5mm.
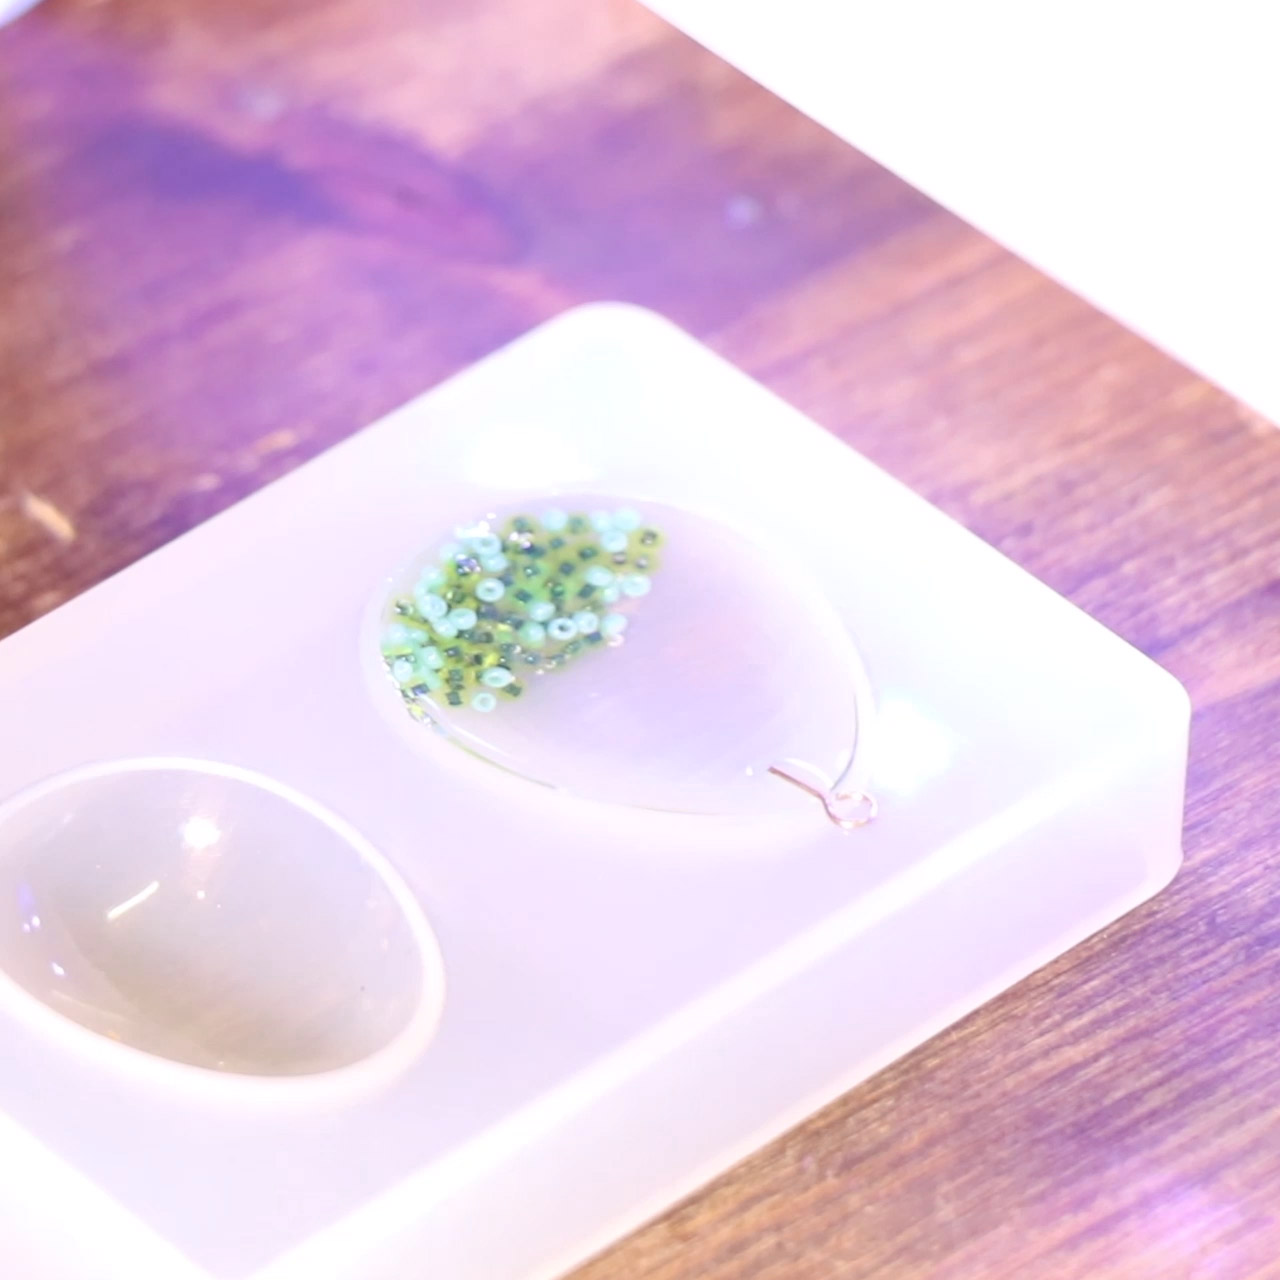
照射
Cure.
クリアーレジンを平らな部分に塗る。
Put clear resin on the flat surface.
キノコが入ったレジンを合体させて照射。
Put an another resin part with mushrooms on and cure.

モールドから取り出し、紙やすりで全体が白くなるまでやする。
Take it out of the mold.
Sand all surface until it gets frosted.
★やする前に大きなバリがある場合は、ニッパーやカッターナイフなどで先に取り除いて下さい
★Clean the joint part before sanding.
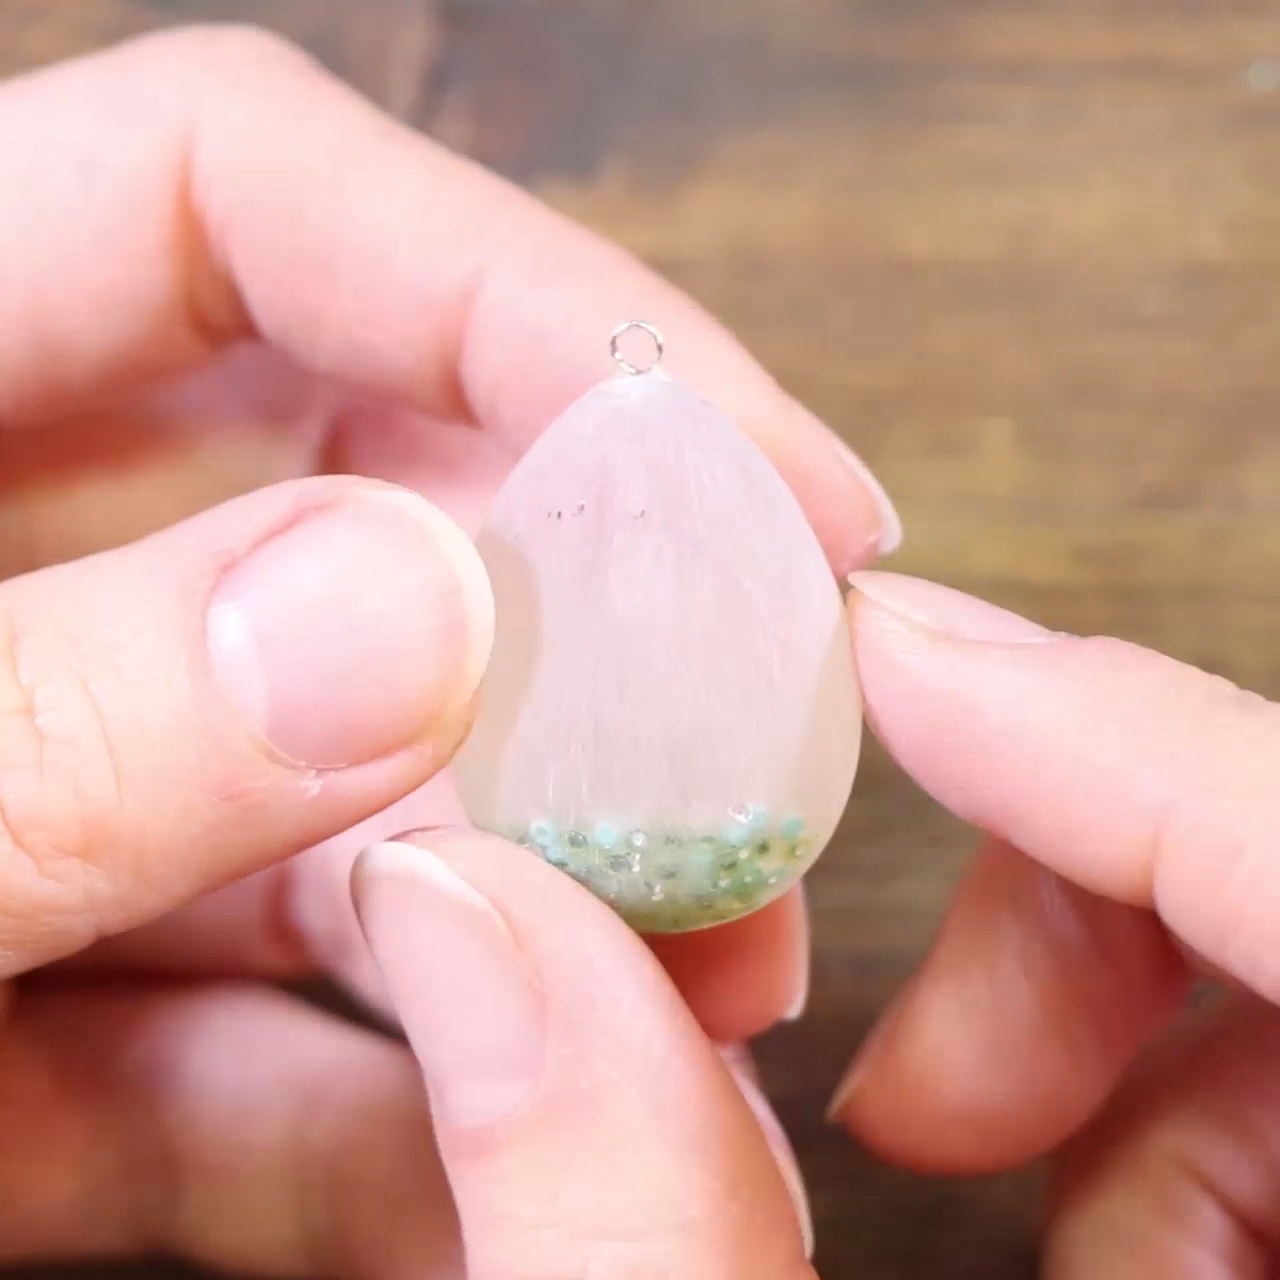
やすり終わった状態。
After sanding.

きのこを入れた側の面の、中を見せたい部分にレジンを塗り照射
Put clear resin to make a small window.
★ポイント:レジンが垂れないよう、少量ずつで塗ってください。
★Put resin little by little.
照射
Cure.
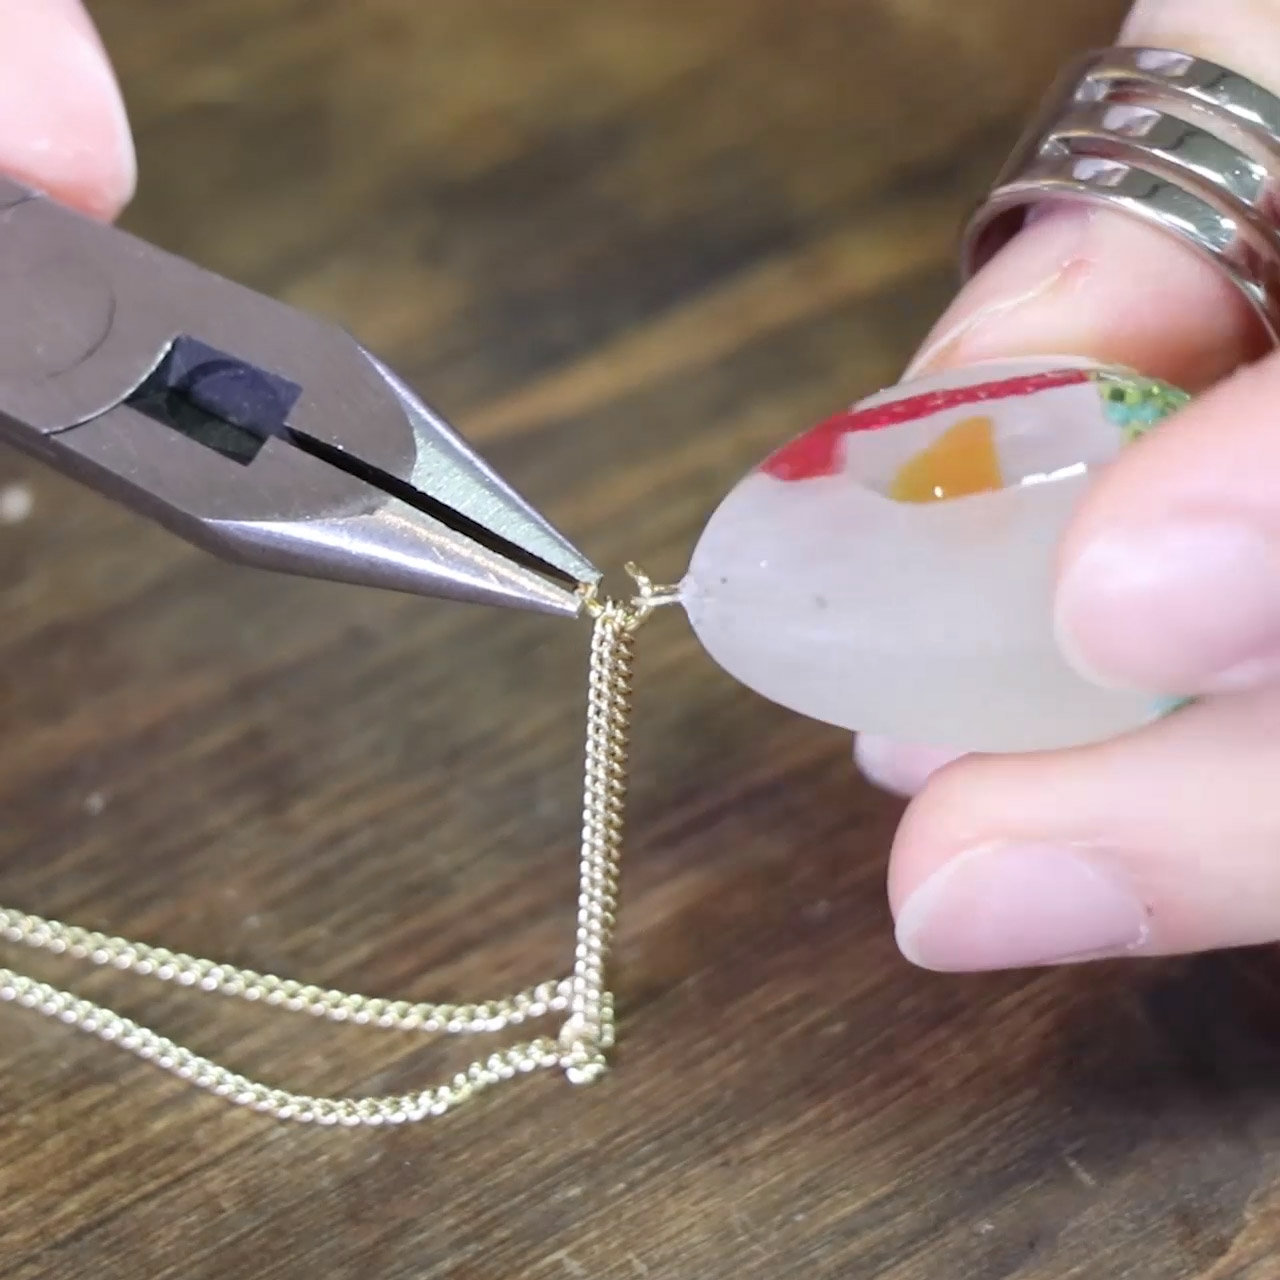
9ピンに丸カンを付けて、ネックレスチェーンを取り付ける。
Attach a jump ring to the eye pin.
Put a chain through the jump ring.
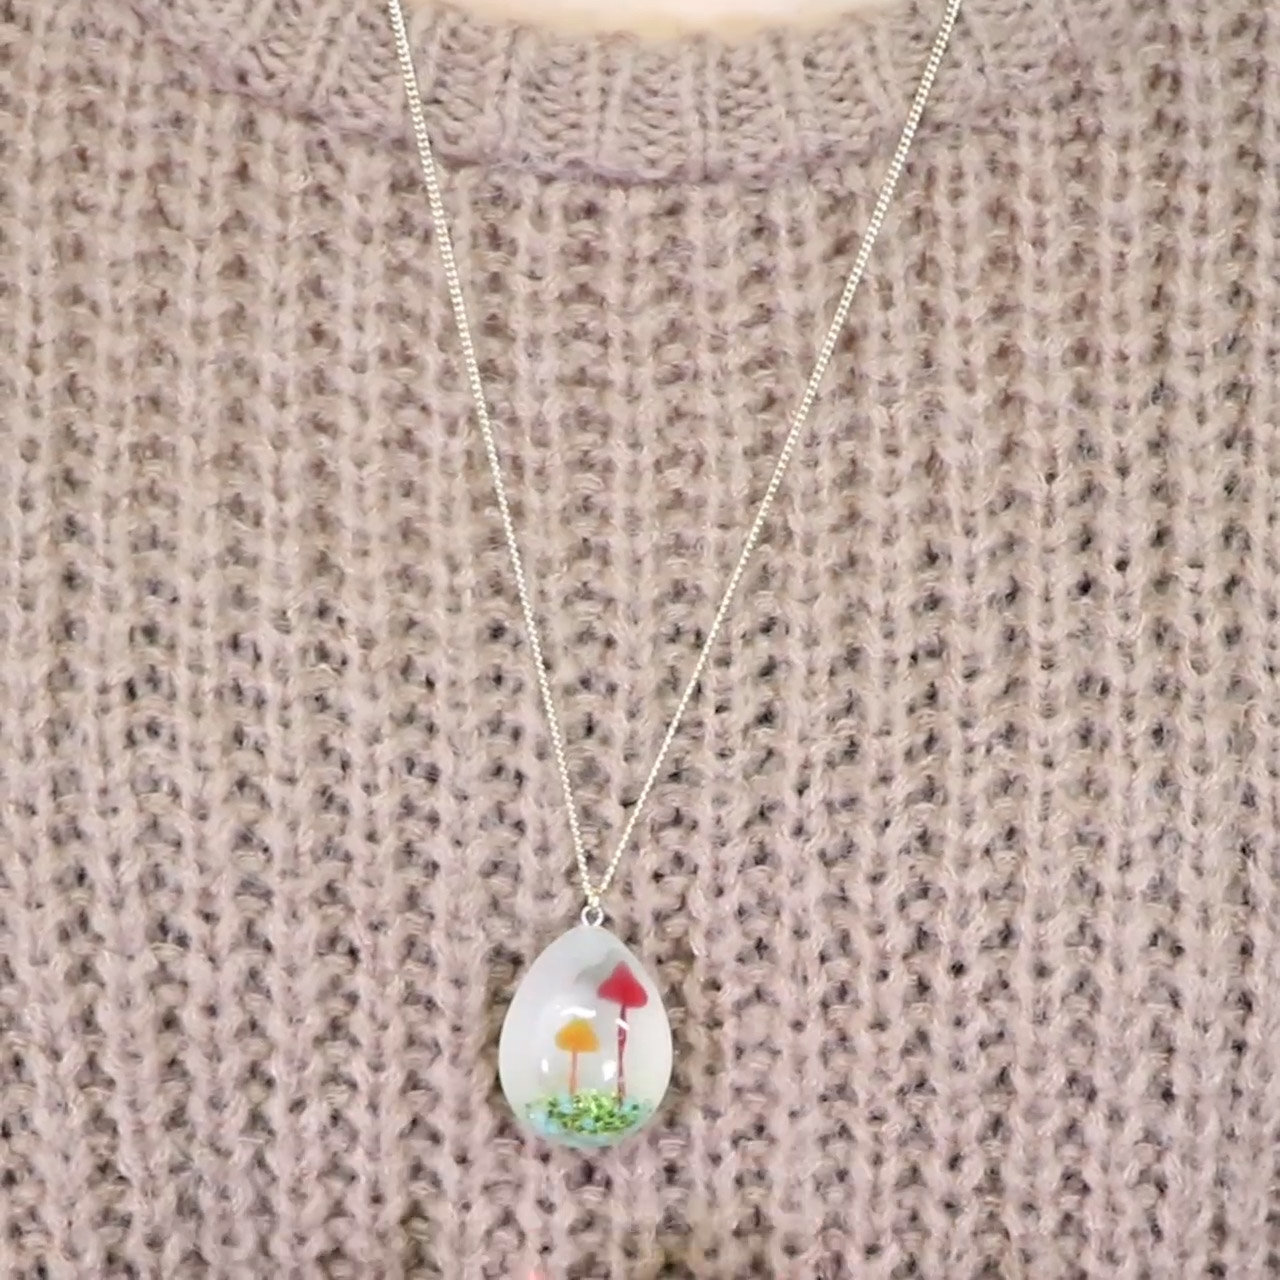
着用イメージ。
Finish!