
球体と星を組み合わせるとなんとも可愛いブルーベリーに☆
フェイクフルーツは時期じゃなくても楽しめるレジン作品の強い味方♡
ブローチにしてストールに留めてもかわいいですね♪
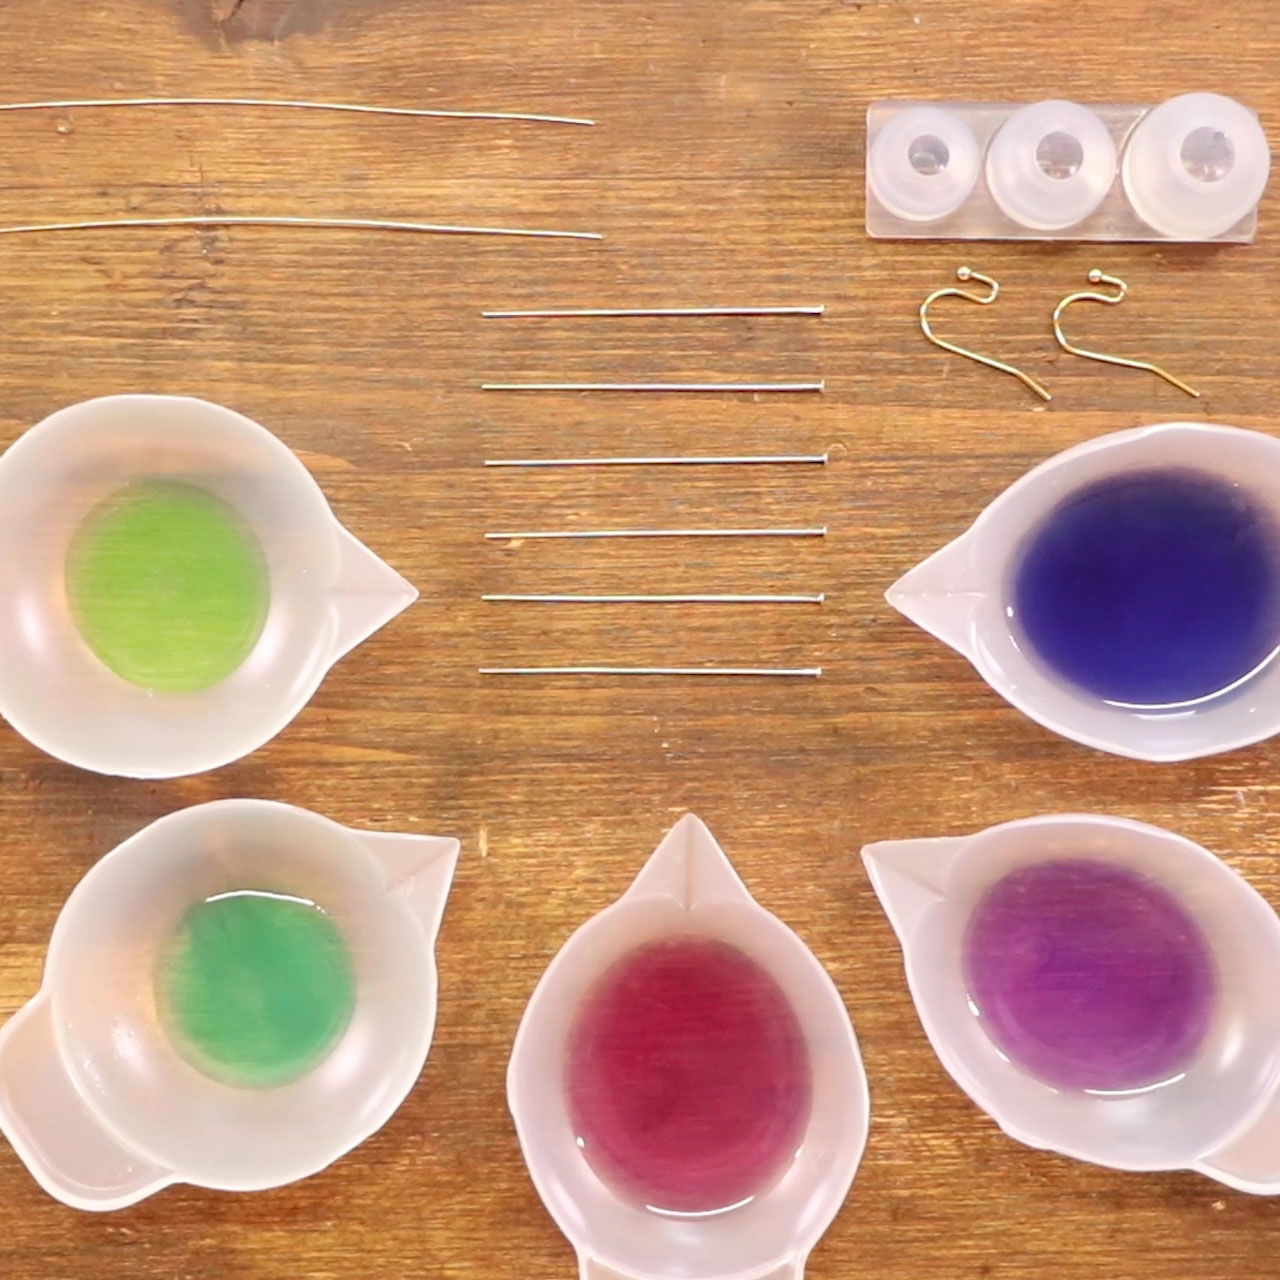
【材料】
①UV-LEDレジン ハードタイプ 6g
②UV-LEDレジン ソフトタイプ 2g
②レジン用着色剤 少々 (ブルー、レッド、パープル、グリーン、イエローグリーン)
③ワイヤー♯26 15cm×2本
④Tピン 6本
⑤ピアス金具 2個
【MATERIALS】
①UV-LED resin HARD: 6g
②UV-LED resin SOFT: 2g
③Resin coloring agent (blue, red, purple, green, yellow green)
④Artistic wir #26: 15cmm×2
⑤Head pins: 6
⑥Earring parts: 1 pair
【道具】
①UV-LEDライト
②調色スティック
③調色パレット
④球体モールド 直径10mm使用
⑤シリコンマット
⑥筆
⑦マスキングテープ
⑧クラフトパンチ 星型
⑨平ペンチ
⑩丸ヤコット
⑪ニッパー
⑫クリアファイル
⑬マジックペン
【TOOLS】
①UV-LED light
②Mixing stick
③Mixing palette
④Sphere mold (D10cm)
⑤Silicone mat
⑥Paint brush
⑦Masking tape
⑧Craft punch (star)
⑨Fat nose plier
⑩Corn plier
⑪Nippers
⑫Clear file
⑬Marker pen
【コツ・ポイント】
◎レジンは必ず固まっているのを確認して下さい
◎レジンが肌についた際はすぐによく洗い流してください
◎レジンを使用する際は手袋、マスクなどを着用して下さい
◎レジンを使用する際は風通しの良い換気のできる場所で
作業をして下さい
◎気泡が気になる方はピンセット(つまようじ)で抜いてください
◎金具を変えるとイヤリングにもなります
【TIPS】
◎Make sure that resin is cured well.
◎Wear disposable gloves to protect your hands.
◎Wear safety goggles.
◎Don’t wear your best clothing, resin drips will not come out.
◎Make sure there is flesh air entering a room.
◎If resin spill on your skin, do not use a ketone or chlorinated based product. Use only soap and water.
パープル、ワインレッド、ネイビー、グリーン、イエローグリーン色レジンをハードレジンで作る。
★グリーン、イエローグリーンは少量で良い
Make purple, wine red, navy, green, and yellow green resin.
★Make just a little amount of green and yellow green resin.
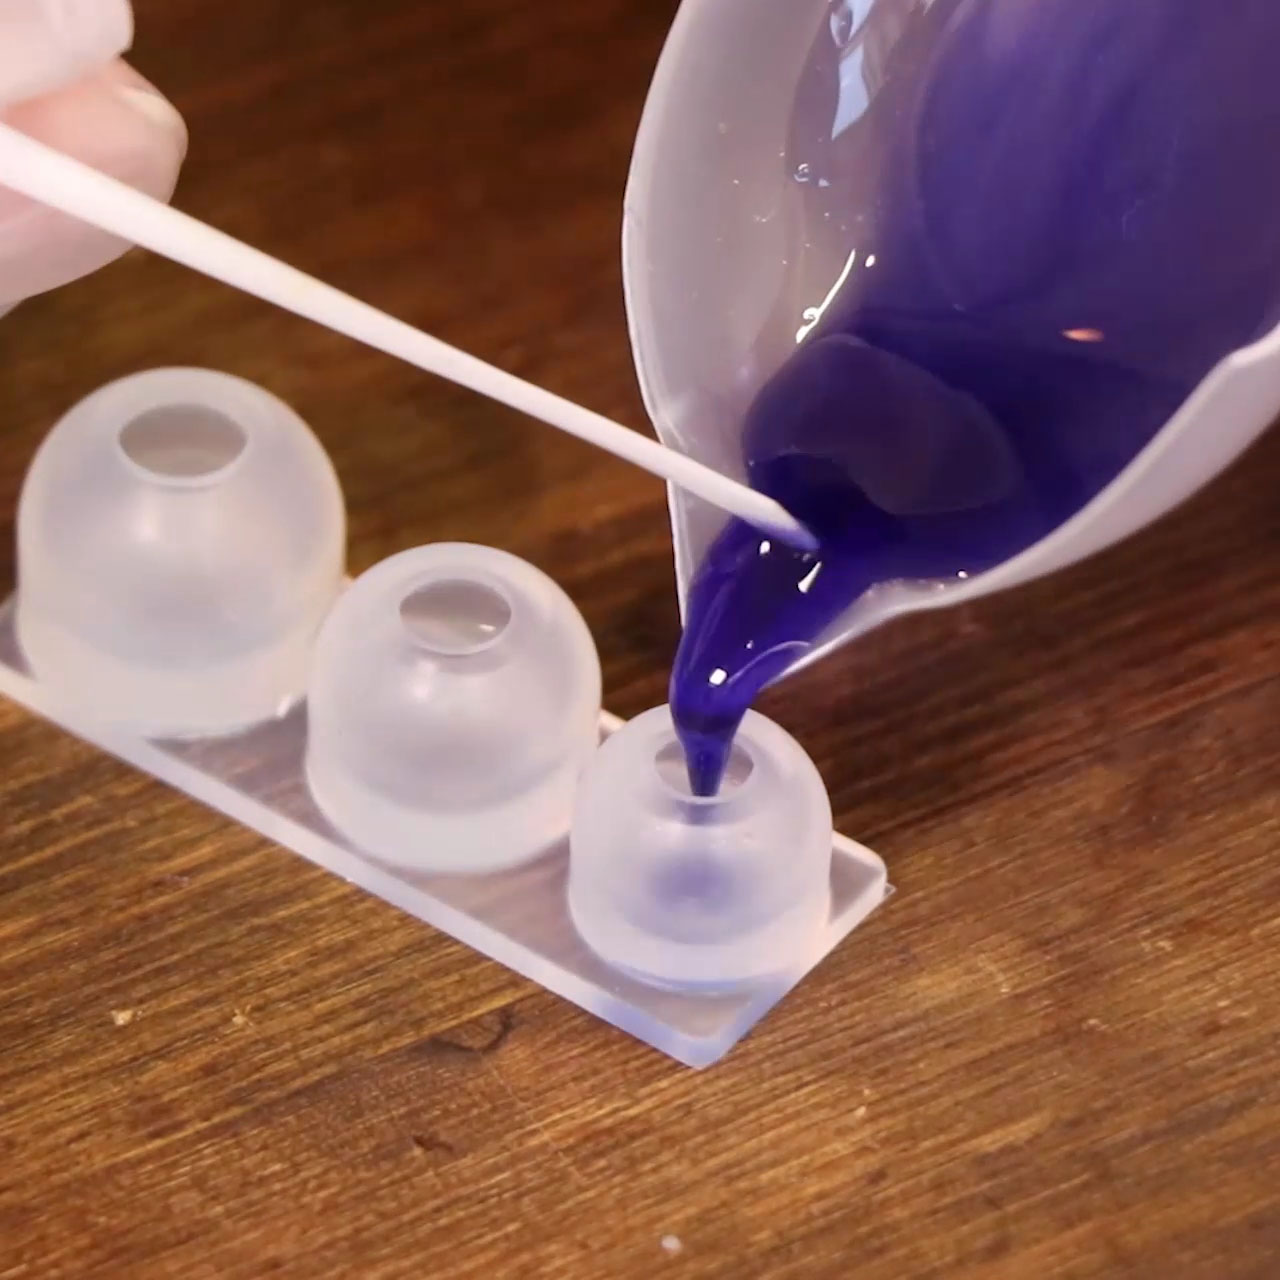
モールドにネイビーレジンを流し込む。
Pour navy resin into the mold.
★着色したレジンの色味が濃いと光が届きにくく硬化しにくいため、
球体の場合2~3回に分けて硬化するとうまくいきやすいです。
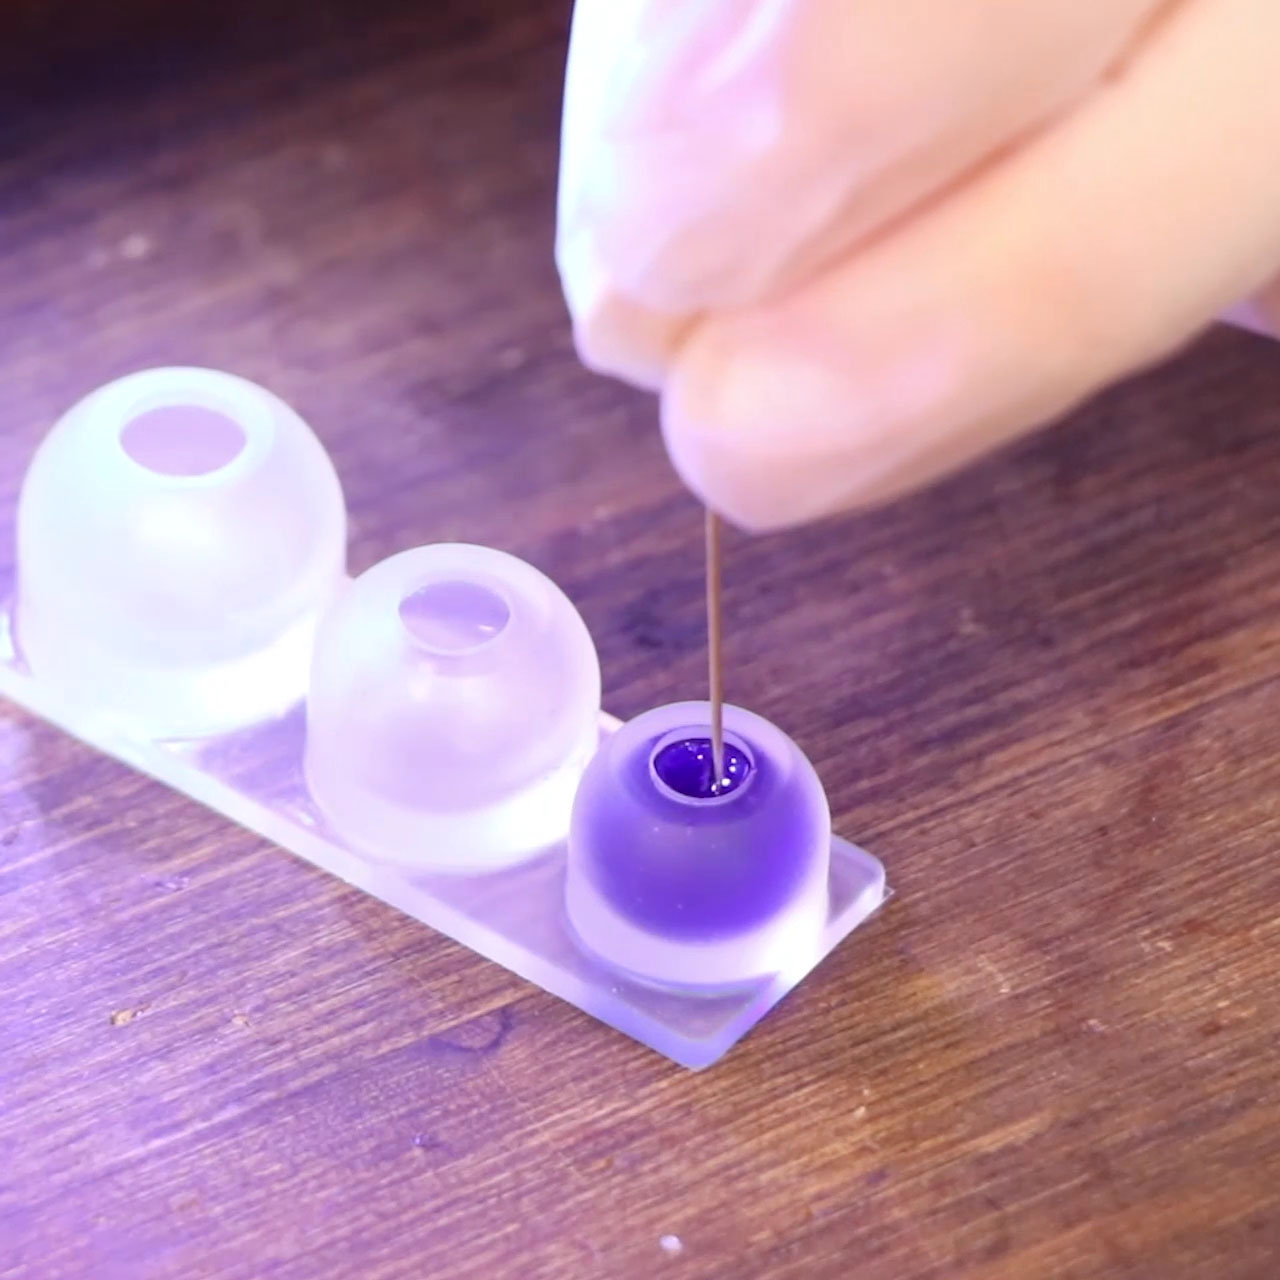
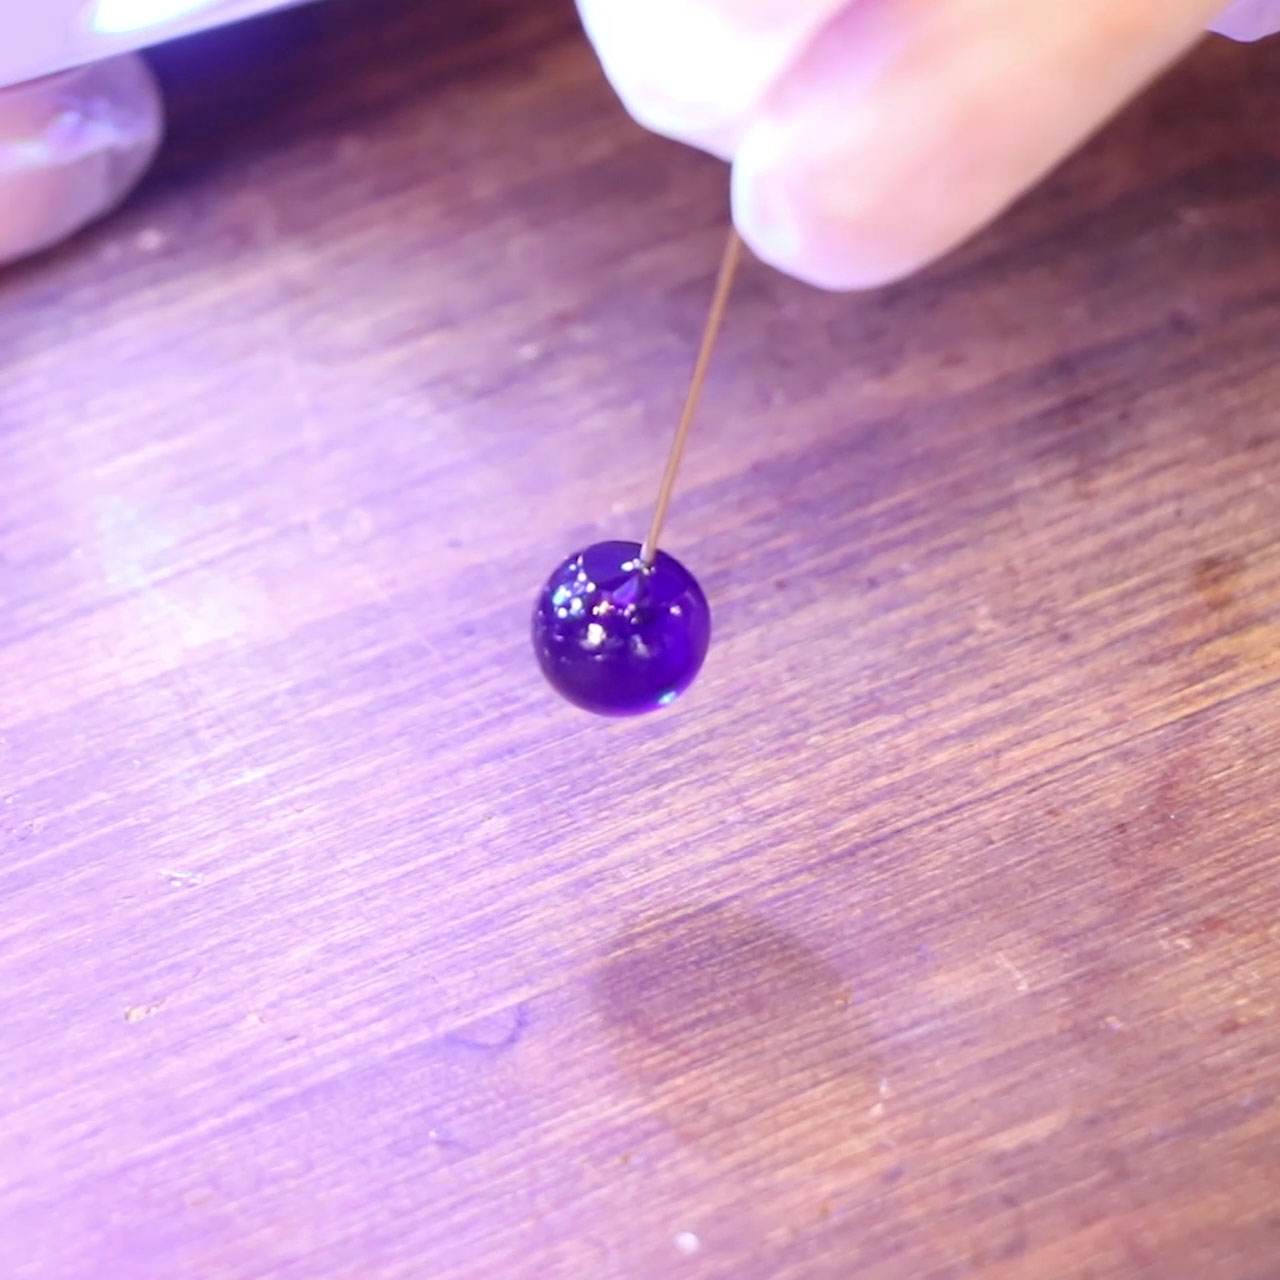
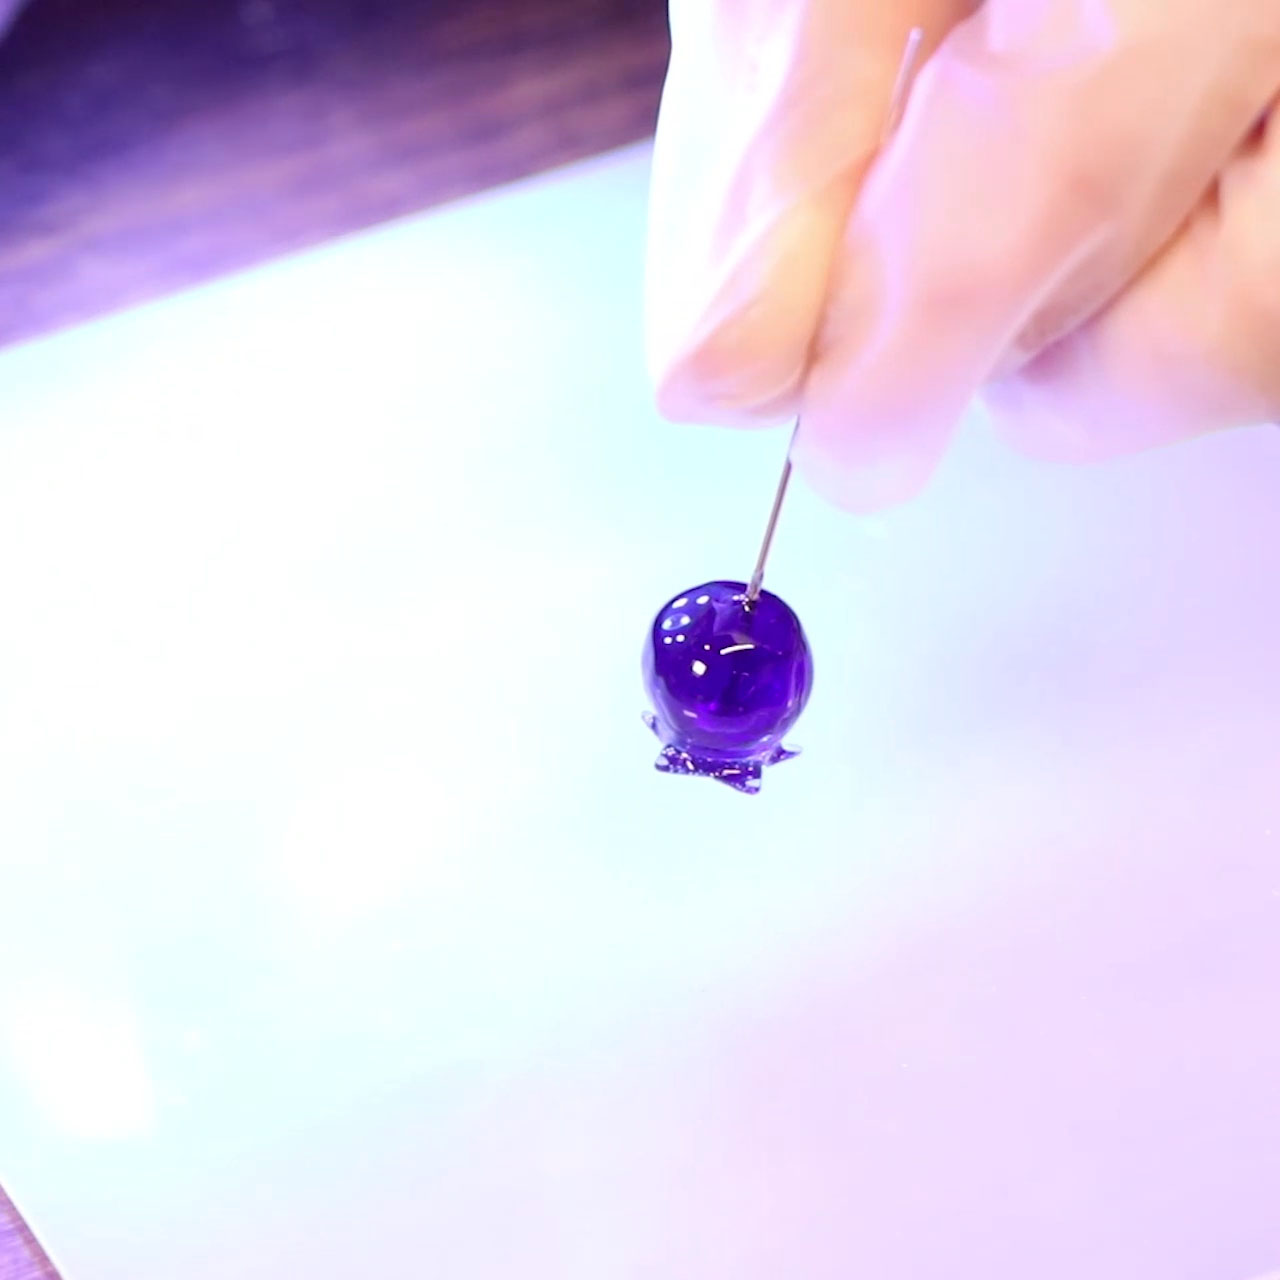
中央にTピンを刺してUV-LEDライトで照射。
Put a head pin in the middle and cure.
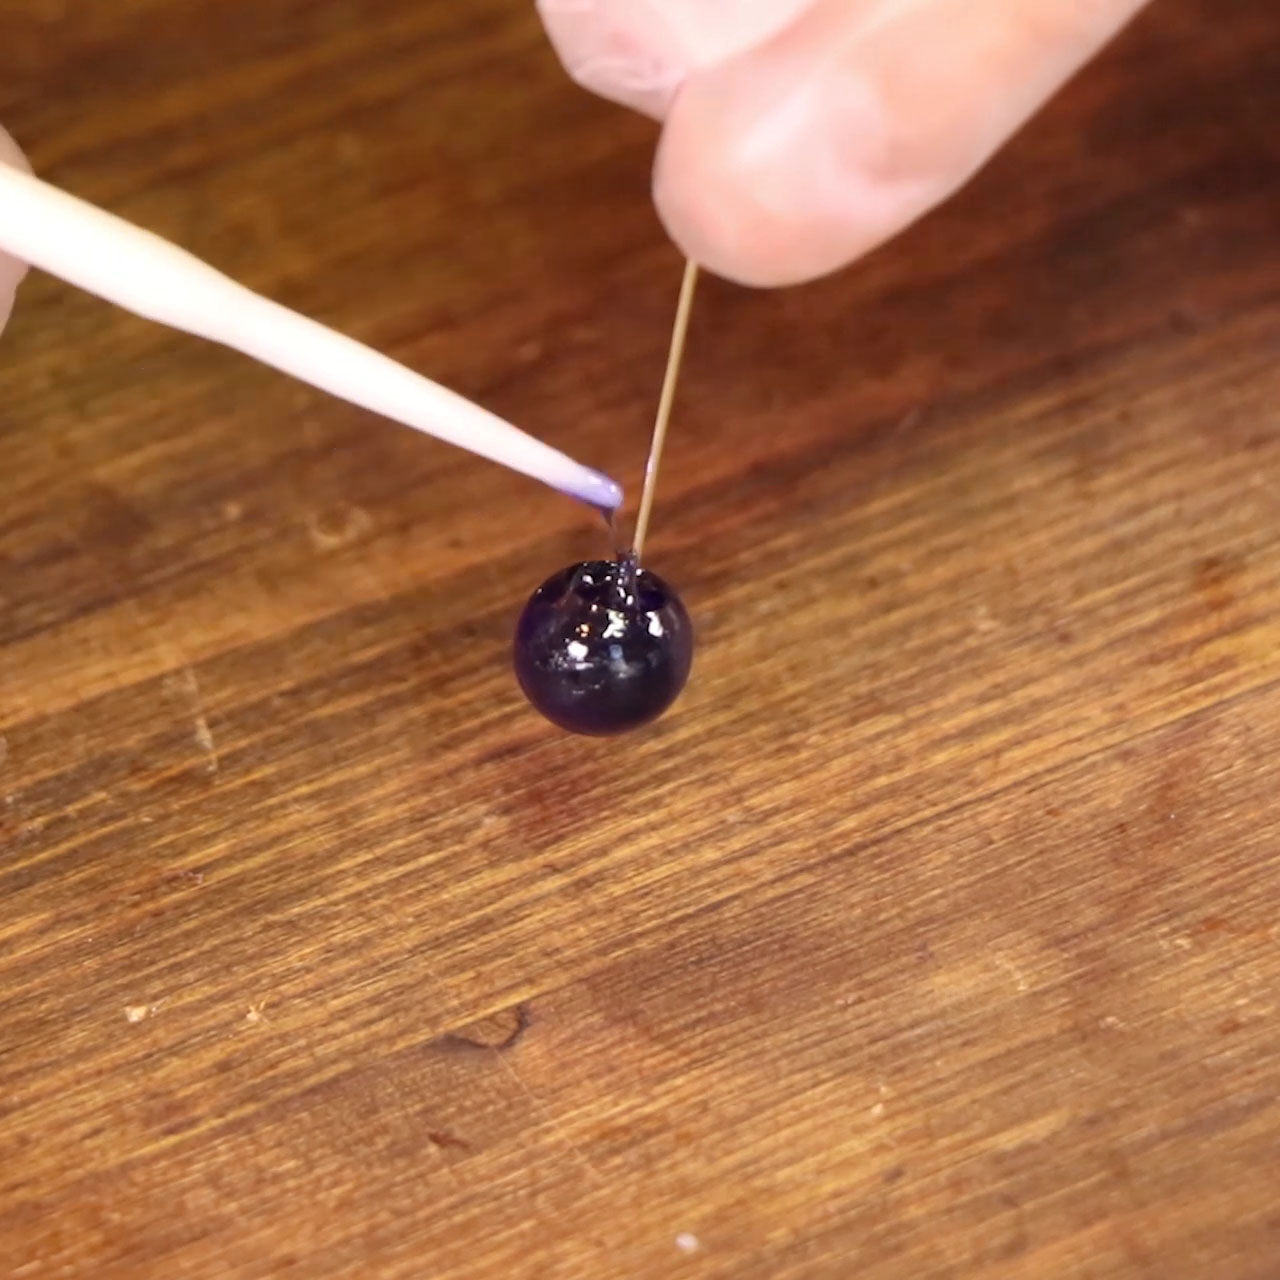
照射後、型から取り出し上部のTピン周りのところに少し空間ができるので、その部分にレジンを塗ります。
Take it out of the mold. Put navy resin into a small gap on the top.
照射
Cure.

3色同じ要領で仕上げます。
Make the same balls in 3 different colors.
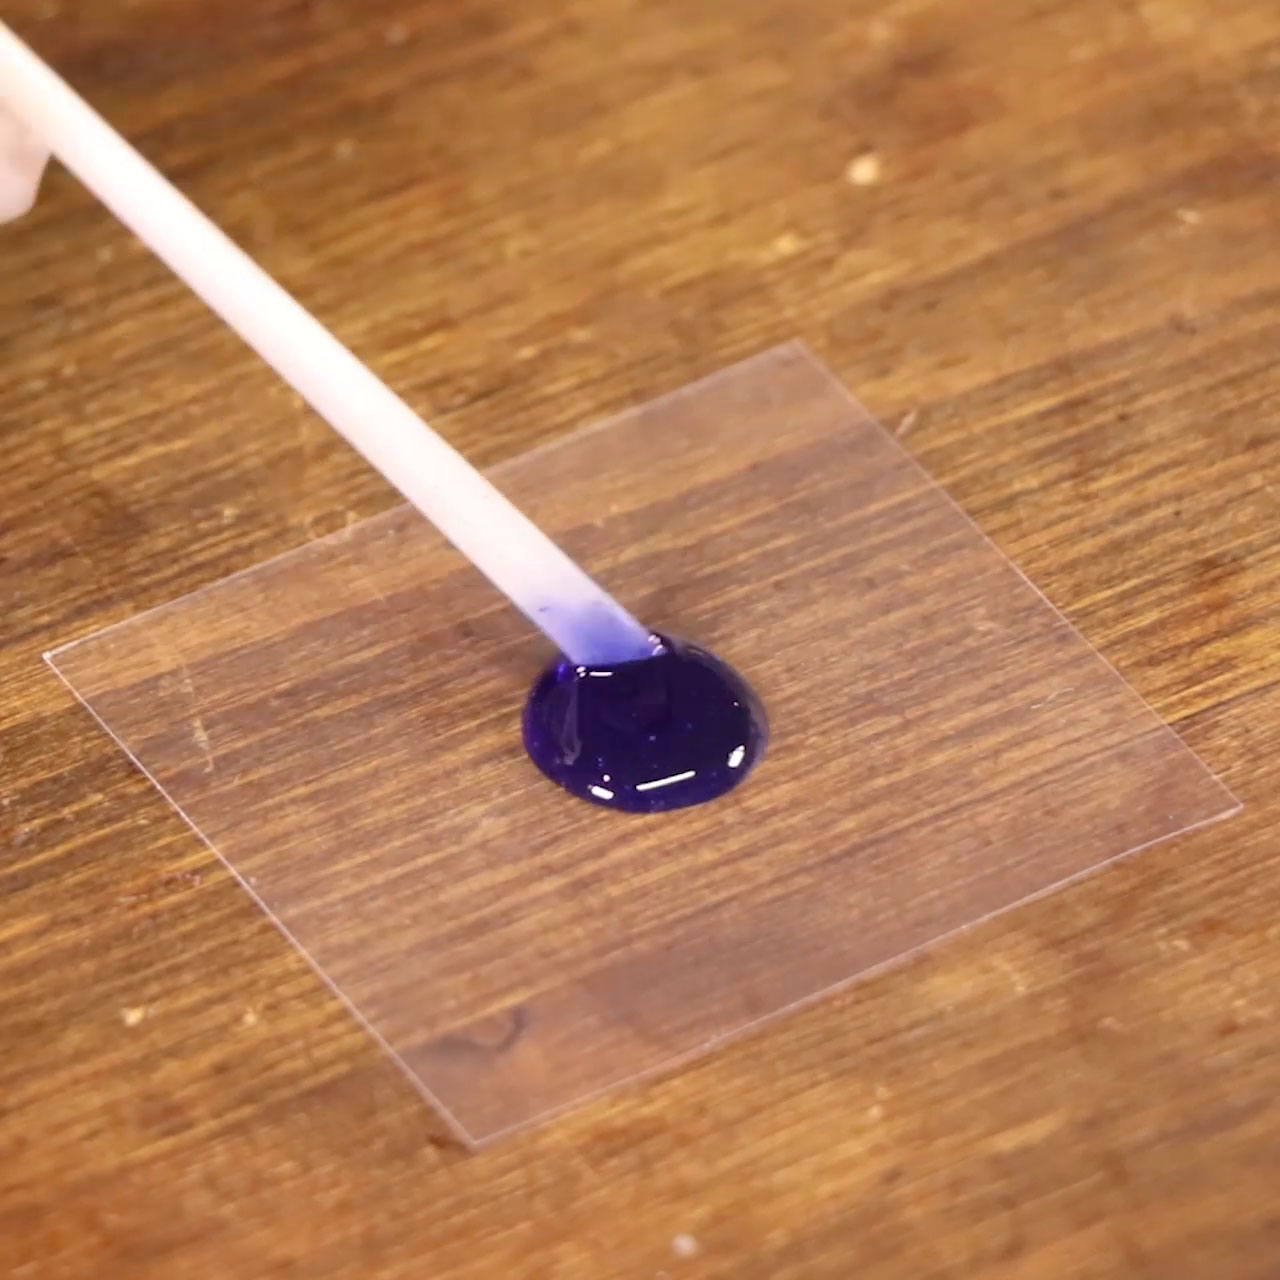
クリアファイルにソフトレジンで作ったネイビー色レジンを置く。
Put navy SOFT resin on a clear file.
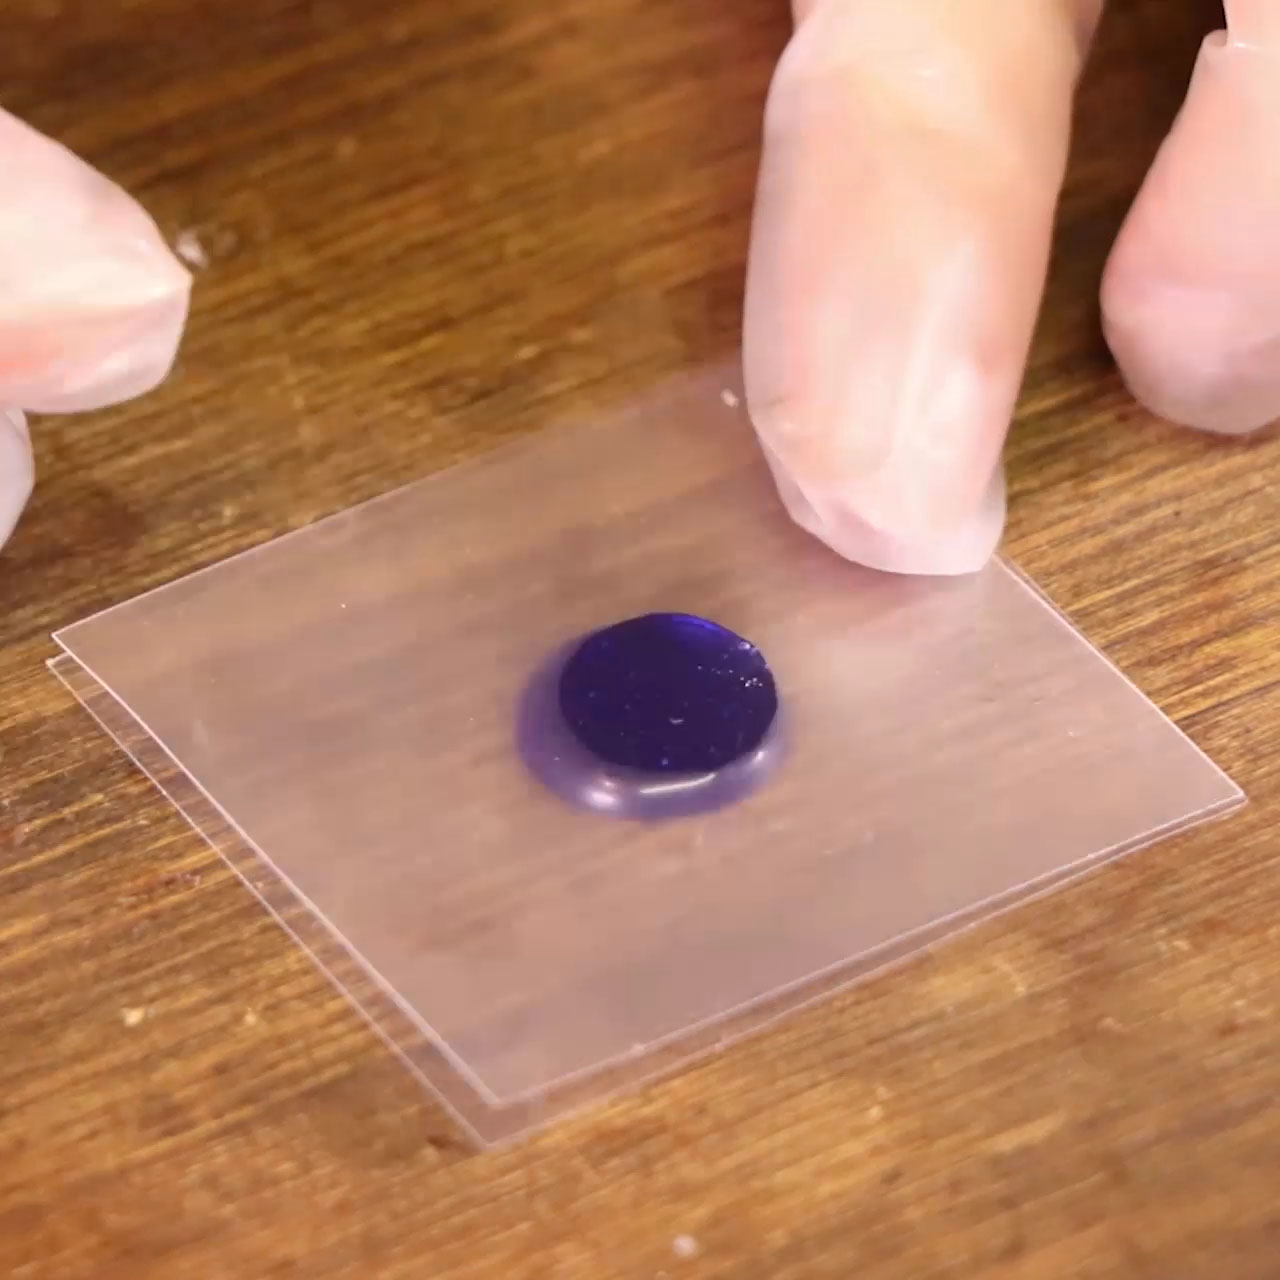
その上からクリアファイルを乗せ、ソフトレジンを挟んで薄くのばす。
Put an another clear file on top and press with fingers to make the resin thin.
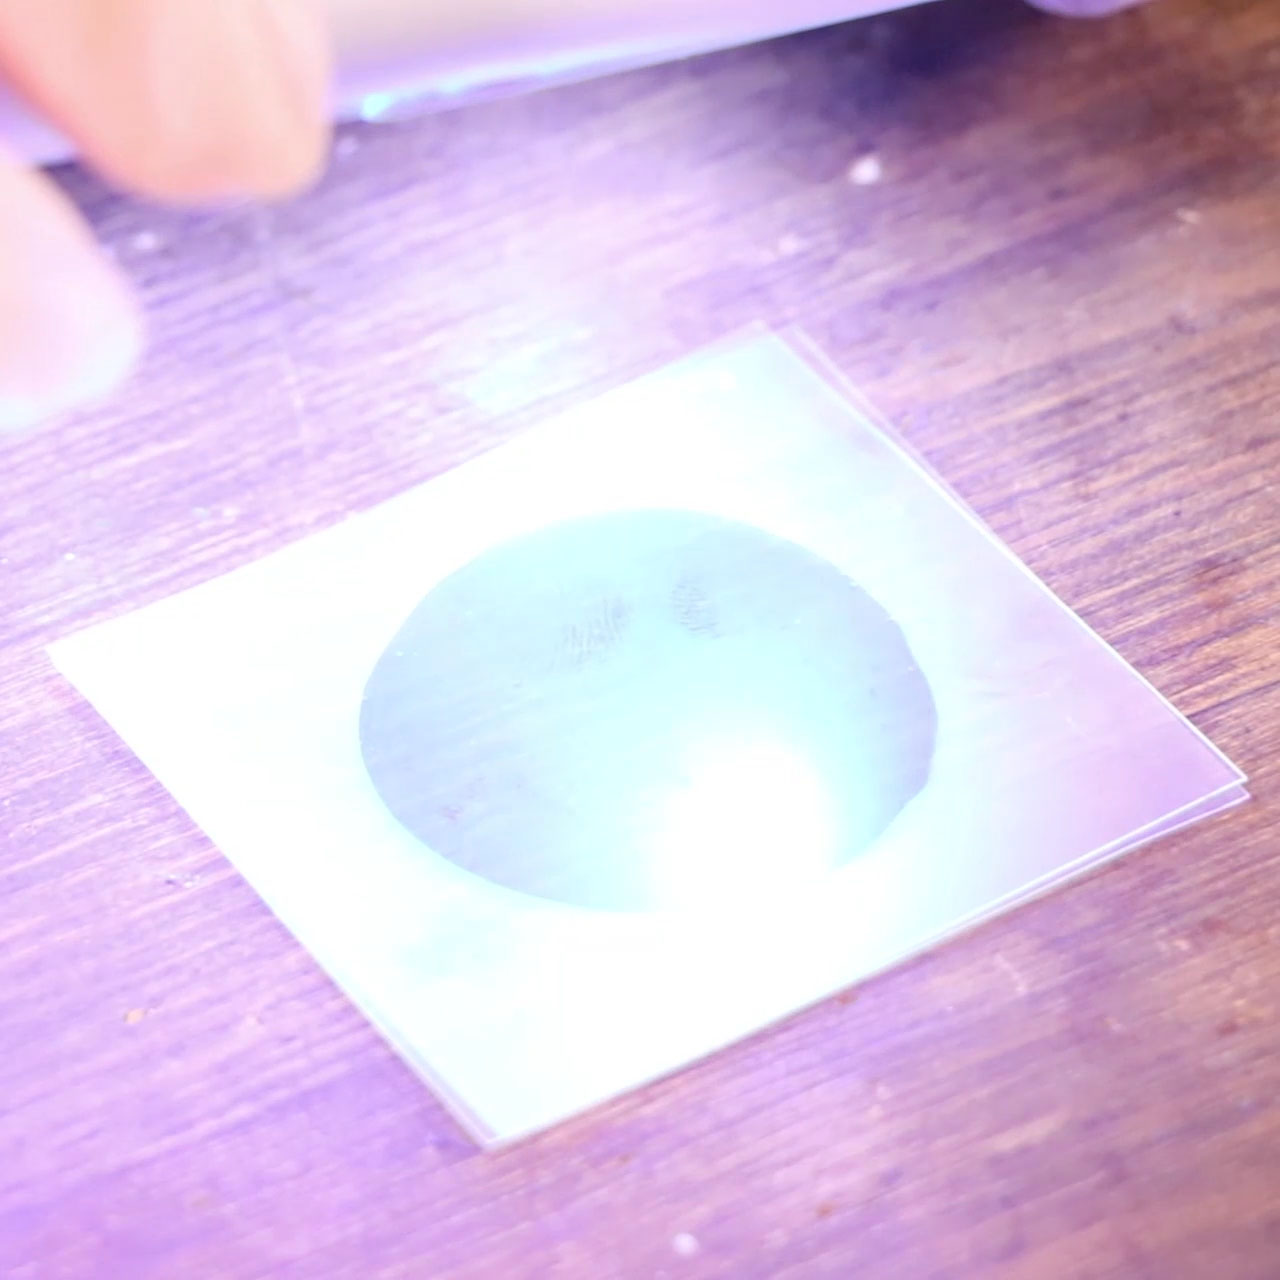
照射
Cure.
クリアファイルから固まったレジンシートを剥がす。
Peel the resin sheet off from the clear file.

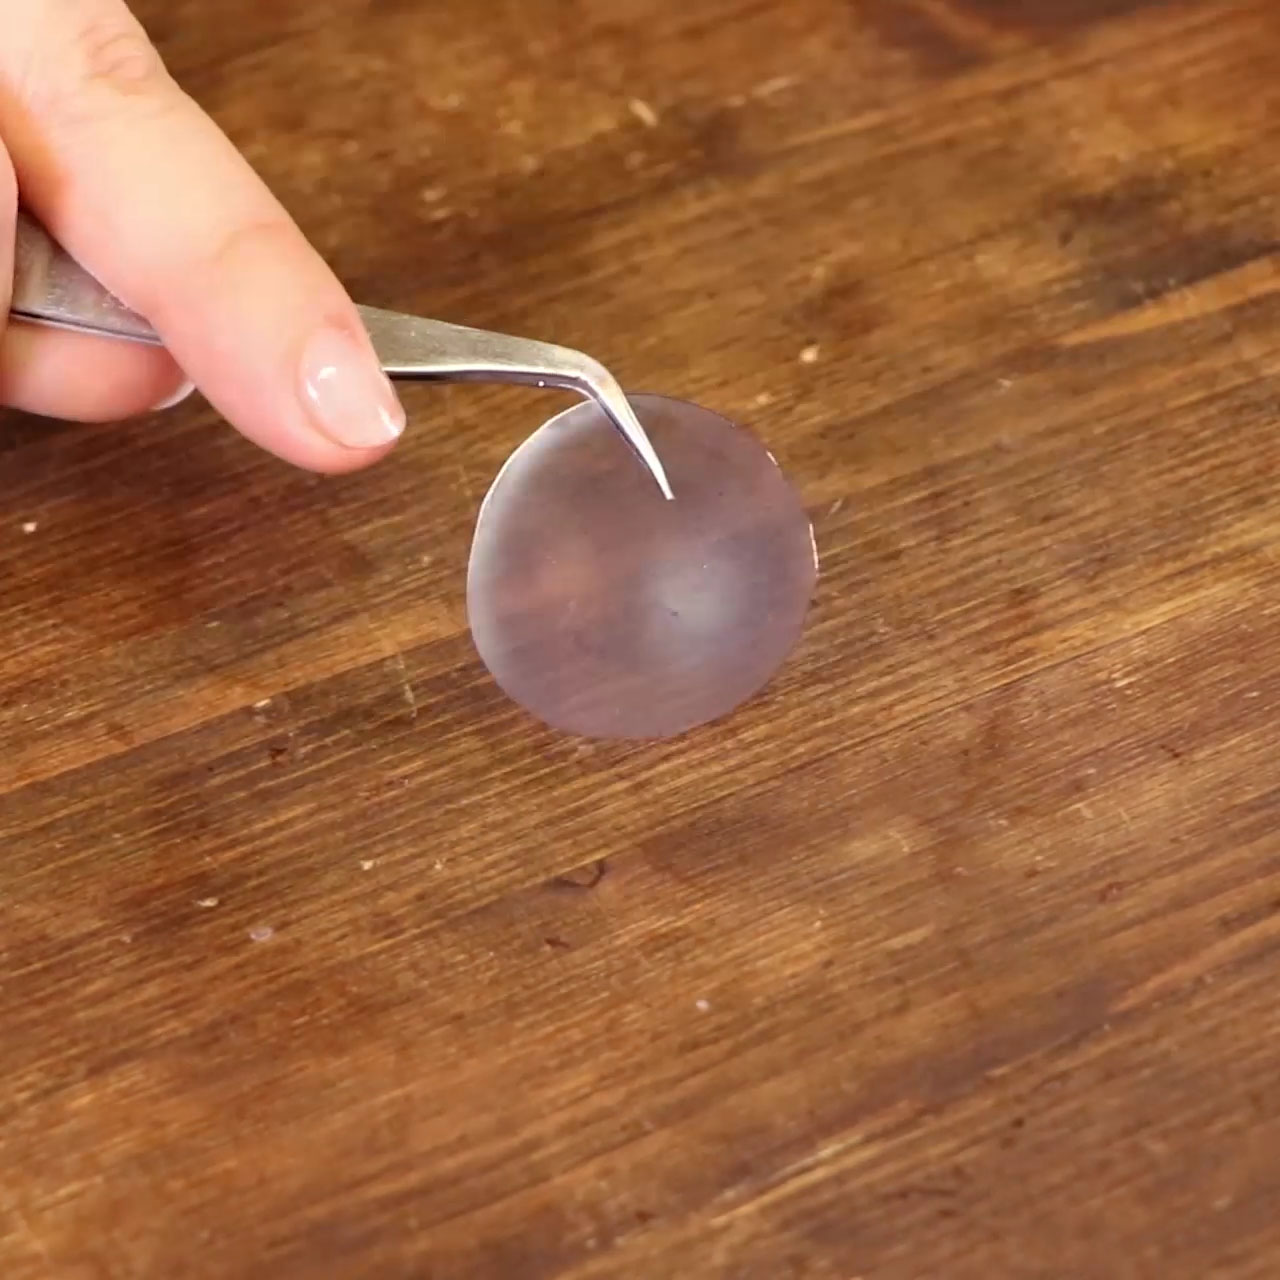
クラフトパンチで型を抜く。
Punch the resin sheet.
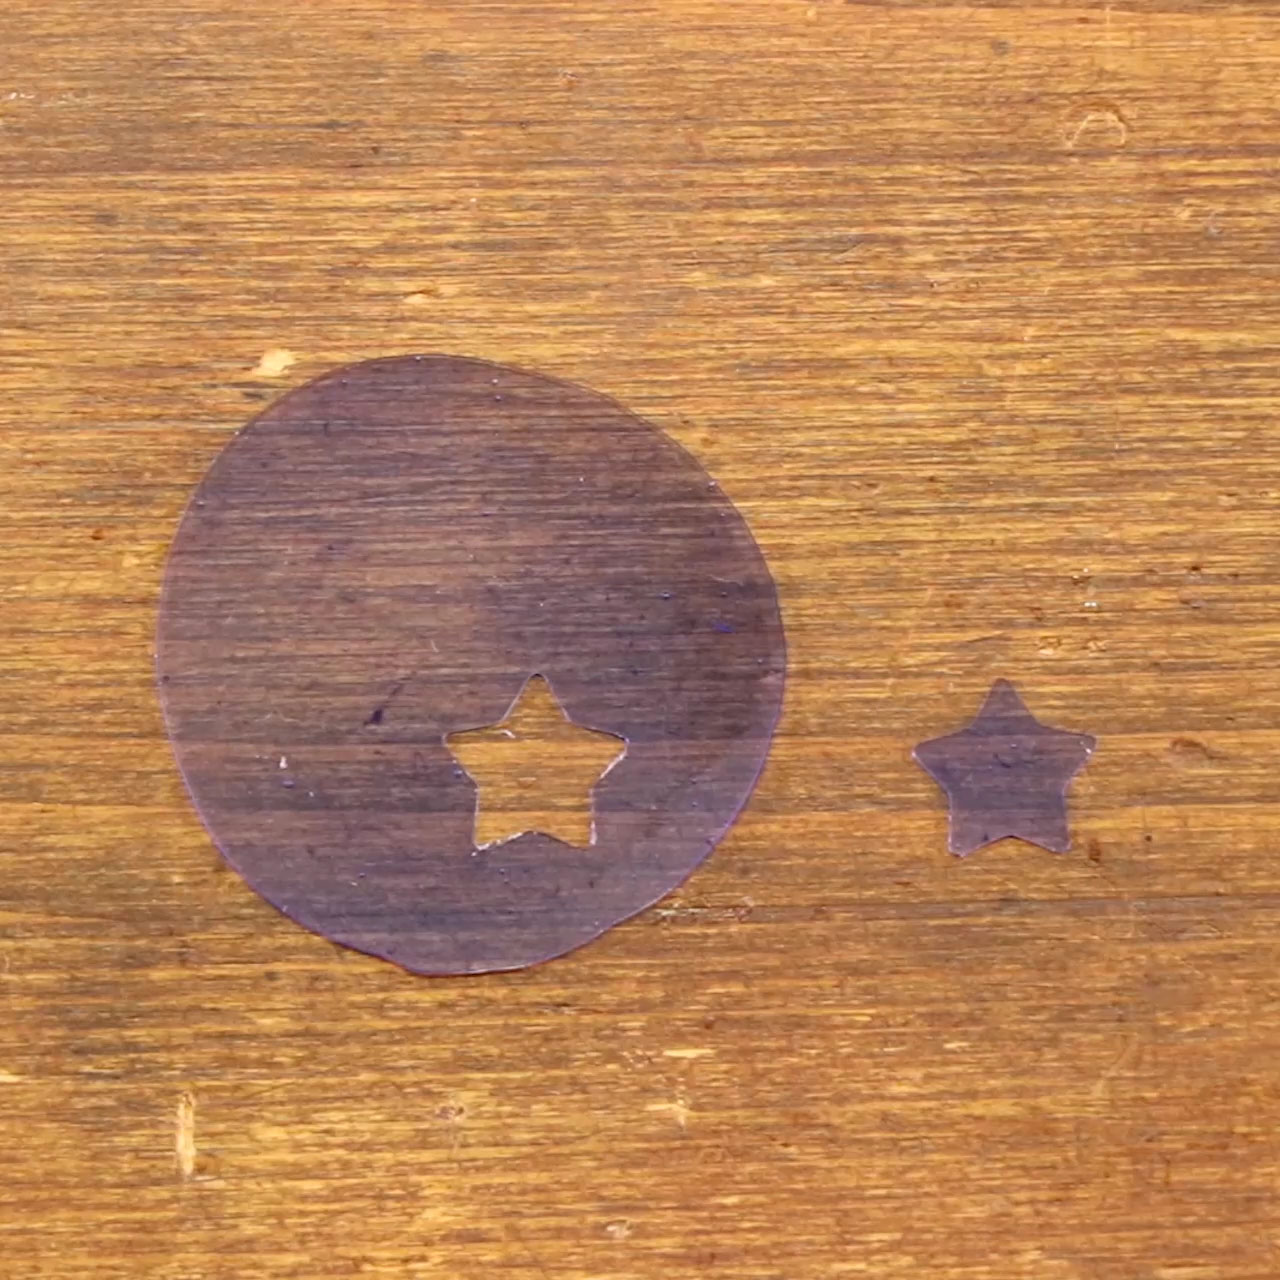
型抜き後。
After the craft punch.
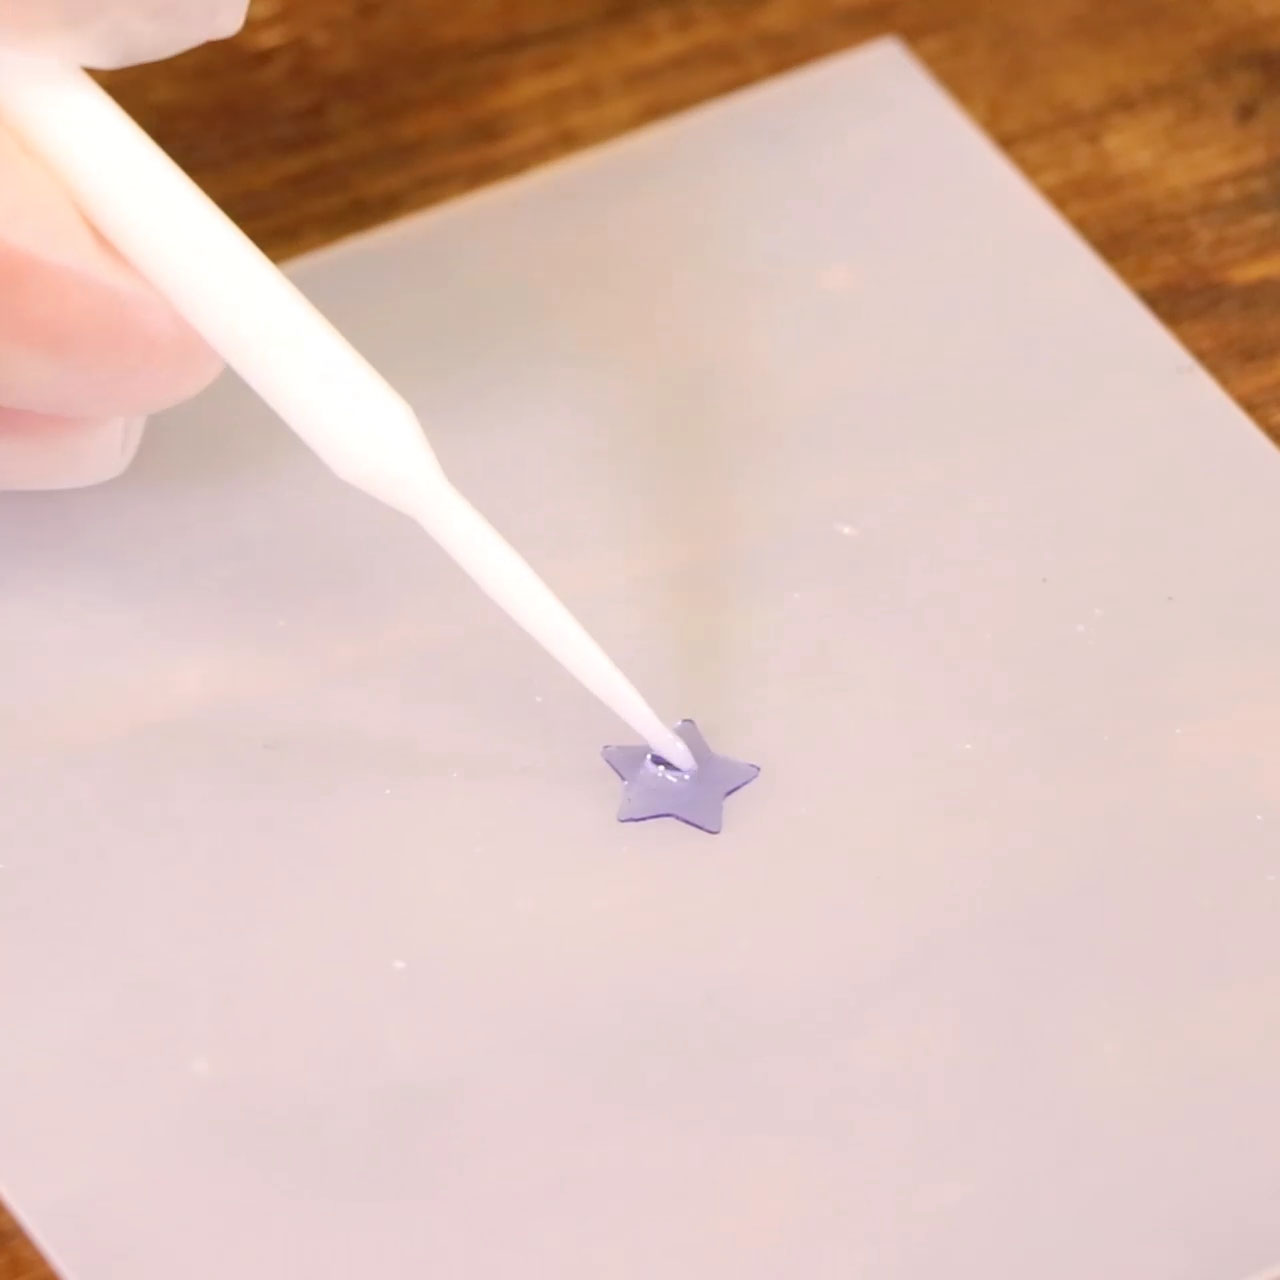
抜いた星形にレジンを塗る。
Put some resin on the star.

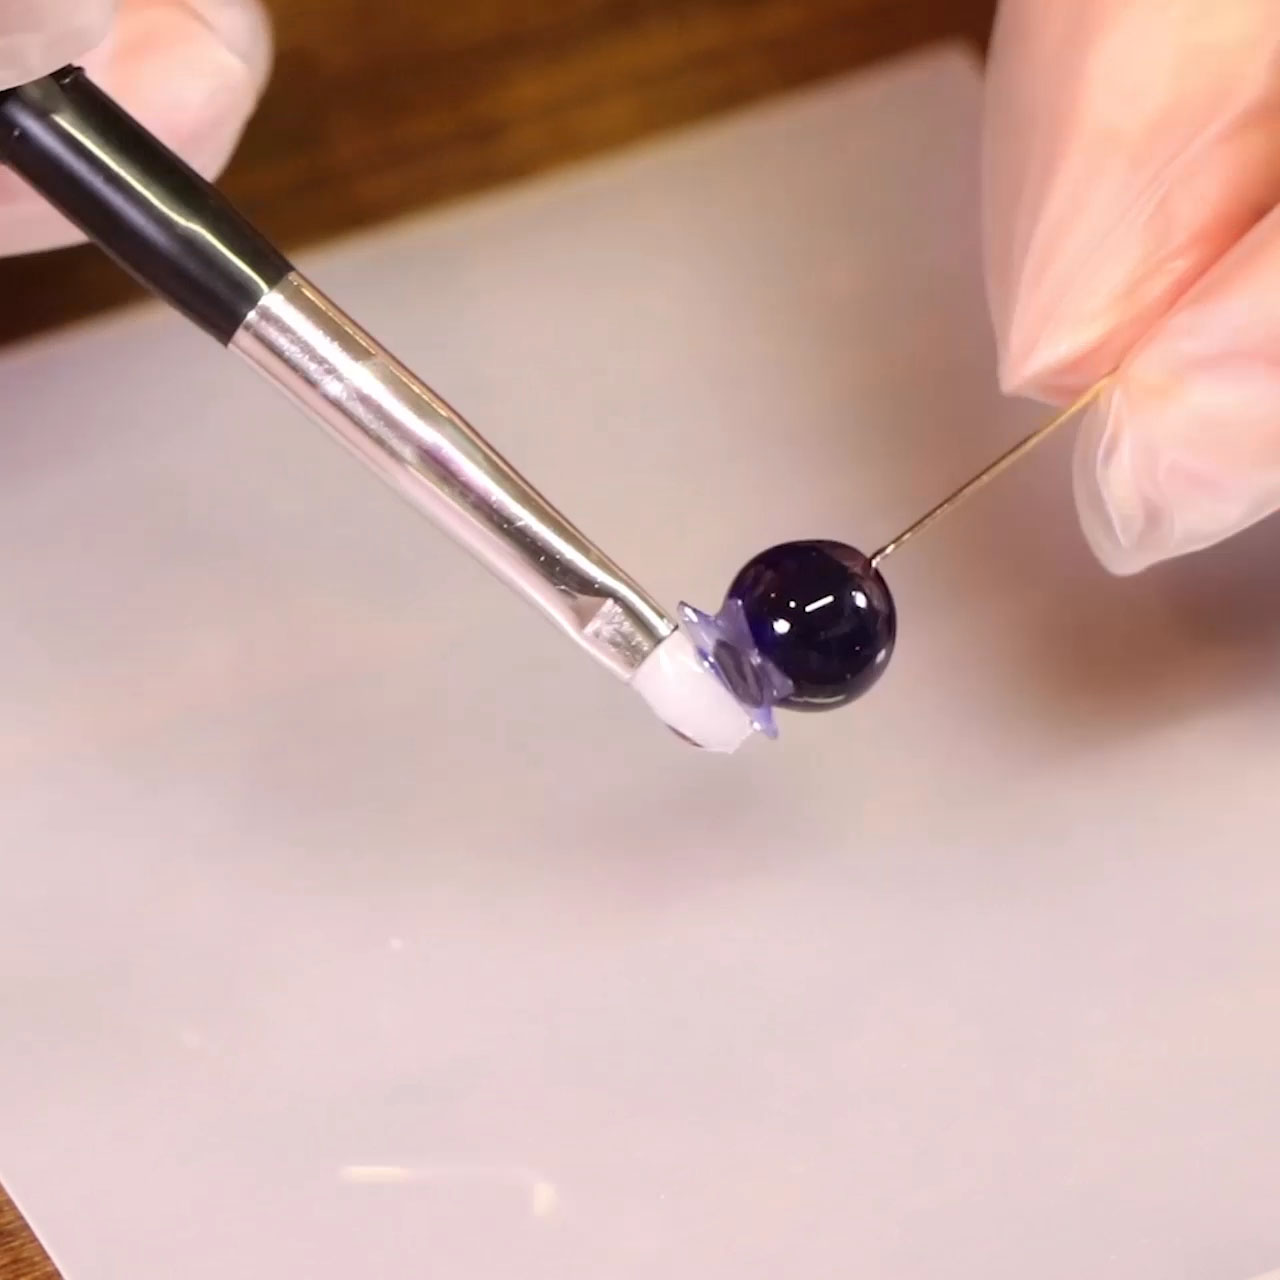
星型の上に球体を乗せ照射。
Place the ball on top of the star and cure.
星型をハードレジンでコーティング。
Cover the star with hard resin.
★実をコーティングする際は球体と星の接着部分を埋めるようにレジンを塗ると綺麗な仕上がりになります
★Fill in the gap between the ball and the star part with resin.
照射
Cure.
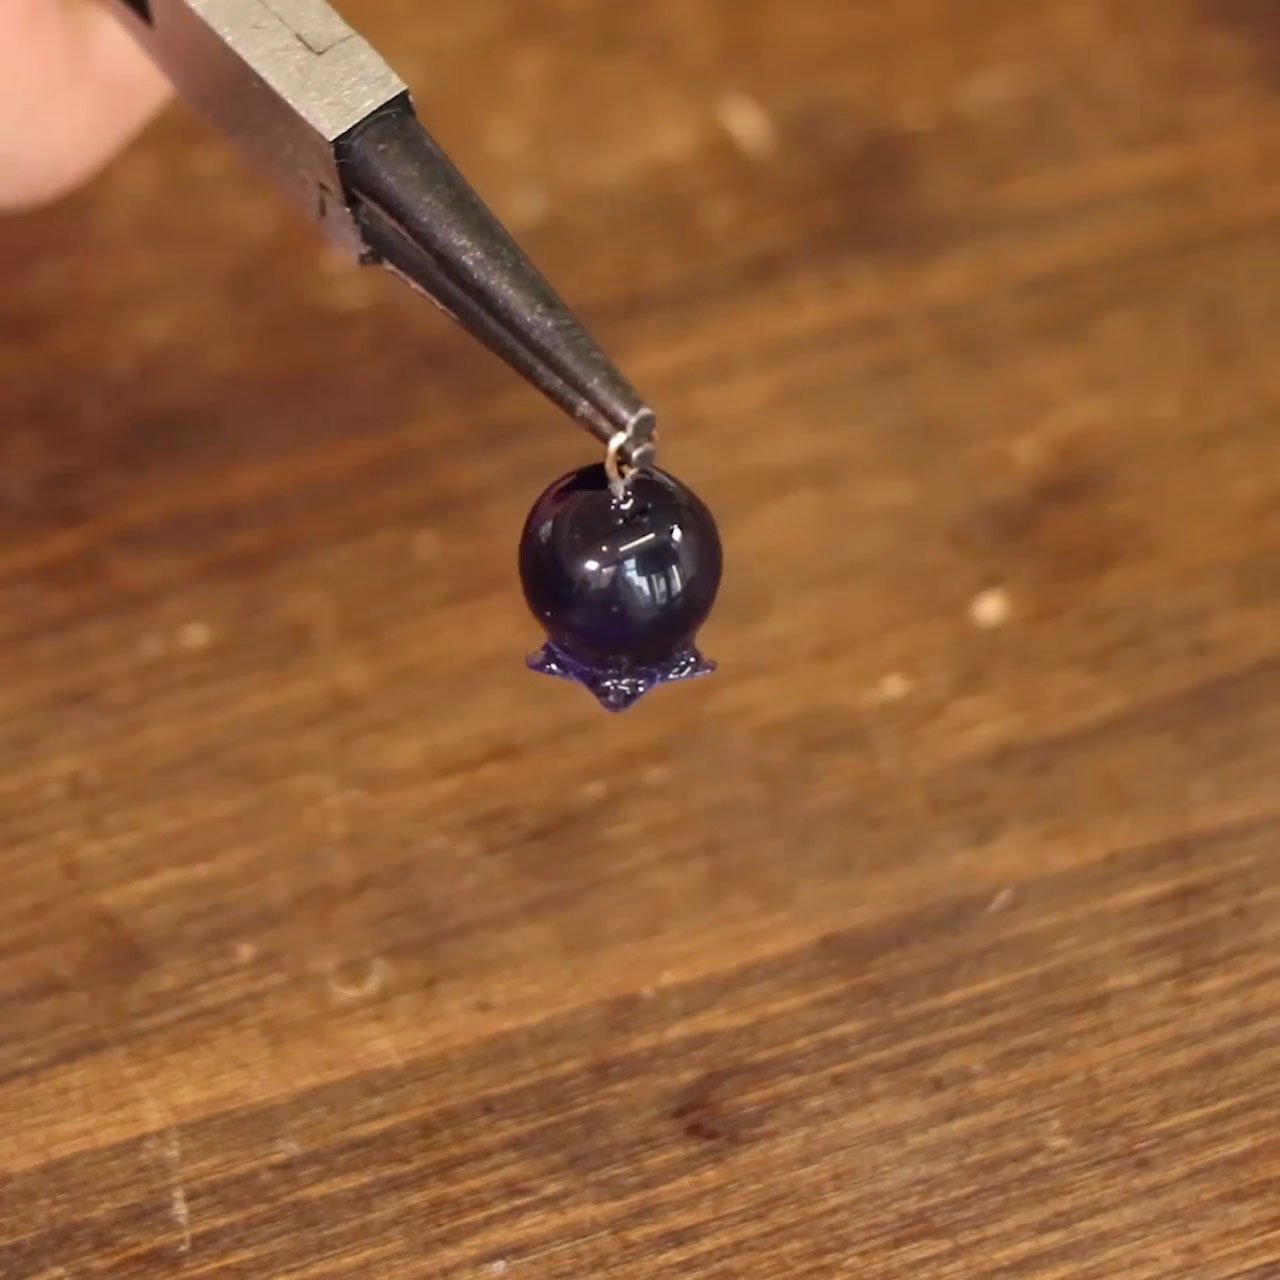
Tピンの先をヤットコで丸める。
Cut the head pin at 5-8mm and curl it up.
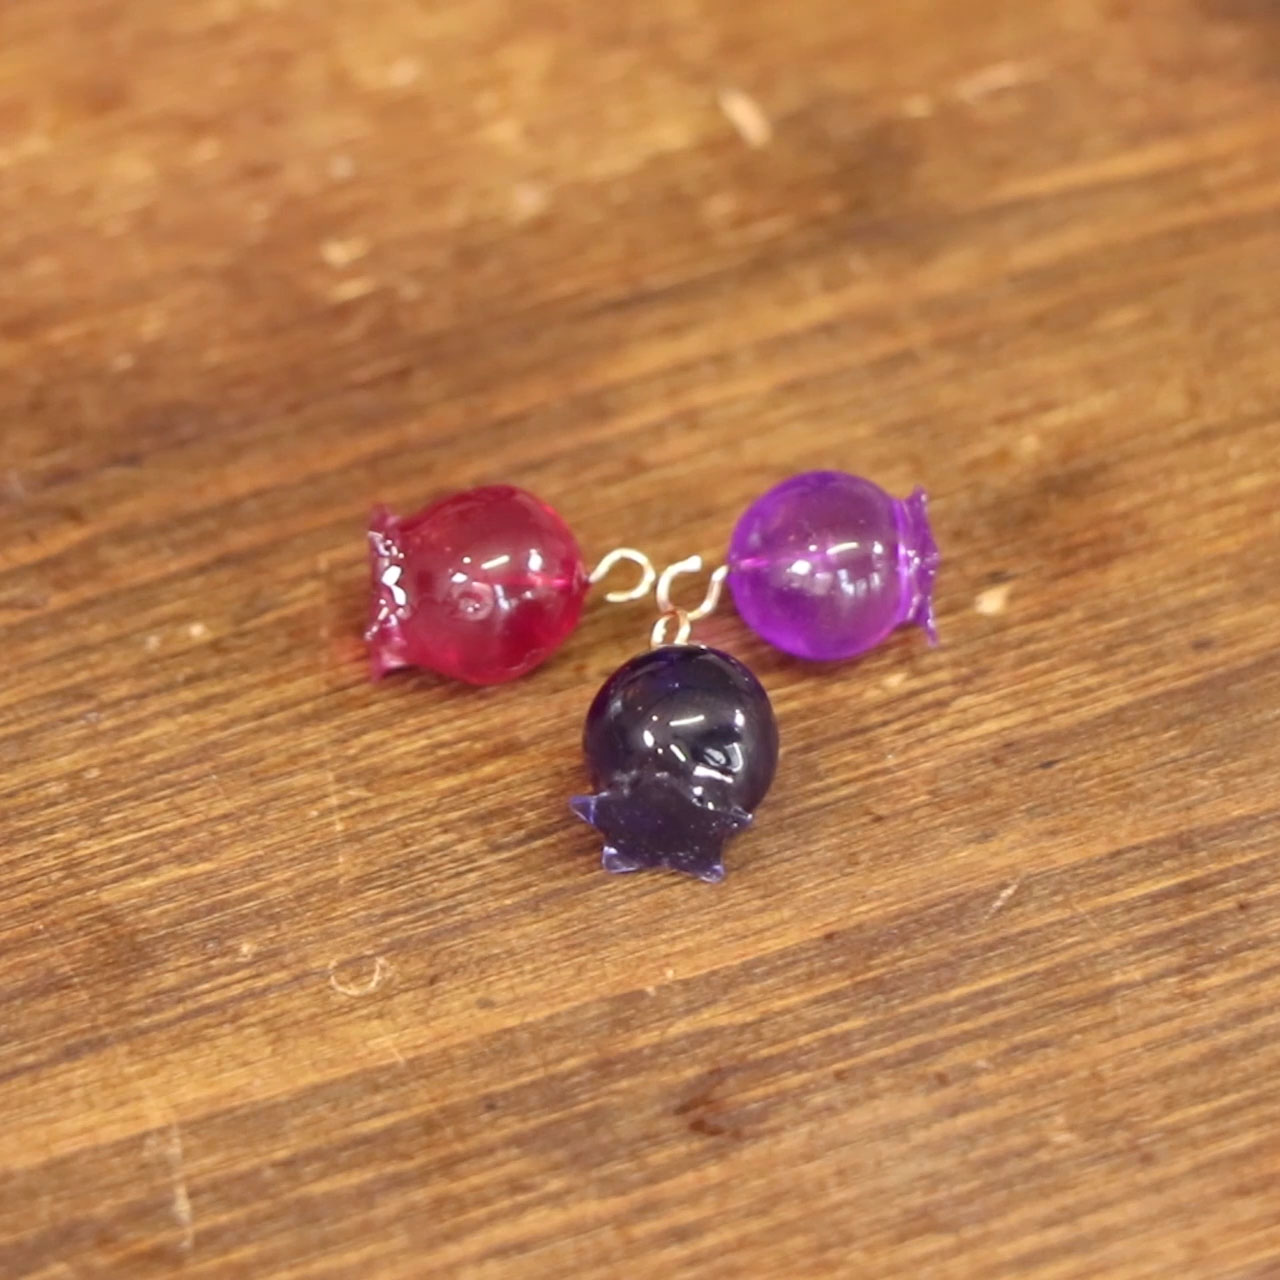
3色同じように作る。
Repeat the same step for the other 2 colors.
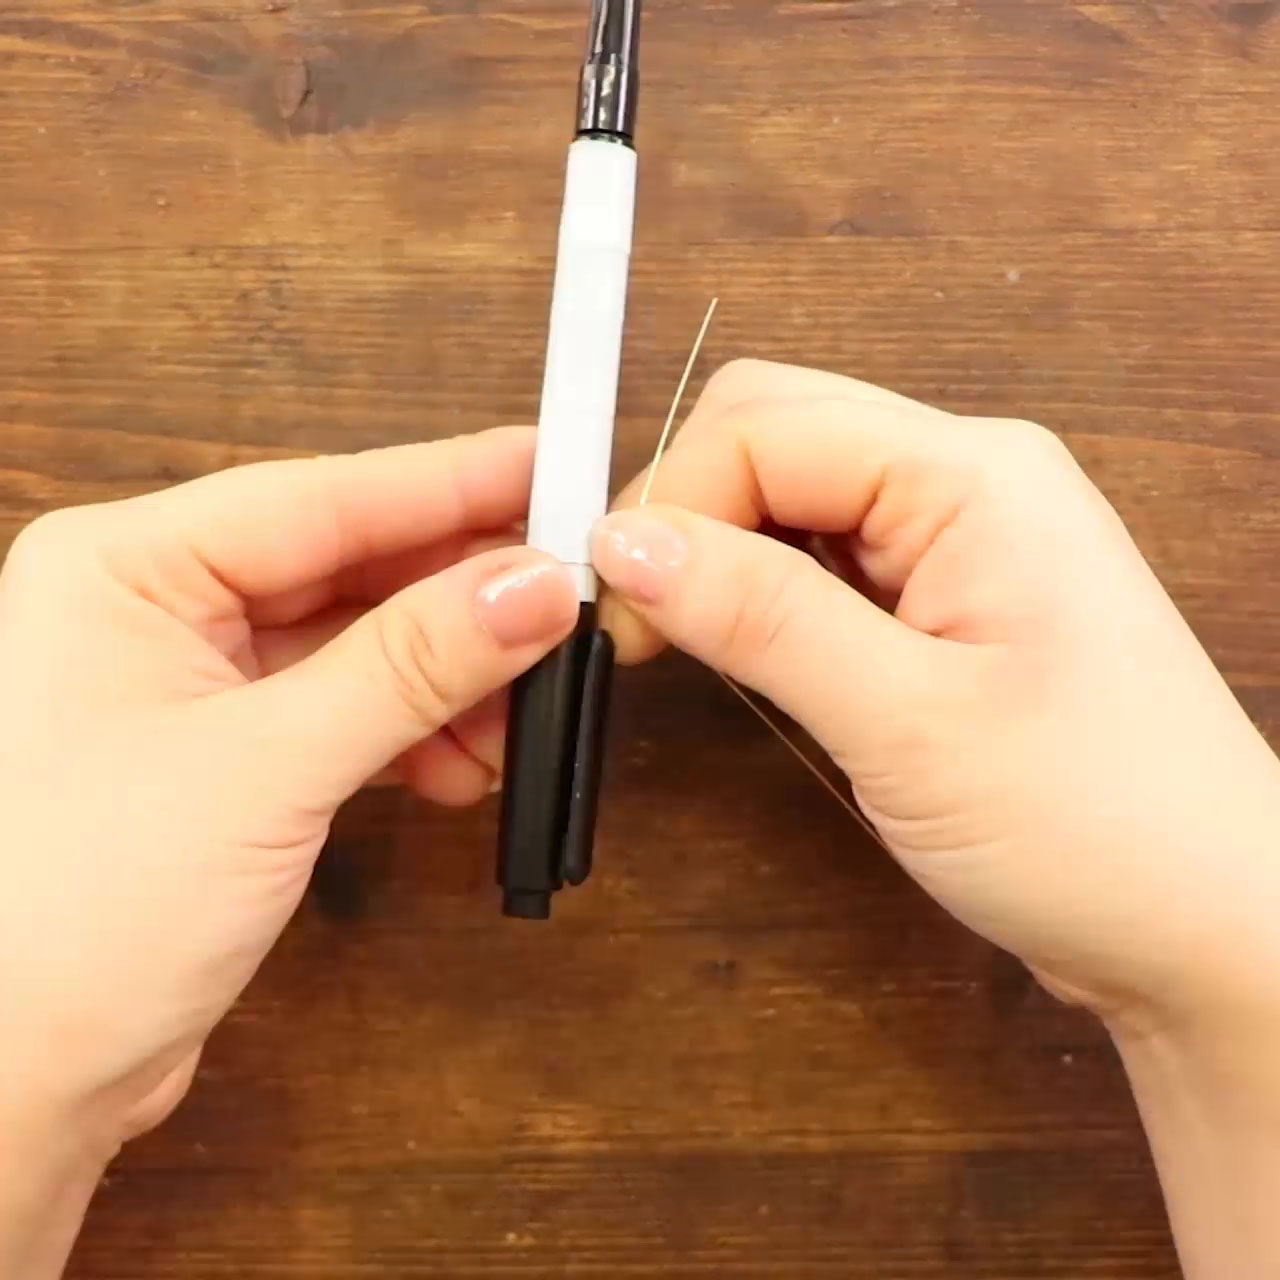
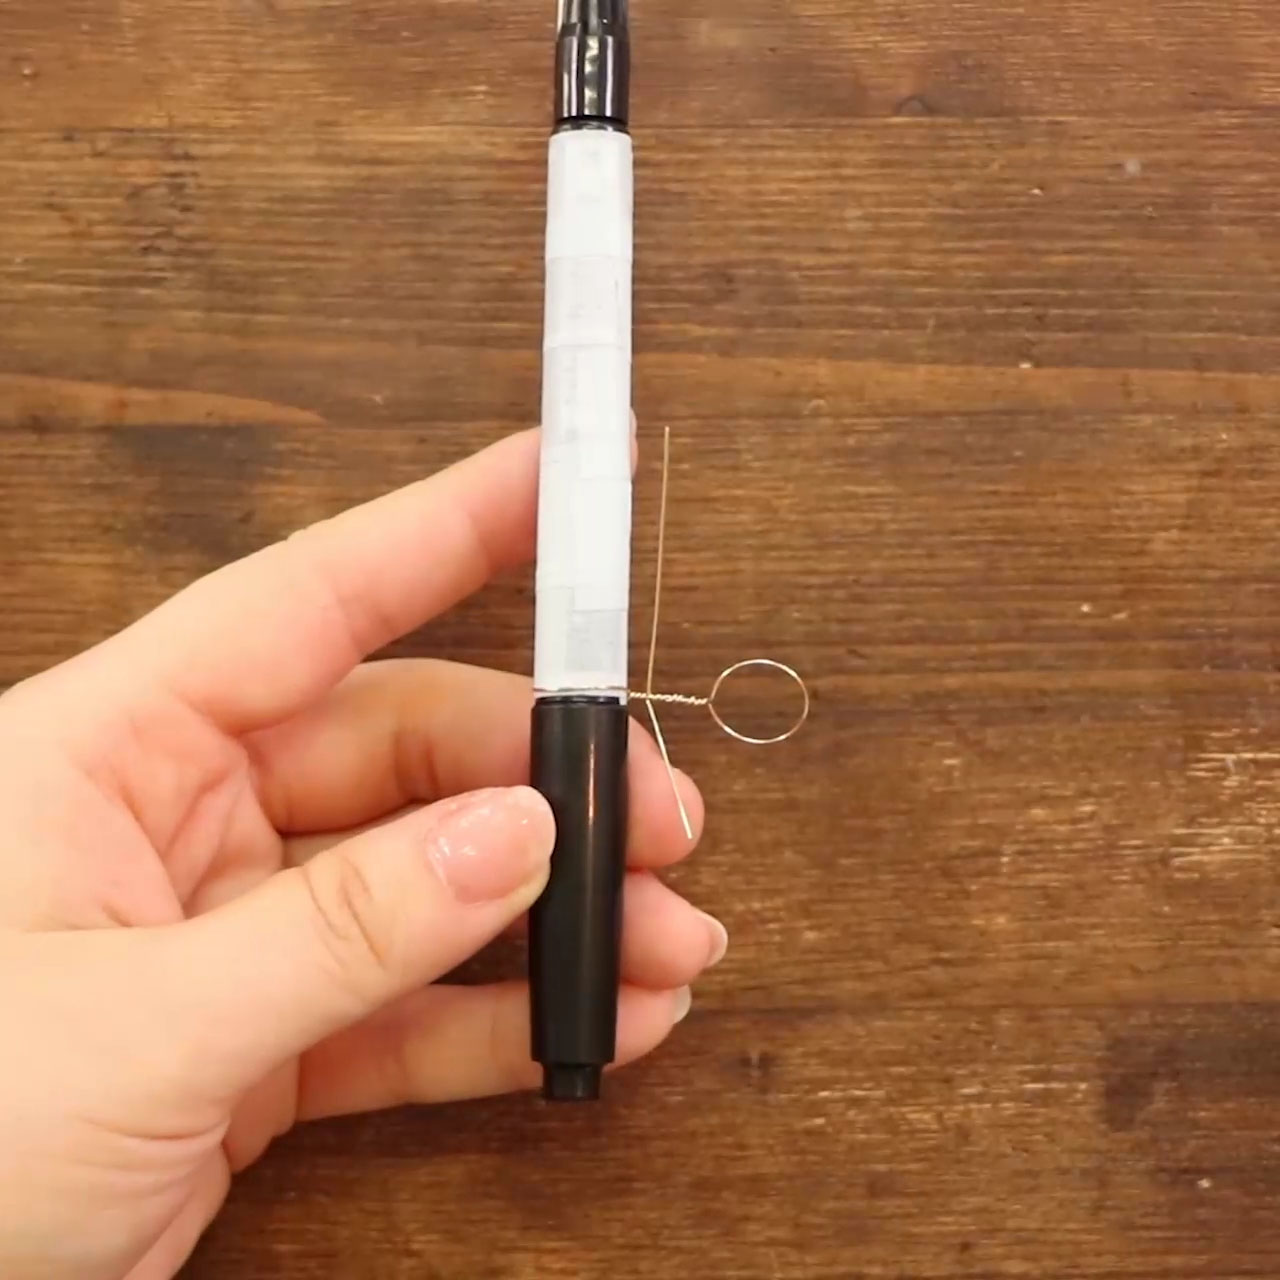
ワイヤーをマジックペンに巻き付け、交差部分を指で摘みペンを回して捩じる(1cmの長さになるように捩じる)
Wrap the wire around the marker. Hold where the wire cross, and rotate the marker until the twisted part is 1cm.
捩じった部分をペンから抜き、余ったワイヤー部分にペンを巻き付け、最初の捩じり終わり部分にワイヤーが交差するように捩じる。
Take the wire out of the marker. Wrap the other side of the wire around the marker and twist.
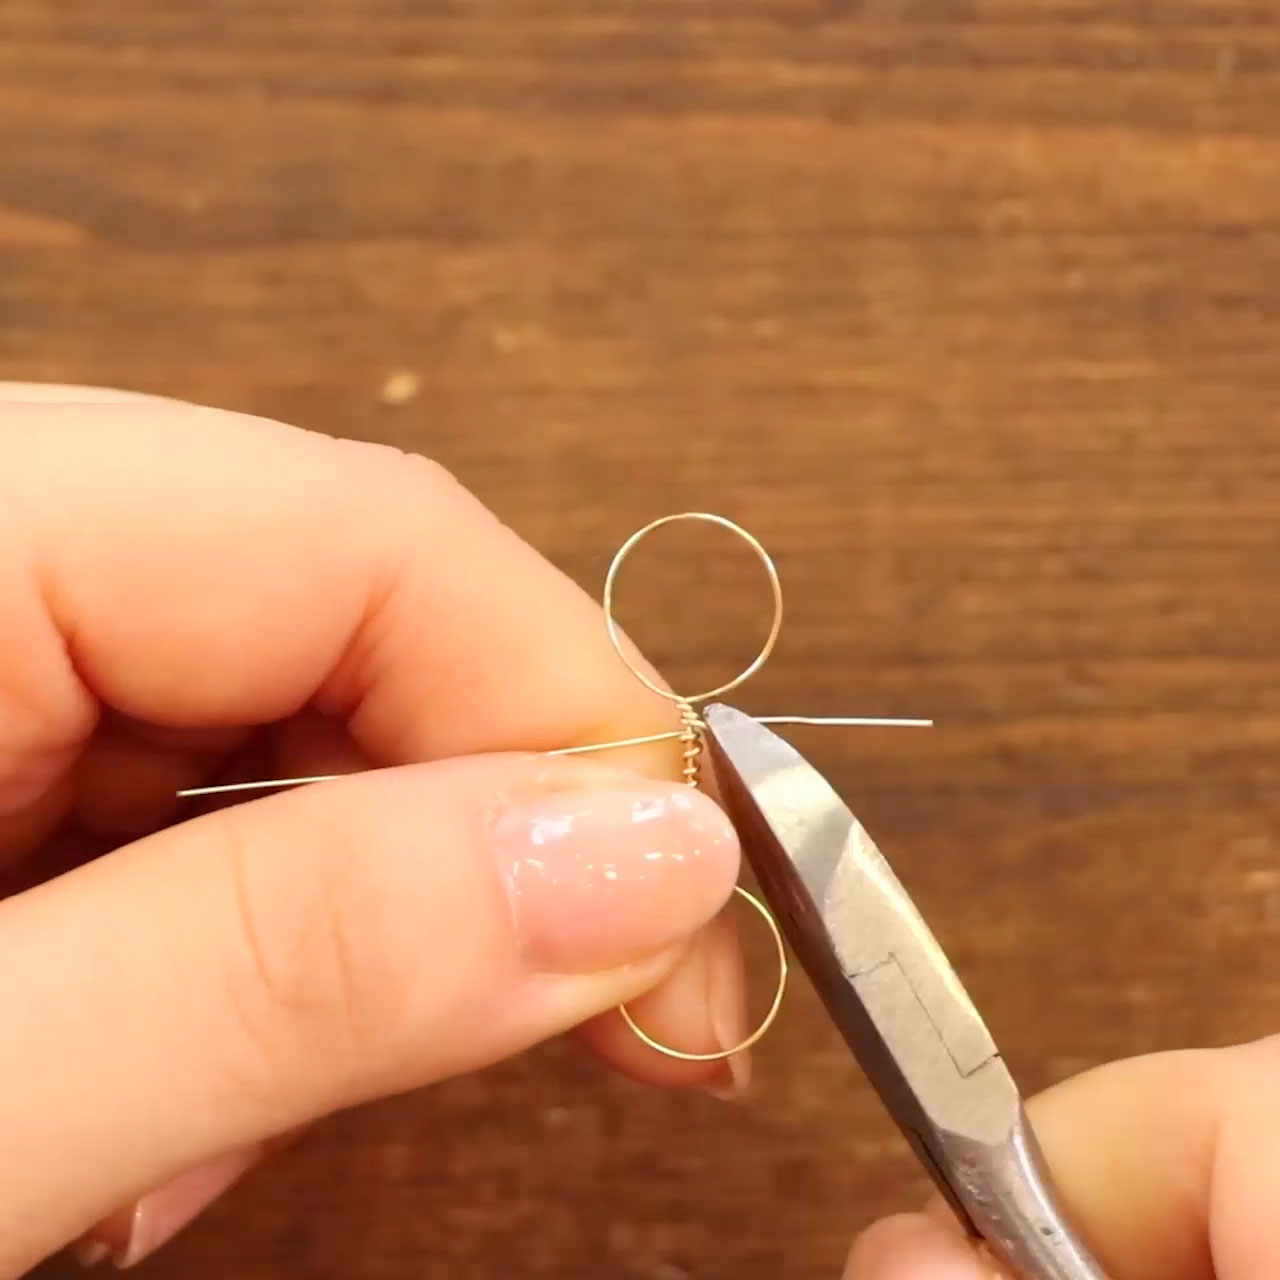
捩じり終わりの余った短い方のワイヤーをニッパーでカットする。
Cut the shorter wire with a nipper.
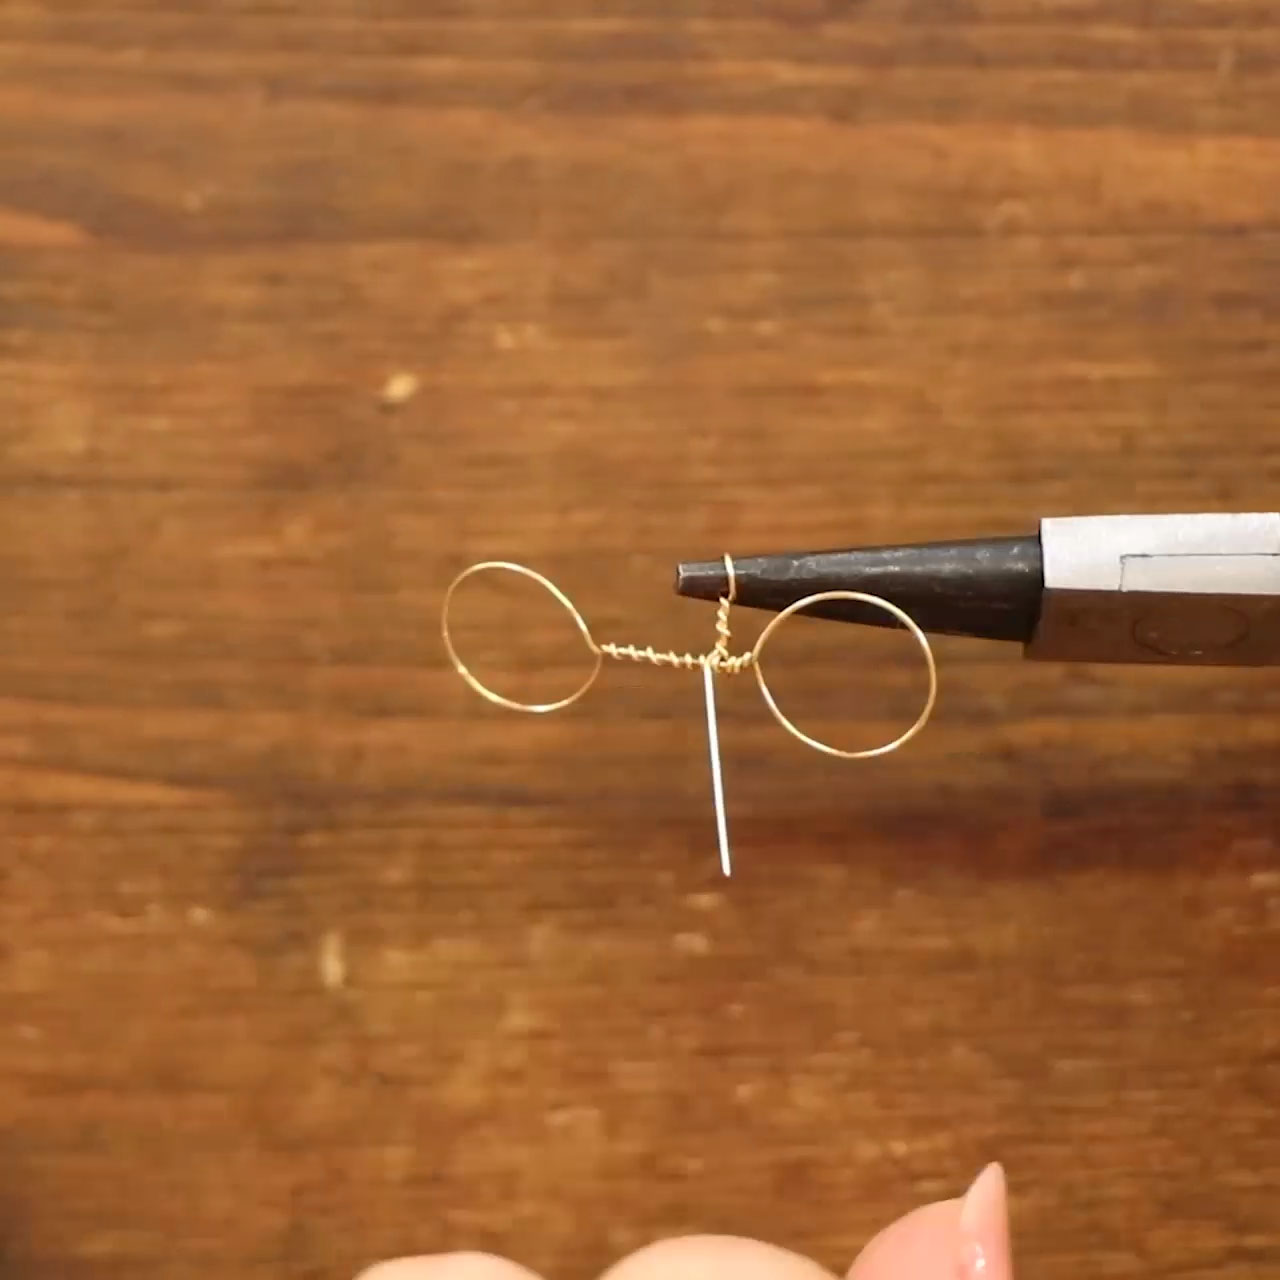
丸ヤットコで残ったワイヤーを捩じり部分から3~5mm離れた箇所で持つ。
丸ヤットコを挟みながらワイヤーを回して捩じり、余ったワイヤーをカットする。
Hold the wire at 3-5mm from where it twisted with a corn plier.
Wrap a small loop around the corn plier and wrap the wire around until the crossing point.
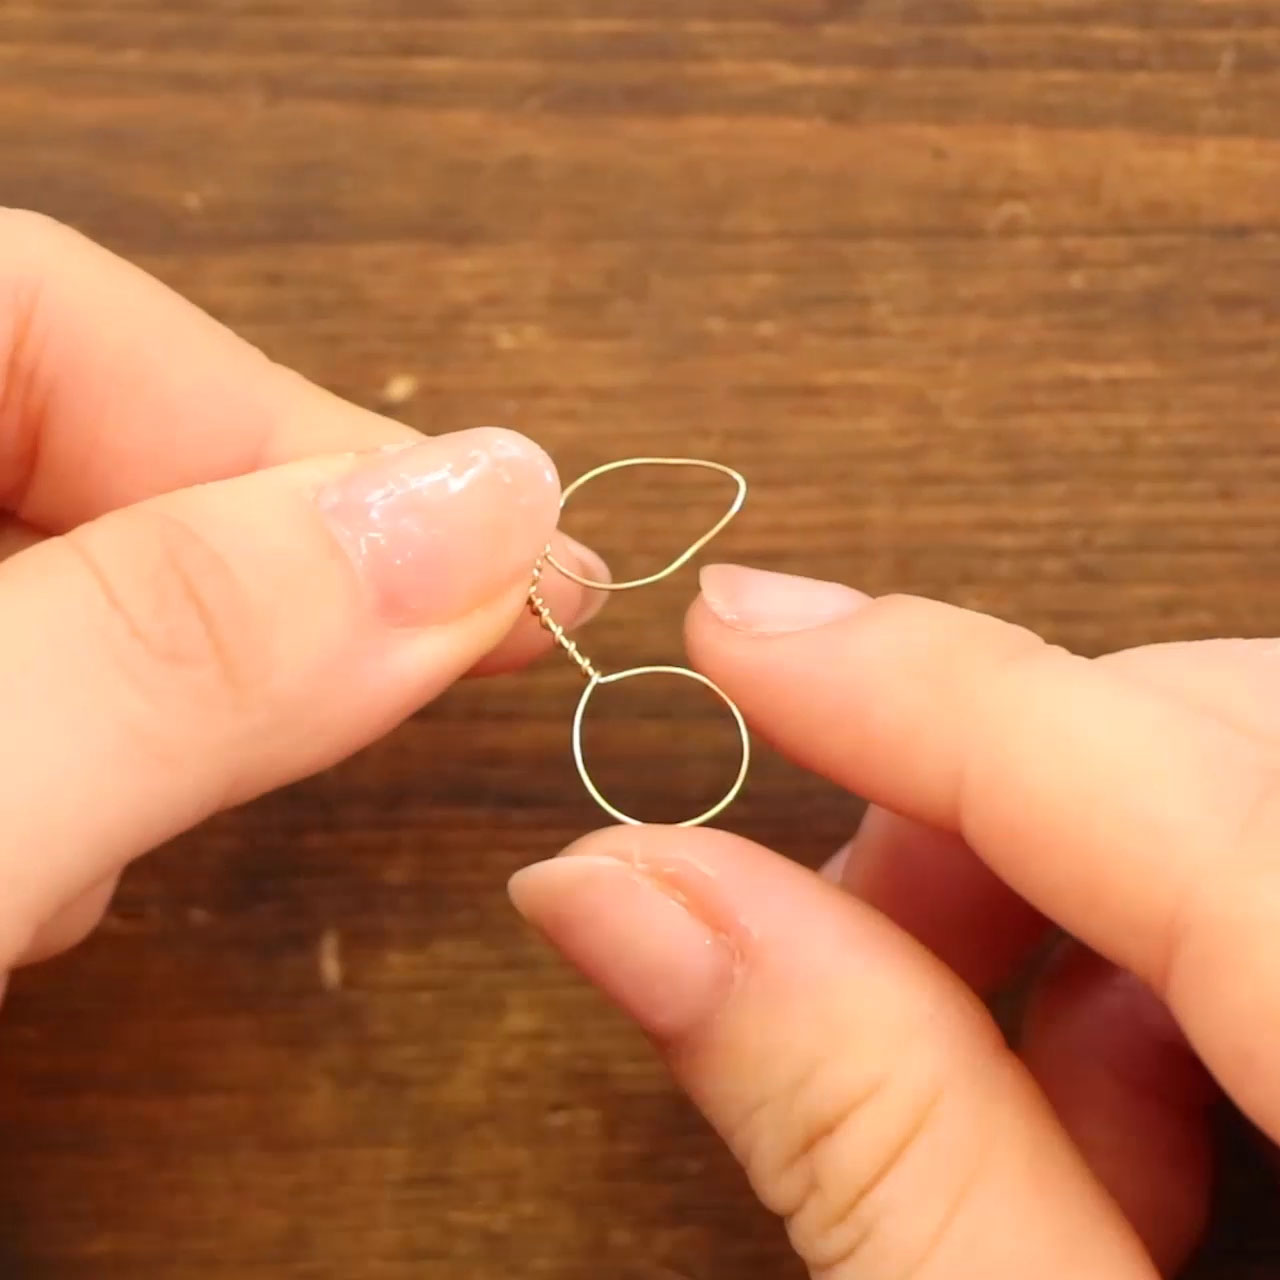
ワイヤーを指で曲げて、葉っぱの形に整える。
Bend the wire with fingers to make leaf shapes.

シリコンマットの上にマスキングテープを丸めて張り、葉っぱ型ワイヤーをマスキングテープの上に乗せる。
ワイヤーの中にグリーンとイエローグリーンレジンをグラデーションになるように塗る。
Put a masking tape (sticky side up) on a silicone mat and attach a leaf shape wire on it.
Put green and yellow green resin into the leaf.
★ワイヤーとマスキングテープの間に隙間がないように注意する
★Make sure there's no space between the leaf wire and masking tape.
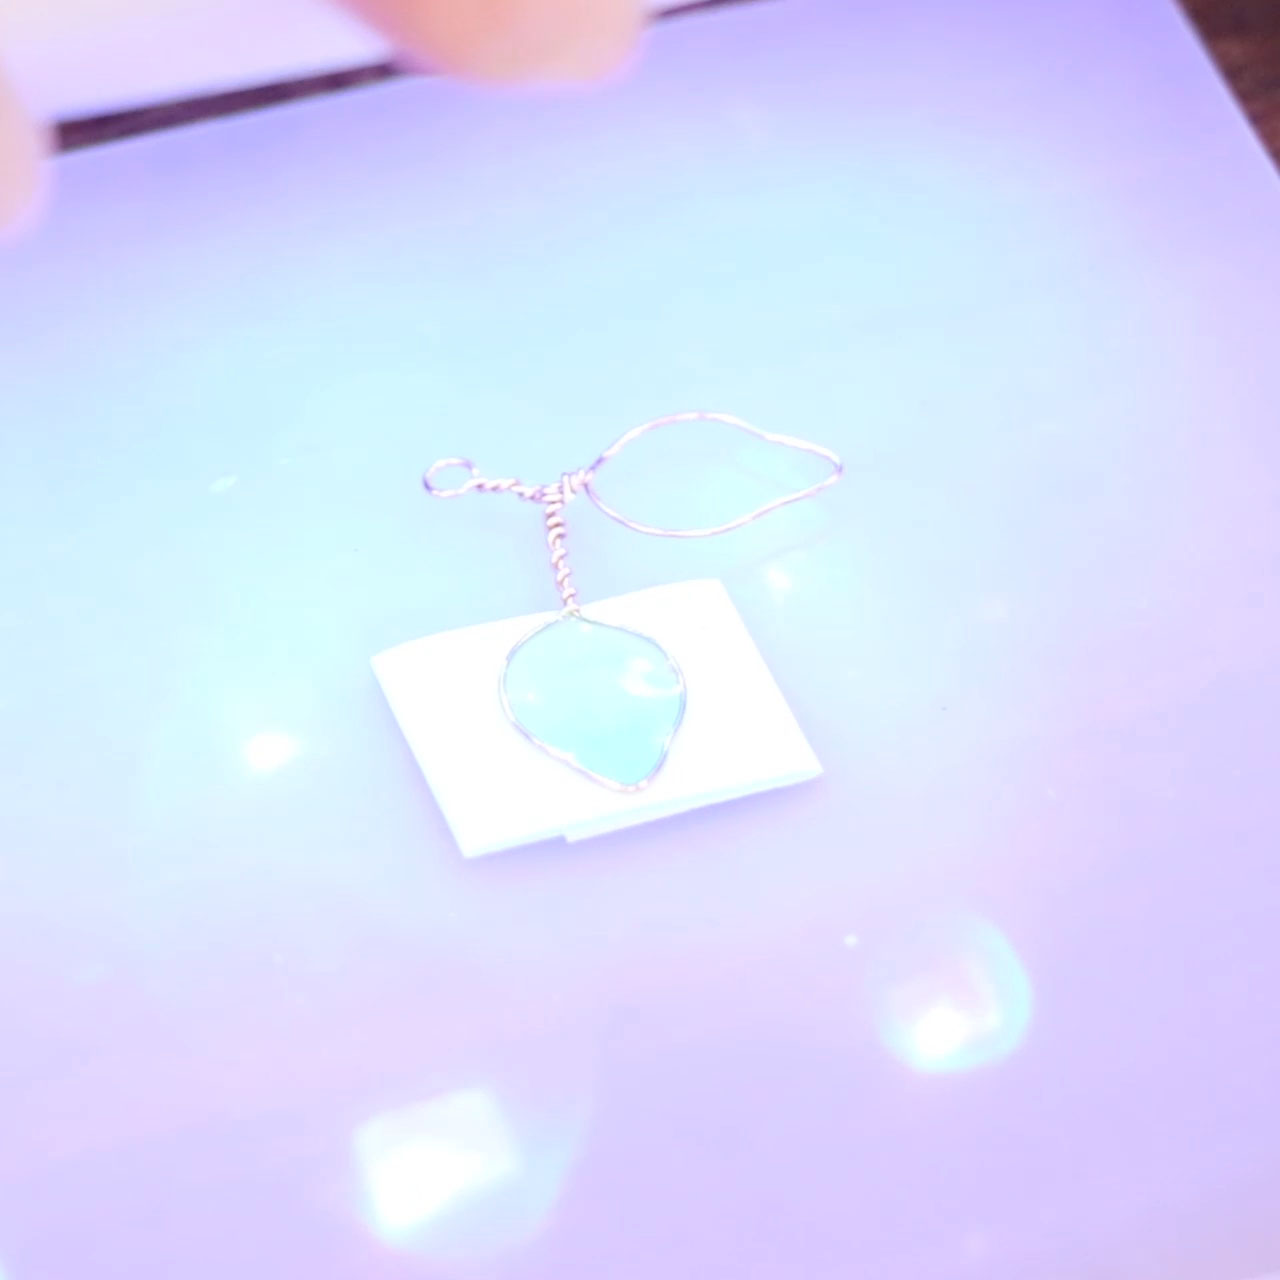
照射し、マスキングテープを剥がす。
Cure, and peel masking tape off.
★マスキングテープを貼っていた側が汚い場合は、クリアレジンでコーティングする。
★If the back side isn't clean, put clear resin on and cure.
もう一枚の葉っぱも同様に作る。
Repeat the same step for the other leaf.

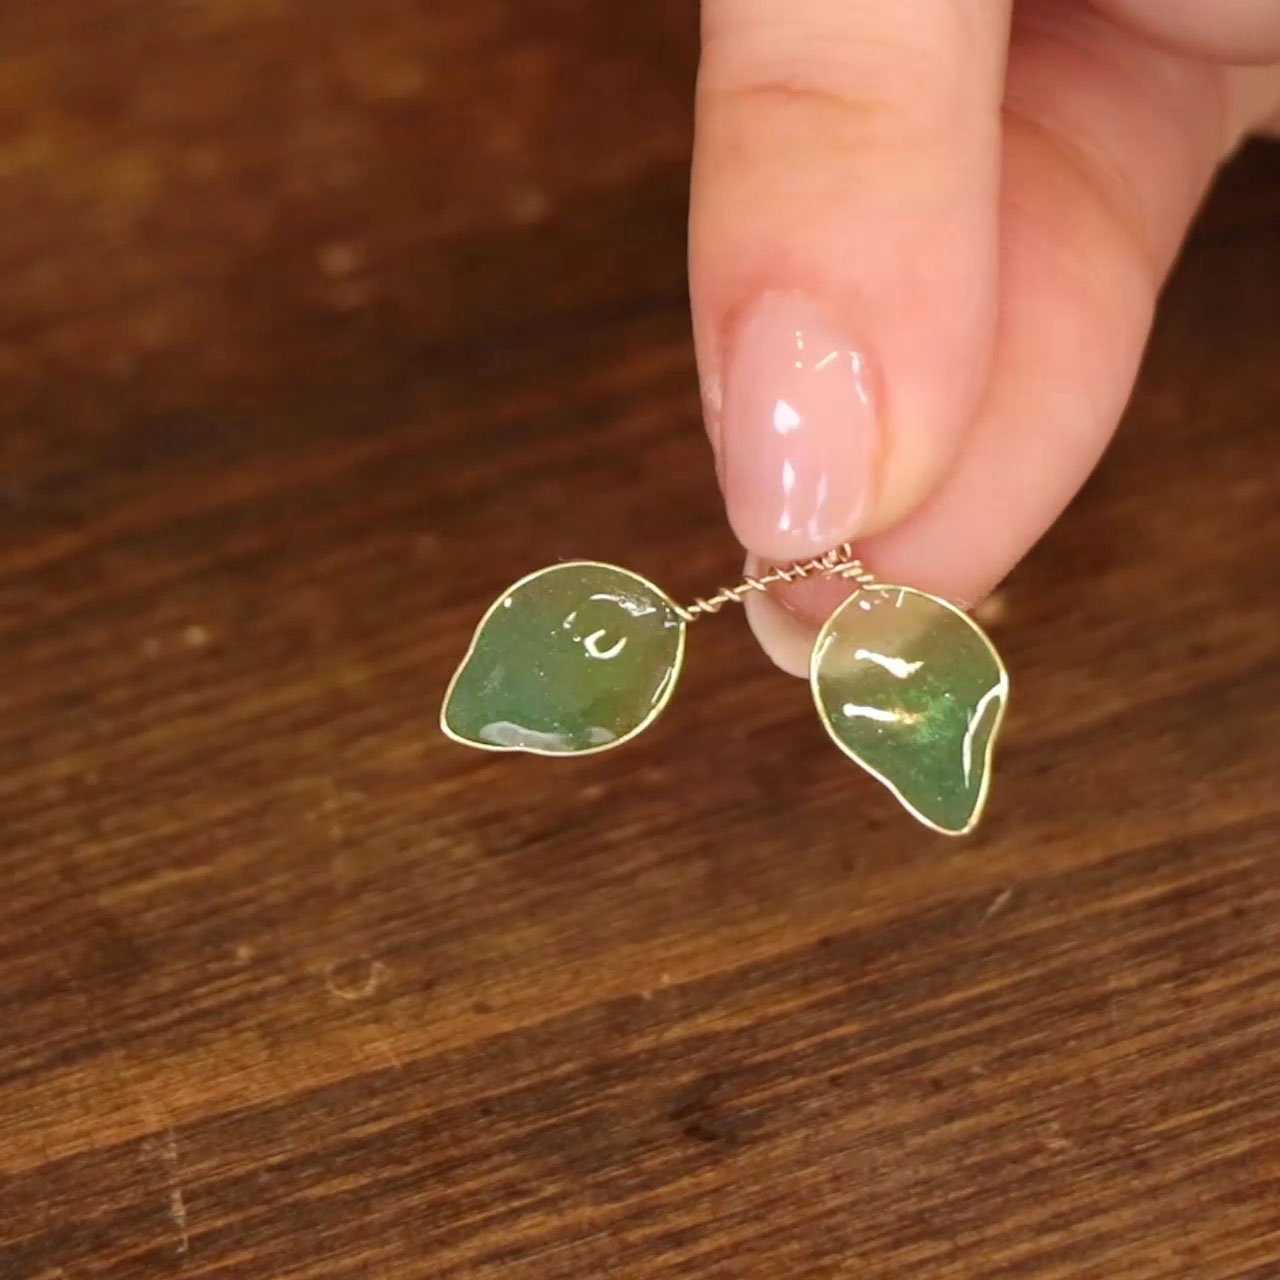
葉っぱの捩じったワイヤー部分にブルーベリーを付ける。
Attach the blue berry at twisted part of the wire.
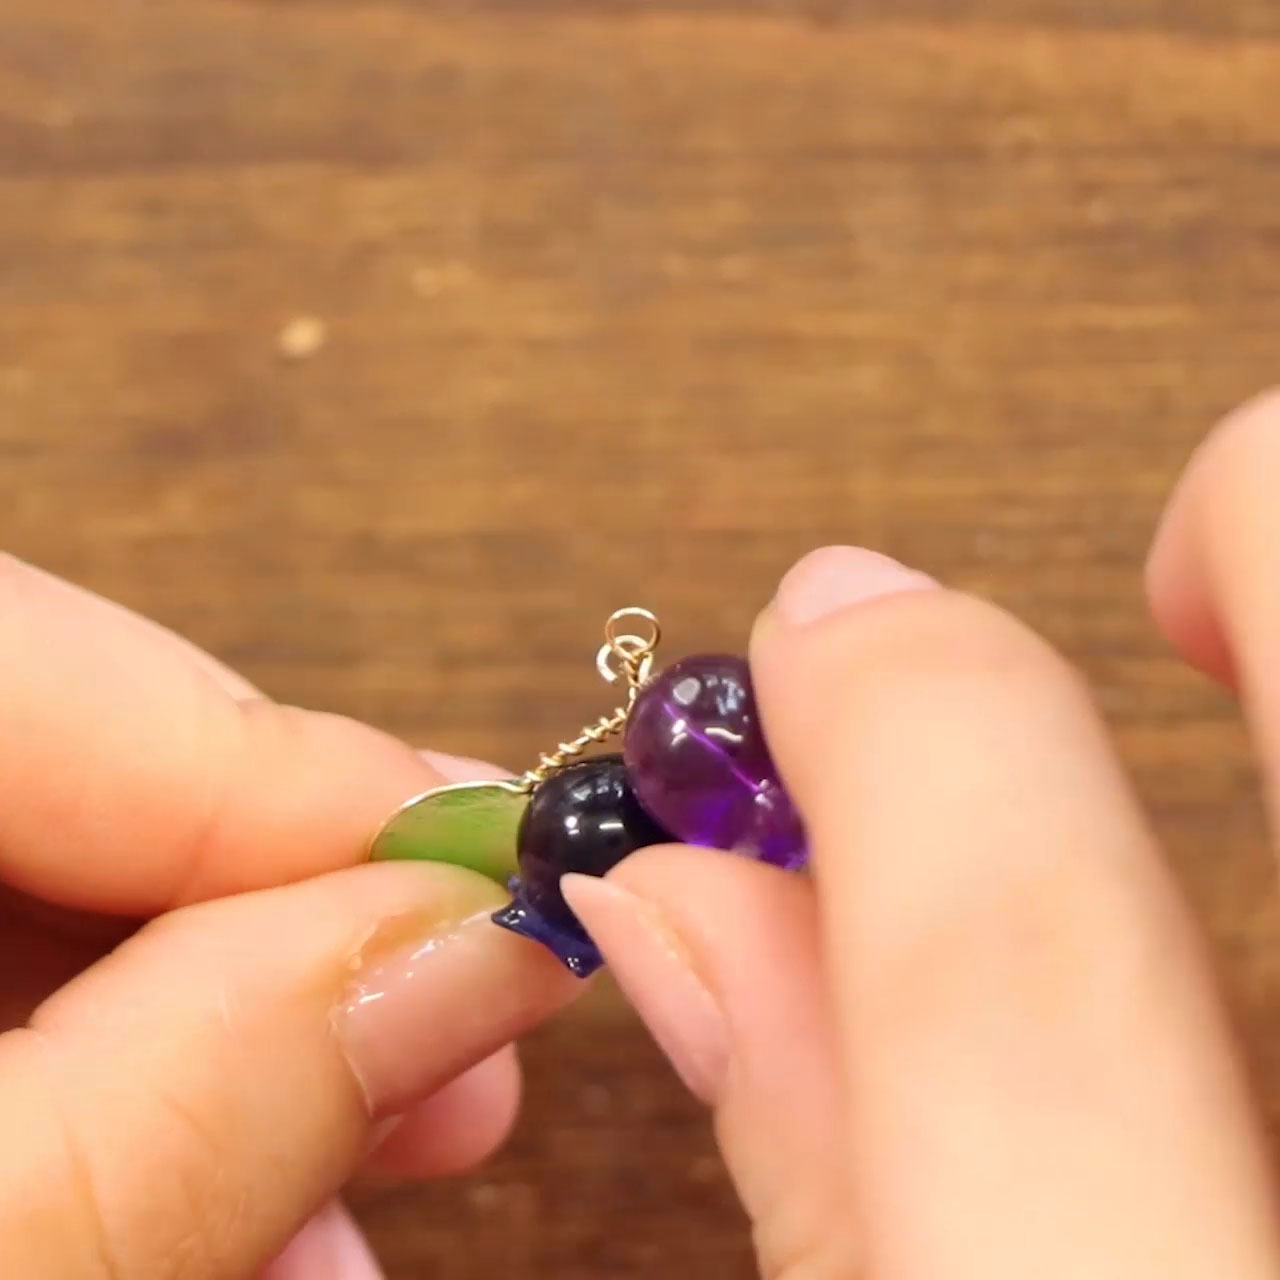
さらにワイヤー部分にもう一つブルーベリーを付ける。
Attach one more blue berry at the twisted wire part.
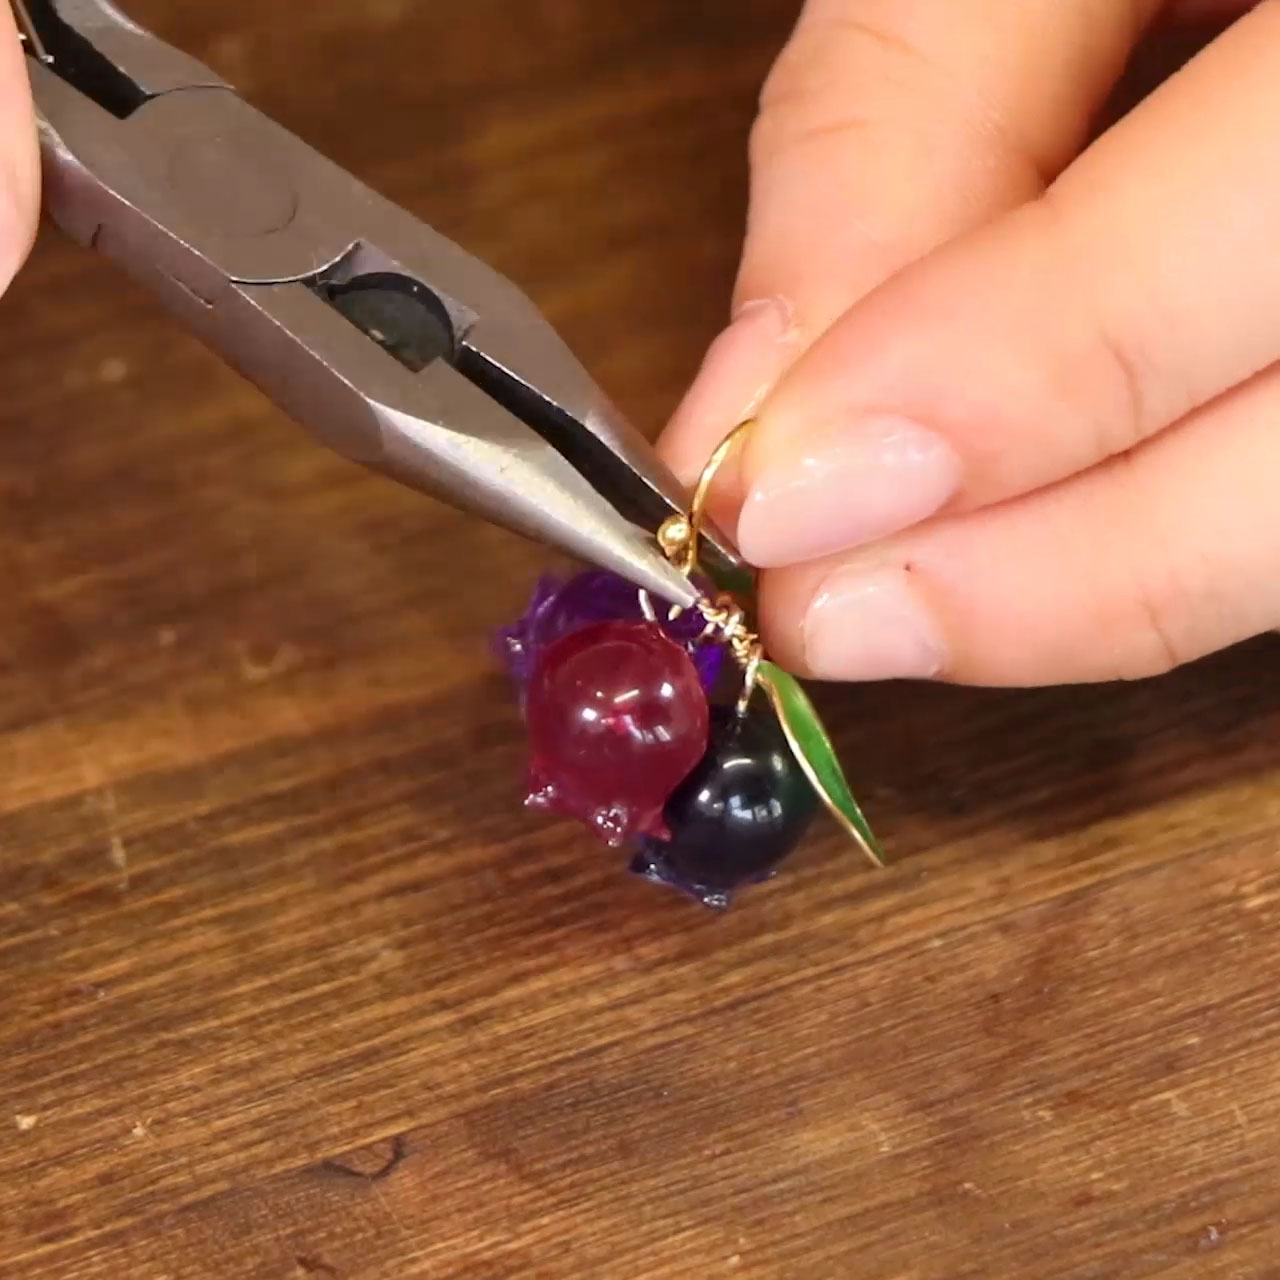
捩じったワイヤーの先の円にピアス金具とブルーベリーを丸カンで通し、金具を閉じる。
Attach the last blue berry with an oval jump ring through the hoop on the top. Also attach an earring part with an oval jump ring.
★金具を変更することでイヤリングにもなります。

出来上がり。
Done!
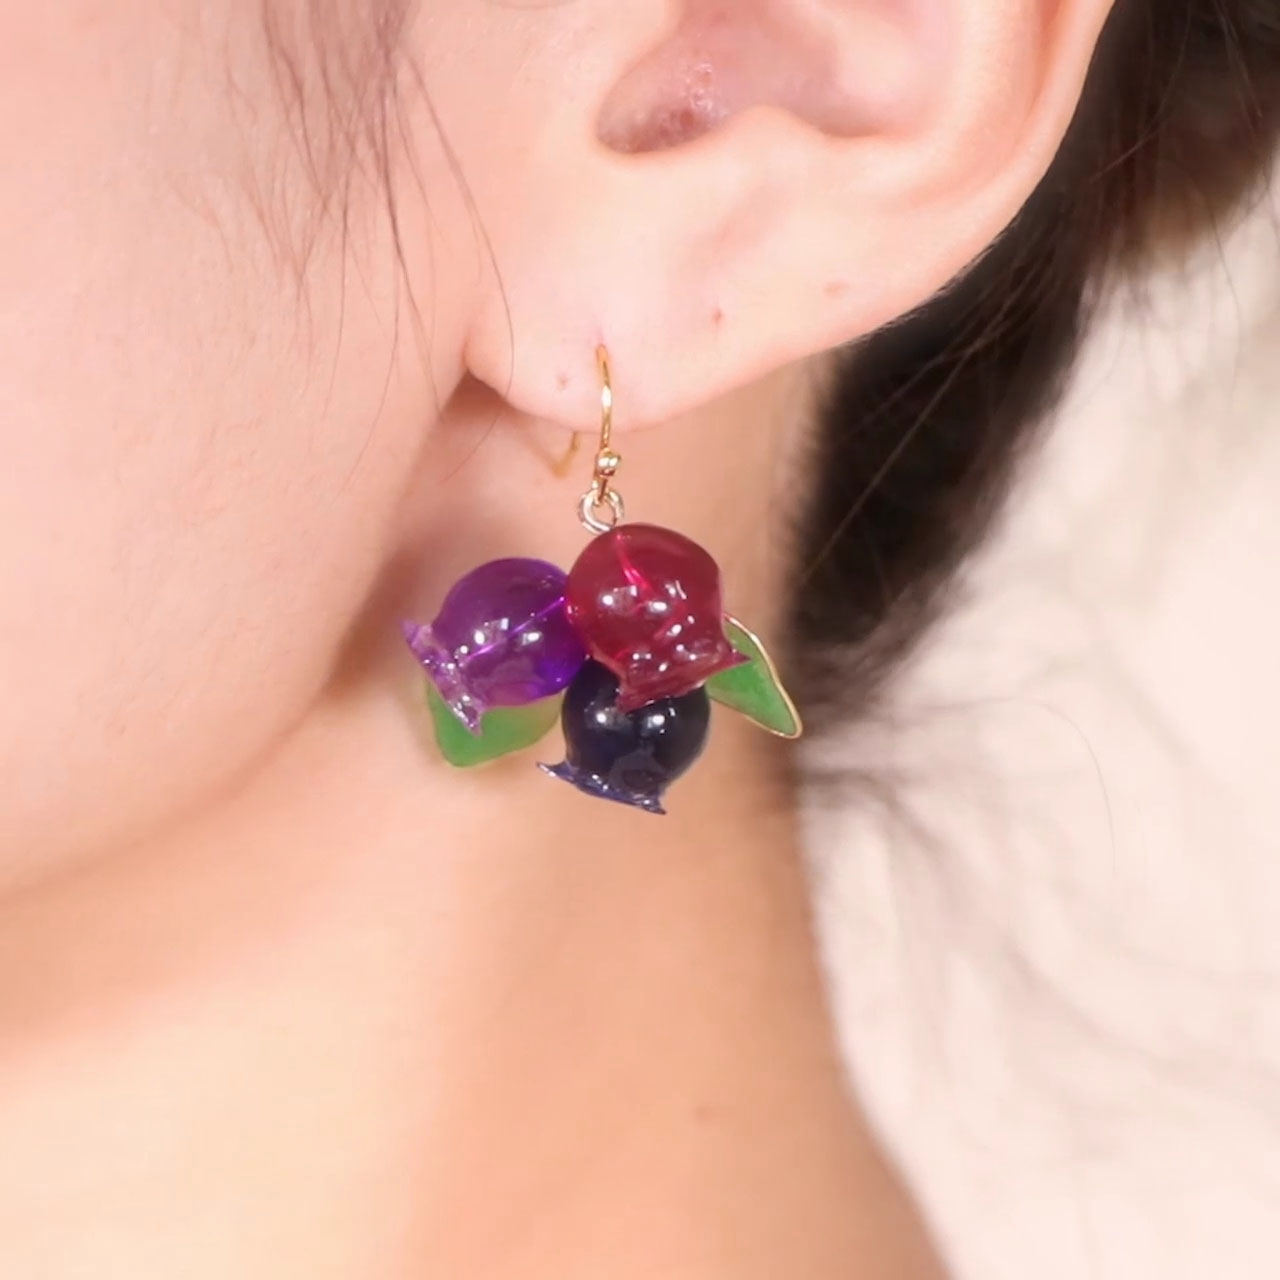
着用イメージ
Try on image.